by Wildwood Outdoor Living | Aug 29, 2023 | news
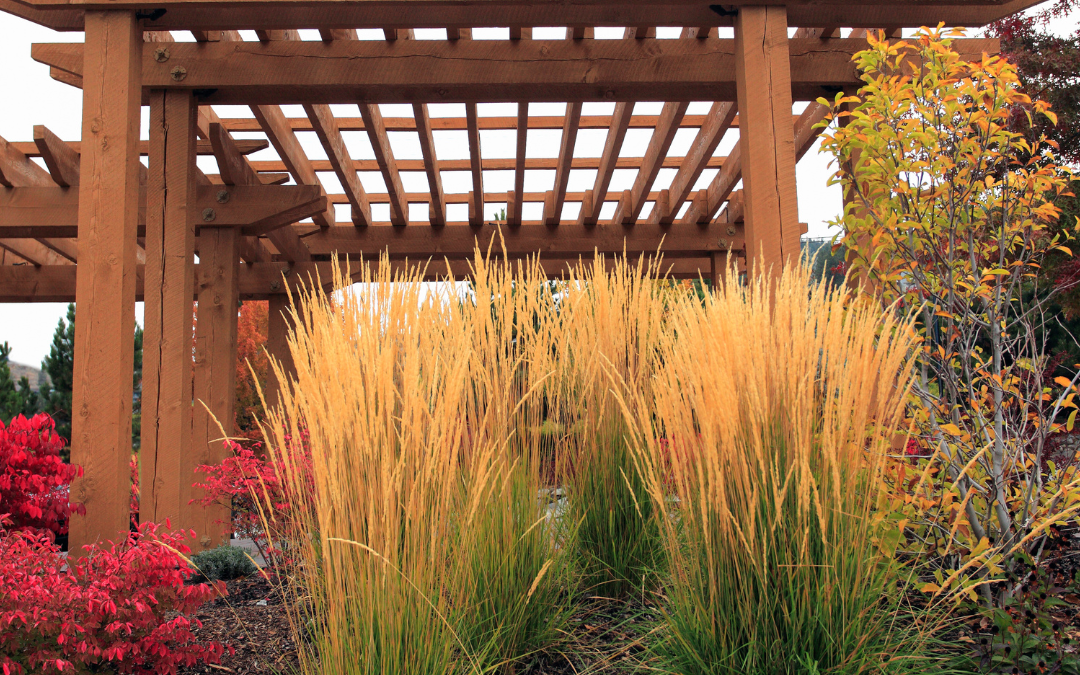
As September approaches, it’s time to embrace the cool and cozy vibes. This also presents an opportunity to grow a variety of crops in your garden that are perfect for making soups, stews, and other comforting dishes. If you’re considering starting a fall garden this year, it’s important to take care of a few end-of-season chores before getting started. Read this weeks Blog 2023 September Gardening Tips, to learn more.
September Lawn & Pond Maintenance

-
Don’t miss out on the opportunity to nourish your fish before winter sets in! It’s crucial to give them the right nutrients during this time. Consider using high-quality staple fish food, such as Aquascapes’ premium options, to ensure their health and well-being throughout the colder months.
-
Keep the beneficial bacteria flowing into your system on a weekly basis and experience the numerous advantages it brings. Regularly introducing these helpful microorganisms will boost your overall health and enhance the functionality of your system. For an extra boost, we recommend Aquascape Benefitial Bacteria which provides over seven different concentrated beneficial bacteria and is completely safe for fish, plants, pets, and wildlife.
-
For optimal results, it is advisable to sow new lawns during cooler temperatures of the day. This helps to ensure that the seeds have a better chance of germinating and taking root. Prior to sowing, it is recommended to nourish the soil with turf starter for enhanced growth and establishment.
-
To maintain a healthy and vibrant lawn, it is important to consistently cut the grass and water it adequately. Aim to mow your lawn at least once a week, ensuring to trim it by at least one inch each time. Additionally, make sure you provide sufficient hydration through regular watering sessions.
-
For a healthy lawn that can withstand the winter, it’s important to keep it clean and free from any obstructions such as toys, leaves, and tools. By doing so, you allow your lawn to receive the necessary nutrients it requires for survival during the colder months.
September Plant Tasks

-
Transform your September garden into a colorful paradise by planting an array of stunning annual flowers. From the vibrant begonia and zinnias to the charming snapdragons and sweet alyssum, the options are endless. Embrace the beauty of nature with celosia, pansies, dianthus, petunias, nasturtiums, calendula, chrysanthemums, and many more breathtaking varieties.
-
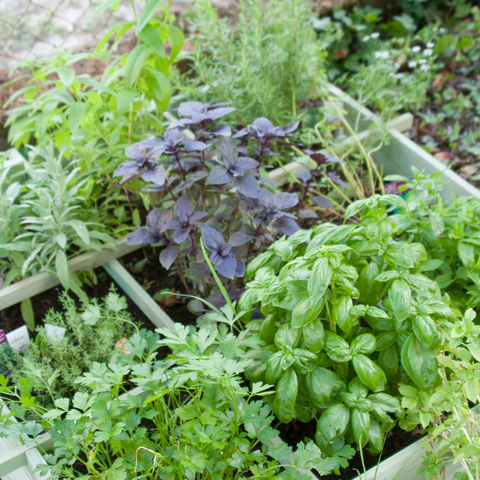
Make sure to keep an eye out for newly arrived fresh vegetable and herb starters. Now is a wonderful opportunity to stock up on these young plants.
-
Get ready for a vibrant spring garden by pre-ordering your spring-flower bulbs today! Planting bulbs in the fall ensures beautiful blooms when the weather warms up. Take advantage of this opportunity to plan ahead and secure your favorite flowers for next season.
-
Bring houseplants inside, but make sure to inspect them for any signs of bugs! This is crucial because pests can easily hide on plants and multiply rapidly indoors. By taking the time to thoroughly check your plants, you can identify any potential infestations early on and take appropriate measures to prevent the spread of pests in your home.
-
Fall is an optimal season for planting shrubs and trees due to a few key reasons. Firstly, the cooler temperatures allow the plants to establish their root systems before the onset of winter. This promotes sturdy growth and reduces transplant shock. Additionally, fall typically brings more rainfall, providing natural hydration and encouraging healthy root development. By planting in this season, you give your shrubs and trees ample time to acclimate to their new environment, ensuring a higher rate of survival come springtime.
-
When tending to your flowerbeds, consider preserving the beauty of your blooms by either leaving them intact for dried flowers or cutting them and hanging them up. This way, you can enjoy their vibrant colors and delicate petals long after they have been picked.
-
To ensure a vibrant and thriving garden, it is advisable to continue planting new perennials until early fall. By doing so, you allow sufficient time for these young plants to establish themselves before the arrival of winter. This proactive approach will help promote their growth and enhance their ability to withstand the challenges of the colder months ahead.
-
Lift onions, dry and store.
-
Avoid watering potatoes that are intended to be stored for an extended period of time. Late-storing potatoes, in particular, should not be watered as it can negatively impact their long-term storage quality.
September Gardening Miscellaneous & More
-
If you want to enhance the quality of your soil, there are a few simple steps you can take. Begin by clearing away any dead leaves and debris from your garden bed. This will create a clean slate for new growth. Next, consider spreading compost or manure over the soil. These organic materials not only enrich the soil with essential nutrients but also improve its overall health, leading to a successful growing season ahead.
-
To improve the fertility of your garden soil, consider planting fall rye in the areas where you have finished harvesting. Fall rye serves as a valuable green manure, adding organic matter and nutrients back into the soil. This practice helps to enrich the soil for future growth and can contribute to healthier plants in subsequent growing seasons.
-
Turn over the compost for the last time this year.
-
To grow more of the plants you desire, you have the option to either harvest and save their seeds or propagate them through other methods. Harvesting seeds involves collecting mature seeds from your plants and storing them properly until you are ready to sow them. On the other hand, plant propagation refers to the process of creating new plants by using cuttings, division, layering, or other techniques. By taking advantage of these methods, you can easily expand your plant collection and ensure a sustainable supply of the specific plants you want.
-
It is advisable to regularly check for the presence of Japanese Knotweed in your surroundings. This invasive plant can cause significant damage to properties and infrastructure if left untreated. If you identify any signs of Japanese Knotweed, it is crucial to take appropriate measures for its control and treatment to prevent further spread and potential harm.
-
One important task to prepare your garden beds for the winter months is weeding. Removing any weeds from the beds can help prevent them from spreading and taking over during the dormant season. It also allows your plants to receive maximum nutrients and reduces competition for water and sunlight. Taking the time to weed your garden beds before winter sets in will ensure a healthier, more vibrant garden come springtime.
-
In certain regions, you can directly sow leafy greens, peas, beans, onions, and broccoli. This means planting the seeds directly into the ground or containers without starting them indoors first.

Have a suggestion or question?
Sign up here for more blogs dedicated to better gardening!

by Wildwood Outdoor Living | Aug 22, 2023 | news
With the increasing spread of wildfires, our President Gord Nickel wanted to share everything he knows about ‘Fire Resistant Gardening’ to help you do your best at home. Tune into the latest episode of Get Up and Grow, to learn a few key practices that can help protect your garden and surrounding areas or read along in this week’s blog Fire Resistant Gardening to learn more.
Pruning
By regularly pruning your garden, you can significantly reduce the amount of fuel available for fires to spread. Dead branches tend to be drier and more flammable, making them particularly susceptible to catching fire. Removing these branches not only eliminates potential fire hazards but also improves the overall health and appearance of your plants.
TIP: Overgrown branches, especially those that are close to structures or power lines, can increase the risk of fires spreading rapidly. By trimming back these branches, you create a buffer zone that helps prevent flames from reaching nearby buildings or infrastructure.
Mulching
Another technique to consider is rock mulching. Using rocks as a ground cover can help create a fire break and prevent flames from reaching your plants or home.
Rock mulching into your landscaping design can serve as an effective technique for creating a fire break and safeguarding your plants and home from wildfire risks. Its ability to reduce fuel for fires, conserve soil moisture, require minimal maintenance efforts, and enhance the visual appeal make it an attractive option for homeowners seeking both practicality and aesthetics in their outdoor spaces.
Low Mow
Regularly mowing your lawn can play a crucial role in mitigating the spread of fires. By keeping the grass short, you reduce the chances of it catching fire. Additionally, shorter grass acts as a natural protective barrier, creating a buffer zone between your garden and potential flames. This simple maintenance task can contribute to ensuring the safety of your property during fire emergencies.
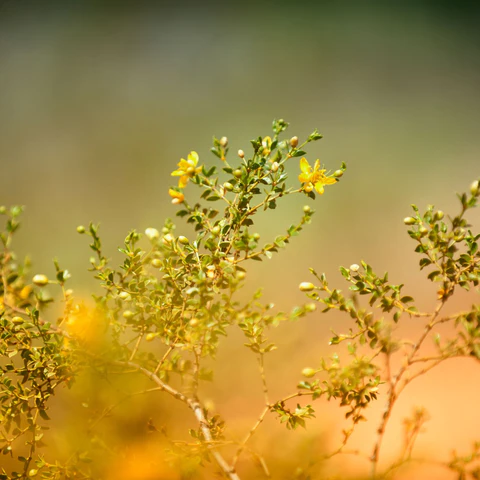
Fire Resistant Plants
When it comes to creating a fire-resistant landscape, choosing the right plants is crucial. Opting for plants with high moisture content and low resin or oil content can significantly reduce the risk of ignition during a fire. These types of plants are less likely to ignite quickly, allowing valuable time for firefighting efforts and minimizing the spread of flames.
Get Up and Grow: Fire Resistant Gardening
By integrating these practices into your gardening routine, you can establish a fire-resistant environment that plays a crucial role in safeguarding your property against potential wildfires. For more information and help, check out the latest episode of Get Up and Grow below.
Have a suggestion or question?
Let us know at info@wildwoodoutdoorliving.com.
Sign up here for more blogs dedicated to better gardening!
by Wildwood Outdoor Living | Aug 15, 2023 | news
To extend the growing season, now is the best time to start planting your fall and winter veggies and even get some cover crops going. To get started, check out our mid-August seed sowing list, complete with handy tips and insights in this weeks blog Top 5 Mid-August Seeds to Sow!
Mid-August Planting All Over Canada
If you’re looking to sow seeds in late summer, there are loads of great options that will thrive. In places like Lower Mainland BC and nearby areas, the first frost usually hits around November 2nd. But If you’re into gardening in a different area, just do a quick Google search with “first frost date” and the name of your town. You’ll find all the info you need to plan out your garden accordingly.

Radishes are all about that cool soil vibe, and the best part is they grow super fast when you plant them in the fall. Keep things exciting by planting short rows every couple of weeks so you can enjoy a non-stop supply of these tasty veggies.

Check out pac choi, the cool-weather champ! It’s a must-have for your fall garden. This veggie slows down its growth as autumn rolls in, which means you can easily snatch it at its best before it bolts. Harvesting made simple! You should totally give it a try and mix things up with your meals. Growing these veggies in containers or garden beds is super easy, plus they’re packed with both speed and nutrition. With different sizes and flavors to choose from, pac choi will bring endless culinary excitement to your kitchen.

Prepare yourself to be head over heels for carrots! These vibrant orange wonders are absolutely incredible. And guess what? You still have a whopping 75+ days to relish them this season. So, why not sow some seeds within the next couple of weeks? That way, you’ll be all set for an abundant autumn harvest. Don’t forget to keep the seed bed nice and damp until the seeds start sprouting, especially when it’s scorching hot and goes above 25°C (77°F). Gotta give those little seeds the best chance to grow!

Kale is seriously amazing! If you plant it in mid-August, you’ll have a bountiful harvest all winter long. And if you’re obsessed with its goodness from having it all summer, why not try planting it in winter too? This leafy green is not just any ordinary vegetable – it’s packed with more vitamins and nutrients than you can imagine. If you’re looking to level up your health game, kale is here to save the day!

You’ve got to check out the amazing Mustard family! From fancy Mizuna to the impressive Giant Red, these leafy greens bring a whole lot of variety to your salad game. These mustard greens are pretty chill. They actually love the cool soil and thrive in it. If you’re into arugula and corn salad, you should totally plant some mustard greens now. They’ll hang out with you through fall and winter, making your salads extra delightful.

And one for good-luck! Arugula is a fan of cool weather and soil. When the nights start getting chilly, around 15°C (60°F) or lower, it’s the perfect time to plant these awesome arugula seeds. Just keep an eye on the weather forecast before you get started! Don’t go crazy and plant all of them at once. Here’s the master plan: plant a small row every two weeks until around the third week in September.
Well look at that, it’s the middle of August and you’re all set with a whole new gardening adventure. Don’t forget to shop our huge selection of seeds online and in-store. Plus! If you order in time, you’ll get 20% off a whole lot of seeds before the end of the season.
Have a suggestion or question?
Let us know at info@wildwoodoutdoorliving.com.
Sign up here for more blogs dedicated to better gardening!
by Wildwood Outdoor Living | Aug 8, 2023 | Gardening 101
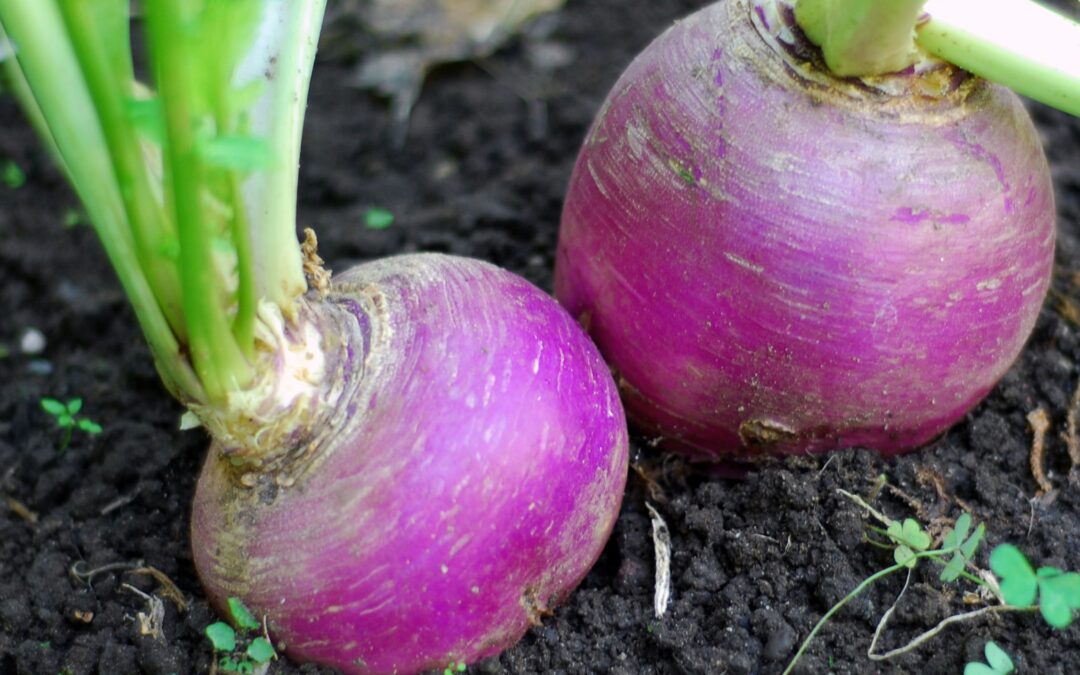
Welcome to Turnips 101, your ultimate guide to all things turnips! Whether you’re a seasoned vegetable enthusiast or just starting your culinary journey, this weeks blog will provide you with everything you need to know to grow your very own Turnip this season! Let’s get started…
About Turnips
Turnips, often linked to potatoes and beets, are actually more closely related to radishes and arugula. They all belong to the mustard family within the Brassica genus. The turnip plant offers both edible parts – the bulbous taproot, which can be white or purple, and the leafy greens. While originating in eastern Asia, turnips gained popularity and were extensively cultivated during the Roman Empire. Today, they are grown and consumed in temperate regions across the globe.
Turnip Flavour Profile
The mild spiciness of turnips contributes to a unique flavor profile that falls somewhere between that of a potato and a radish. This subtle heat adds an interesting dimension to the overall taste experience. Similar to horseradish, the flavors of concentrates tend to be more pronounced in the sinuses rather than on the tongue. This makes them ideal for combining with various root vegetables or complementing other bold flavors like ginger. Their concentrated nature adds a unique and dynamic taste to culinary creations.
Mature turnips offer a bolder taste compared to their younger counterparts. They are particularly suitable for mashing or including in hearty soups and stews. Turnips, like many root vegetables, are resilient and cost-effective options for keeping fresh produce available during the winter season.
TIP: It’s worth noting that larger and older turnips may have tougher skins, which can result in a slightly bitter taste. In such cases, peeling them before consumption is recommended to enhance their flavor.
How To Grow Turnips
Turnips are a versatile vegetable that can be enjoyed throughout the year. However, their prime season is in the fall when they are fully mature and freshly harvested. In the spring, turnips are still small and have a delightful sweetness.
Difficulty: While it is relatively simple to cultivate this plant outdoors in a garden setting, it may not be the most suitable choice for container gardening.
Timing: To achieve successful growth, it is advisable to directly sow seeds from the month of April through August. This timeframe provides optimal conditions for germination and establishment of plants. By following this guideline, gardeners can maximize their chances of achieving a fruitful and vibrant garden.
Sowing: To ensure optimal growth, it is recommended to sow your seeds thinly at a depth of 1cm (½”) in rows that are spaced apart by 30-45cm (12-18″). As the plants start to grow, thin them out, leaving a distance of 5cm (2″) between each plant. This allows for sufficient space for the plants to develop and receive adequate nutrients.
Soil: These plants have a moderate to heavy appetite for nutrients and thrive best in rich, loamy soil that has been enriched with composted manure. To ensure optimal fertility, it is recommended to add 4 liters (1 US gallon) of complete organic fertilizer for every 10 square meters (100 square feet) of bed. Additionally, it is advised to apply lime to the beds in the fall before planting, as this helps bring the pH level to an ideal range of 6.0 – 6.8.
Growing: To achieve optimal growth of these plants, it is recommended to have loose soil and ensure regular watering. It’s important not to leave them in the ground for longer than necessary, as root maggots can cause significant damage. Choose a sunny area in your garden to plant turnip seeds and sow short rows frequently, similar to how you would with radishes.
Pests & Disease: The cabbage root maggot, scientifically known as Delia radicum, is a small fly that poses a threat to brassica crops. These flies lay their eggs on the soil near the base of brassica plants. To safeguard directly-seeded crops from infestation, utilizing a floating row cover can offer effective protection.
Harvesting Turnips
Turnips are a vegetable that can be harvested relatively quickly after planting. Generally, they are ready to be harvested within 40 to 55 days. To ensure that turnips are ready to be harvested, it is recommended to wait until they reach a diameter of 3 inches. However, if you prefer a milder and sweeter taste, it is advised to pick them when they are smaller in size.
Have a suggestion or question?
Let us know at info@wildwoodoutdoorliving.com.
Sign up here for more blogs dedicated to better gardening!

by Wildwood Outdoor Living | Aug 2, 2023 | How To Grow
How to Grow Water Lilies
Whether you have a pond or simply want to add a touch of tranquility to your garden, water lilies are the perfect choice. Not only do they create a serene atmosphere, but they also provide shade and shelter for fish and other aquatic creatures. So if you’re looking to create a peaceful oasis or simply appreciate the beauty of nature, water lilies are sure to make a splash in your garden. Get ready to be mesmerized by these exquisite pond plants that bring both beauty and serenity wherever they bloom, by learning how to grow your very own Water Lilies!
Step 1: Choosing the Right Variety of Water Lilies

Alright, let’s dive into the wonderful world of water lilies! When it comes to choosing the perfect variety for your pond or garden, there are a few options to consider. You’ve got hardy water lilies, tropical water lilies, and even miniature water lilies to choose from.
Hardy water lilies are known for their resilience and ability to withstand colder temperatures. They come in a range of colors and sizes, making them a popular choice for many garden enthusiasts.
On the other hand, tropical water lilies bring a touch of exotic beauty to your space. These vibrant blooms thrive in warmer climates and can add a splash of tropical paradise to your pond or garden.
If you’re working with limited space or prefer something more compact, miniature water lilies might be just what you’re looking for. These petite beauties pack a punch with their small size but still offer stunning blooms that will catch anyone’s eye.
So take some time to explore the different varieties available and consider factors like climate, space constraints, and personal preference. With the right variety of water lily at your fingertips, you’ll be well on your way to creating a breathtaking aquatic oasis.
Step 2: Selecting the Ideal Location for Your Water Lily Pond or Container

Now that you’ve decided to create a beautiful water lily pond or container garden, it’s time to choose the perfect location for it. Finding the ideal spot is crucial as it can greatly impact the health and growth of your water lilies.
First things first, consider whether you want to have a traditional pond or opt for a container garden. This decision will determine the flexibility of your location options.
For a traditional pond, you’ll need to find an area in your yard that receives at least six hours of sunlight each day. Water lilies thrive in sunlight, so make sure there are no large trees or structures casting shadows over the chosen spot.
If you’re going for a container garden, you have more flexibility in terms of location. You can place it on your patio, balcony, or even indoors near a sunny window. Just ensure that wherever you choose, there is enough sunlight for your water lilies to flourish.
Keep in mind that water lilies also require some protection from strong winds. Placing them near tall shrubs or fences can help create a natural windbreak and prevent damage to their delicate leaves and flowers.
By selecting the right location with adequate sunlight and protection from strong winds, you’ll be setting up your water lily pond or container garden for success!
Step 3: Preparing the Soil and Planting Your Water Lilies Correctly

Alright, let’s dig into step 3: preparing the soil and planting your water lilies correctly. This is where we get our hands dirty and set the foundation for healthy growth.
Firstly, you’ll want to make sure you have the right soil mix. Water lilies thrive in a wetland soil mix that retains moisture while still allowing for proper drainage.
Now, let’s talk about planting depth. It’s important to know that different types of water lilies have different planting depth requirements. Generally, you’ll want to plant hardy water lilies at a depth of 12-18 inches, while tropical water lilies prefer a slightly deeper planting depth of 18-24 inches. Be sure to check the specific instructions for the variety you’re working with.
When it comes to dividing and repotting water lilies, it’s usually best to do this every couple of years or when they become overcrowded in their current container. Gently remove the plant from its pot and carefully separate any rhizomes or tubers that have multiplied. Then, repot them in fresh wetland soil mix, making sure they have enough space to grow and spread out. Remember, proper preparation and planting are key for your water lilies’ success.
Step 4: Providing Proper Care and Maintenance for Healthy Growth

Alright, folks, let’s dive into step 4 of our guide on providing proper care and maintenance for healthy growth in your water garden. This time, we’ll be focusing on three important aspects: fertilizing water lilies, controlling pests and diseases, and some handy pruning and deadheading tips.
First up, let’s talk about fertilizing those gorgeous water lilies. These aquatic beauties need a little boost every now and then to thrive. Make sure to use a slow-release fertilizer specifically formulated for water plants. Just sprinkle it around the base of the lily pads or follow the package instructions for best results.
Next on our agenda is keeping those pesky pests and diseases at bay. Nobody wants their water garden overrun by unwanted critters or plagued by nasty infections! Regularly inspect your plants for any signs of trouble like aphids or fungal diseases. If you spot any unwelcome visitors or suspicious spots on your plants, take action immediately with appropriate treatments recommended for aquatic environments.
Last but not least, let’s discuss pruning and deadheading – to keep your water garden looking tidy and vibrant. Remove any yellowing or decaying leaves from your plants to prevent them from rotting in the water. Deadhead spent flowers regularly to encourage new blooms and maintain a visually pleasing display.
Remember, taking proper care of your water garden is crucial for its healthy growth. So grab that fertilizer, keep an eye out for troublemakers, and give those plants a little trim when needed! Your flourishing aquatic oasis will thank you in full bloom!
Enjoying the Serenity of Blooming Water Lilies in Your Own Backyard Oasis

In conclusion, creating your own backyard oasis with blooming water lilies can bring a sense of serenity and tranquility to your life. Imagine stepping outside and being greeted by the vibrant colors and delicate fragrance of these beautiful flowers.
By incorporating water lilies into your outdoor space, you can create a peaceful retreat where you can unwind after a long day. Whether you choose to have a small pond or a larger water feature, the presence of these enchanting flowers will undoubtedly add an element of natural beauty.
For more information on growing your own water lilies at home, check out the latest episode of Get Up and Grow “How to Grow and Care for Waterlilies” with our President, Gord Nickel below!
Have a suggestion or question?
Let us know at info@wildwoodoutdoorliving.com.
Sign up here for more blogs dedicated to better gardening!
