While it’s time to take your garden indoors, we thought you might want to try something new and exciting this indoor growing season. Microgreen Pea Shoots! They grow quickly, ensuring that you can enjoy their wonderful benefits in no time. Learn everything this is to grow your very own Microgreen Pea Shoots below, to get growing this winter season!
About Microgreen Pea Shoots
Microgreens are delightful baby salad greens that are similar to sprouts, but they’re grown in soil. Unlike sprouts, which require quick germination to prevent rotting of the seeds, microgreens can be sown just like any other herb or vegetable seeds. This means that even those seeds with longer germination requirements can still be cultivated as microgreens. Just imagine growing basil, carrots, spinach, and other delicious edible greens! Learning how to grow Microgreen Pea Shoots are truly valuable because you can cultivate them indoors throughout the winter season for a nourishing supply of fresh vegetables.
How to Enjoy Microgreen Pea Shoots
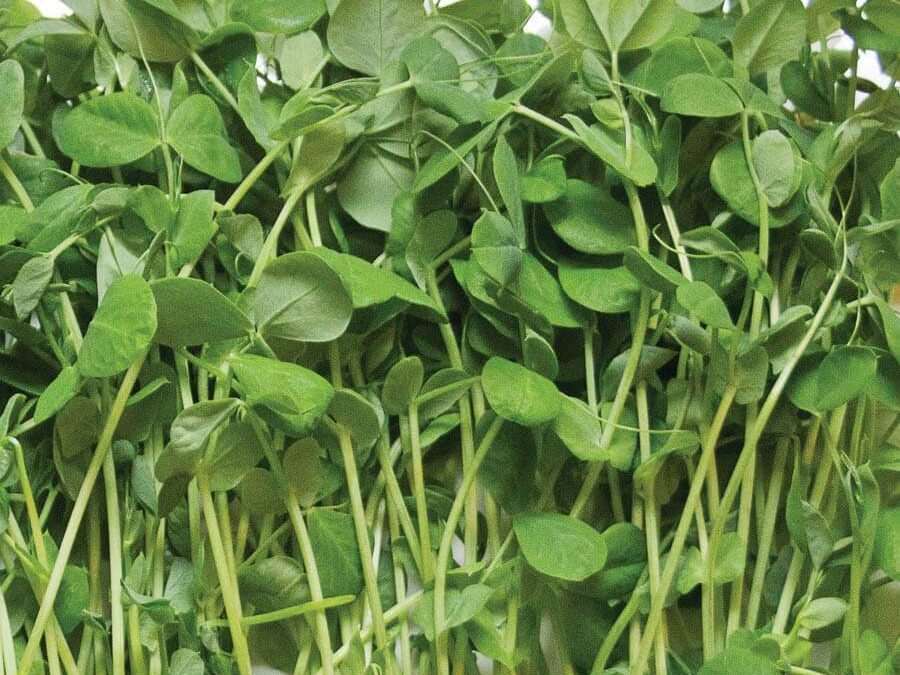
Pea shoots are truly incredible when enjoyed in their natural raw state. You can also enhance their deliciousness by tossing them with a flavorful sesame-based dressing or adding them to stir-fries towards the end of cooking, preserving their wonderful crunchy texture. We carry the highly sought-after Dwarf Grey sugar variety, known for its exceptional quality and delectable flavor of thick, rapidly growing shoots. However, it’s worth noting that any type of pea seeds can be used to cultivate these delightful microgreen pea shoots. It’s a fantastic product to experiment with alongside kids as these greens grow surprisingly fast. Not only are they sweet and tasty, but they also pack a nutritional punch!
Growing Microgreens Indoors
Indoor gardens have their own advantages when it comes to simplicity and control. Unlike outdoor gardens, you don’t have to worry about unpredictable factors that could hinder or enhance your success. Sprouts, for example, can easily be grown by rinsing the seeds with water repeatedly. It’s a quick process that can be completed within a few days since you typically choose plants that germinate rapidly. On the other hand, microgreens are grown in soil and harvested once their first leaf or leaf pair appears. With microgreens, there is no rush as they grow steadily in their natural environment.
How to Grow Microgreens
Step 1 – Timing Microgreen Pea Shoots
Microgreen Pea Shoots typically take just two weeks to grow. It’s important to be patient and allow extra time for them to grow if needed. Additionally, keep in mind that microgreens can be grown year-round as long as they receive sufficient light.
Step 2 – Starting Microgreen Pea Shoots
To give your seeds the best chance of thriving, it’s important to follow the planting instructions for each variety. Some seeds prefer to be sown on the surface of the soil, while others need to be covered. For optimal results, we suggest using sterilized seed starting soil in shallow trays that have drainage holes at the bottom. If you’re interested in growing microgreens, you might consider using 12-cell plug inserts that can easily fit into seedling germination trays. Happy planting!
Tip: If you want to grow microgreens but don’t have traditional gardening pots, don’t worry! You can repurpose recycled plastic containers or clamshell packaging for this purpose. Just make sure to poke some drainage holes at the bottom for proper water flow. While using a seedling warmer can speed up germination, it is not absolutely essential.
When spreading the sterilized soil, it’s best to keep it at a depth of only 2-3 inches. This ensures that there will be enough space for the baby seedlings to grow their roots comfortably as you prepare for harvest time.
Step 3 – Watering Microgreen Pea Shoots
After planting the seeds, it’s important to keep the soil moist, similar to a wrung out sponge, but avoid allowing it to sit in water. You can use a mist sprayer to regularly spritz the soil and maintain the moisture level. A helpful tip is using seedling germination trays – you can place a second tray on top of the planted tray to trap moisture inside and prevent rapid evaporation.
Step 4 – Growing Microgreen Pea Shoots
Once you spot the first sprout emerging from the soil, it’s time to take action. If you have been using a seedling warmer, go ahead and remove the tray from it. Similarly, if you have been using a cover for your seeds, it’s time to remove that as well. Remember that bright light is crucial for healthy microgreen growth. During late spring to early autumn, growing microgreens outdoors under natural daylight conditions is ideal. However, when cultivating them indoors, especially during the short and dim days of winter, it becomes important to provide some form of supplemental light to ensure their proper development.
Step 5 – Harvesting Microgreen Pea Shoots
When it comes to harvesting microgreens, it’s best to wait until the first leaf pair fully opens and turns green. That’s when they are packed with the most nutrients. However, if you prefer, you can let them continue to grow and simply harvest as needed. Just keep in mind that the longer they are left to grow, the more roots will develop in the soil.
When they’re ready, you can gently remove microgreens from the soil and give them a gentle rinse until all the soil particles are washed away. You have the option to enjoy them as whole, including their roots. Alternatively, you can trim them with scissors and responsibly dispose of the used soil in your compost bin.
Getting Microgreen Pea Shoots
Now that you know just how easy it is to grow the highly nutritious Microgreen Pea Shoots, why not give them a try? Click here for our favourite Microgreen Pea Shoot seeds and be sure to keep us posted on your growing journey online through social media @wildwoodoutdoorliving.
