by Wildwood Outdoor Living | Nov 22, 2023 | How To Grow
Growing mushrooms can be a rewarding and fulfilling experience. Whether you are a seasoned gardener or just starting out, learning how to grow mushrooms can open up a whole new world of possibilities in your home or garden. To successfully grow mushrooms, there are a few key factors to consider. In this week’s blog, we’re here to teach you everything there is to learn about growing your very own mushrooms at home!
Growing Medium For Growing Mushrooms

First and foremost, you will need the right growing medium. This can include materials such as straw, wood chips, or sawdust that provide the necessary nutrients for the mushrooms to thrive.
Unlike plants, mushrooms don’t rely on soil and sunlight for their nourishment. Instead, they flourish by breaking down organic matter and extracting nutrients from it. This organic matter, also called substrate, is crucial in mushroom cultivation. The choice of substrate used in growing mushrooms greatly impacts the yield, growth rate, and overall well-being of the mushrooms. Let’s delve into some of the commonly utilized substrates in mushroom cultivation together.
Organic Wheat Bran & Hardwood Sawdust – Hardwood sawdust combines organic wheat bran and hardwood sawdust in a balanced blend. This carefully crafted mix is designed to meet the specific growth needs of Lion’s Mane mushrooms. The organic wheat bran provides a nourishing array of nutrients, while the hardwood sawdust creates a dense and fibrous structure for the mycelium to flourish and colonize.
Manure – Particularly horse manure, is highly valued by gourmet and medicinal mushroom enthusiasts due to its rich nutrients. It contains organic matter that mushrooms thrive on. However, it’s crucial to prioritize safety when using manure. Make sure it has been properly composted and doesn’t contain any pesticides or harmful chemicals. Fresh manure can also introduce unwanted microbes, so proper care must be taken.
Coco coir – Which is made from coconut husks, is a wonderful choice for growing mushrooms because it’s sustainable and renewable. It has the amazing ability to retain water and is often used in conjunction with other substances. Although, when used by itself, coco coir may not provide enough nutrients for certain types of mushrooms. Therefore, it’s recommended to use it as a supplement rather than the sole substrate.
Moisture for Growing Mushrooms

Next, it’s important to create the ideal growing environment. Mushrooms prefer cool and dark conditions with high humidity levels. You may need to invest in a grow tent or create a designated space where you can control temperature and humidity levels, like an aquarium.
Another crucial aspect of mushroom cultivation is choosing the right mushroom variety for your desired outcome. There are countless types of edible and medicinal mushrooms available, each with their own specific growth requirements and flavours.
Once you have prepared your growing medium, created the optimal environment, and selected your desired mushroom variety, it’s time to inoculate your substrate with mushroom spawn. This involves introducing mycelium (the vegetative part of the fungus) into the growing medium to kickstart the growth process.
Throughout the growth cycle, it’s important to monitor temperature and humidity levels regularly. Mushrooms require consistent care and attention to ensure successful growth. Depending on the variety you choose, it may take several weeks or even months before you can harvest your first crop.
Oyster Mushrooms – For the best results, oyster mushrooms thrive in a humidity level ranging from 75% to 95%. Why is this important? Maintaining this higher level of humidity is crucial as it keeps the oyster mushrooms wonderfully moist and prevents them from becoming dry. By ensuring a consistent humidity within this range, you can enjoy plump and succulent oyster mushrooms with an absolutely delightful texture.
Lion’s Mane – Lion’s Mane mushrooms prefer a slightly higher humidity range compared to oyster mushrooms, typically between 85% to 95%. Creating the right humidity level is crucial for the successful growth of Lion’s Mane mushrooms. While it may not be as forgiving as growing oyster mushrooms, it is still relatively straightforward. By using a humidity tent with airflow holes, you can maintain the ideal moisture level needed for cultivating Lion’s Mane. The higher humidity promotes the development of its distinctive long and spiky tendrils, which contribute to its unique appearance and texture.
Lighting for Growing Mushrooms

Although mushrooms differ from plants in their photosynthetic capabilities, light still holds great significance in their growth and development. While plants rely on light for energy, mushrooms utilize it as a means to determine their growth direction and initiate the fruiting process.
Artificial Lighting – In the process of cultivating mushrooms, using a 6500K light is crucial as it mimics the spectrum of natural daylight. These types of lights can be set on a timer to simulate a natural day-night cycle for your mushrooms. This way, they can receive adequate light without being exposed to too much brightness. This nurturing spectrum plays a vital role in promoting healthy mushroom growth, ensuring their upward development and overall proper formation.
Avoid Direct Sunlight – Mushrooms truly flourish in ambient light, preferring the gentle glow that filters through curtains or the soft illumination found in shaded areas. It’s important to protect them from direct sunlight, as this can dry them out and impede their growth. Ensuring they receive indirect light will help them thrive while keeping them shielded from harmful sun exposure.
Fresh Air for Mushroom Growing

Mushrooms, just like any living organisms, need a careful balance of essential elements to grow successfully. One of these crucial factors is fresh air, which includes the exchange of oxygen and carbon dioxide known as Fresh Air Exchange (FAE). For mushrooms to carry out their metabolic functions, they require oxygen. Having a consistent supply of fresh oxygen ensures that the mycelium, the vegetative part of the fungus, stays strong and vibrant.
When mushrooms grow, they naturally produce carbon dioxide (CO2) as a by-product. However, excessive levels of CO2 can actually impede their growth, resulting in elongated stems and undersized caps. By providing proper Fresh Air Exchange (FAE), the concentration of CO2 can be reduced, allowing mushrooms to develop healthily and thrive.
Fresh Air at Home
In most homes, there is usually a decent amount of fresh air exchange (FAE) happening naturally. This happens through everyday activities like opening doors and windows, as well as the general movement of air. So, there’s no need to worry too much about ensuring enough FAE in these environments. However, when it comes to maintaining the right humidity levels, things can get a bit more challenging. It’s important to keep an eye on the humidity and make necessary adjustments to prevent the substrate from drying out. This will help create a comfortable and healthy living environment for everyone in your home. A few ways to improve the balance of FAE and moisture are:
Remove any Tents – Try removing the tent for a short period every day. This simple act can infuse the mushrooms with a much-needed breath of fresh air, supplying them with the oxygen they require to thrive.
Exhaust Fans – If you’re using grow tents, it’s highly recommended to set up an exhaust fan that pulls air outside. This way, you can maintain a consistent supply of fresh air, effectively managing CO2 levels for optimal plant growth.
Cutting Holes – One effective way to enhance the humidity and FAE levels inside a tent is by creating small openings to allow for natural airflow. This technique not only promotes better moisture retention but also helps in maintaining optimal humidity levels.
Mushroom Kits

If collecting all the materials required for growing your own mushrooms at home sounds overwhelming, we highly suggest starting your mushroom growing journey with one of our easy to use Mushroom Growing Kits. Not only do they come ready to use, but they’re a great way to dip your toes in without over spending. Check out our great selection below to get started.
White Oyster Mushroom – White oyster mushrooms possess an exquisite appearance with their fan-shaped cap and white gills. When it comes to taste, they offer a delightful combination of mild, nutty flavors reminiscent of cashews or almonds, with just a hint of seafood-like essence. Their soft and velvety texture adds to the overall sensory experience, while the delicate earthy aroma creates an inviting ambiance.
Blue Oyster Mushroom – Blue oyster mushrooms are truly unique with their blue-gray cap and delicate white gills. When it comes to taste, they offer a mild and savory flavor, with delightful hints of seafood and anise. Their soft and chewy texture gives them a meaty feel that is truly satisfying.
Black Oyster Mushroom – Black oyster mushrooms, a delightful hybrid variety, boast a captivating marbled cap and a sturdy stem. Their flavor profile is truly remarkable, blending sweetness, umami, and a hint of pepperiness for an extraordinary taste experience. With their hearty and chewy texture, these mushrooms lend themselves brilliantly to soups, stews, stir-fries, and even as meat substitutes.
Lion’s Mane Mushroom – Lion’s mane mushrooms are truly unique with their white, fluffy spines. When cooked, they offer a delightful combination of sweetness and nuttiness that resembles the flavor of seafood. What’s more, their tender yet slightly chewy texture makes them incredibly versatile in various culinary creations.
Pink Oyster Mushroom – Pink oyster mushrooms are truly delightful with their distinct pink color and unique fan-shaped cap. When cooked, they offer a delightful sweet and nutty flavor that carries a subtle hint of seafood. Not only that, but their tender and chewy texture also makes them versatile for use in a wide variety of dishes.
Remember that patience is key when it comes to growing mushrooms. It is a process that requires time and dedication but can be incredibly rewarding when you see those first tiny caps emerge from your carefully cultivated substrate.
Whether you’re interested in cultivating gourmet culinary mushrooms or exploring the world of medicinal fungi, learning how to grow mushrooms opens up endless possibilities for culinary creations or natural remedies. So roll up your sleeves and embark on this exciting journey of mushroom cultivation – who knows what delicious surprises await!
Have a suggestion or question?
Let us know at info@wildwoodoutdoorliving.com.
Sign up here for more blogs dedicated to better gardening!
by Wildwood Outdoor Living | Oct 24, 2023 | How To Grow
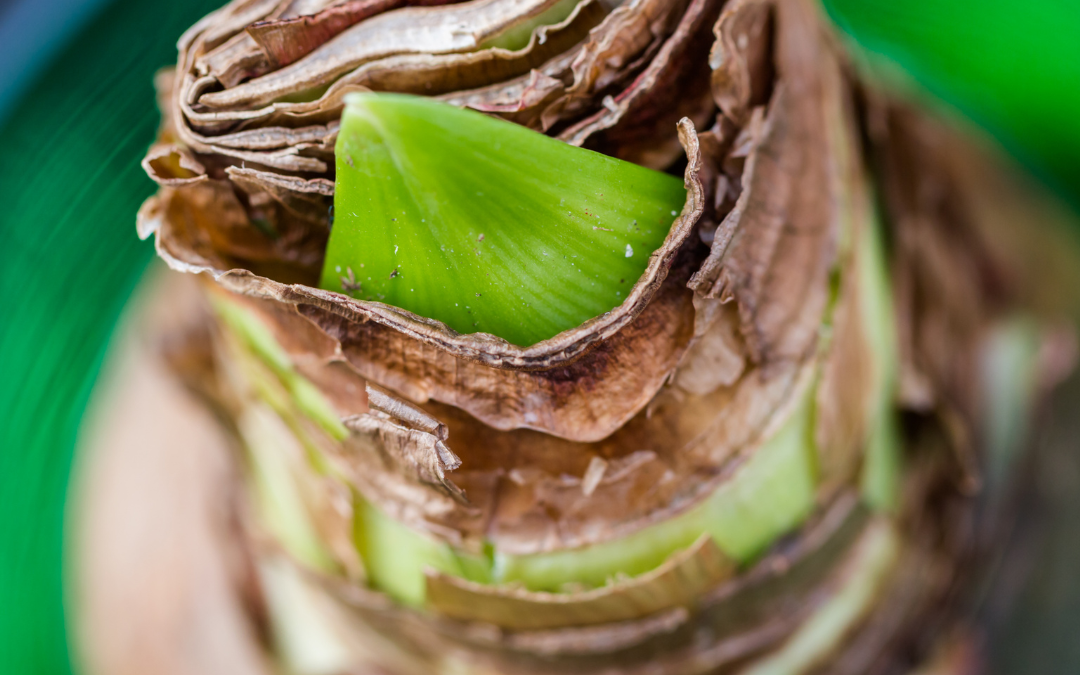
It is crucial to store your amaryllis bulbs correctly. By doing so, you ensure their well-being and promote their future growth and blooming. Proper storage reduces the risk of damage or diseases that can hinder their vitality. Taking the time to store them appropriately demonstrates your care for these beautiful flowers, allowing them to thrive and bring joy for seasons to come. As we introduce our newest collection of Amaryllis Bulbs, we thought we would share the best way to store your bulbs so that they grow strong and beautiful blooms this season,
How To Store Amaryllis Bulbs

When it comes to storing amaryllis bulbs, proper care and attention are essential to ensure their health and longevity. By following a few simple steps, you can help your bulbs thrive and prepare them for future growth.
Step 1: Clean Your Amaryllis Bulbs

Firstly, it’s important to clean the bulbs before storing them. Gently remove any excess soil or debris from the bulb, being careful not to damage any of the roots. This will help prevent the spread of disease or pests during storage.
Step 2: Inspect Amaryllis Bulbs

Next, inspect the bulbs for any signs of damage or rot. Discard any bulbs that appear soft or diseased, as they may not survive storage. It’s crucial to only store healthy and intact bulbs for optimal results.
Step 3: Where to Store Amaryllis Bulbs

Once cleaned and inspected, choose an appropriate storage location for your amaryllis bulbs. A cool, dry place with good air circulation is ideal. Avoid areas with extreme temperatures or high humidity levels, as this can negatively impact bulb health.
Tip: Consider using a breathable container such as a mesh bag or paper sack to store your amaryllis bulbs. This allows for proper airflow while also protecting them from excessive light exposure.
Step 4: How Long To Store Amaryllis Bulbs

Finally, be mindful of the duration of storage. Amaryllis bulbs typically require a period of dormancy before they can be replanted and bloom again. Aim for a storage period of around 8-12 weeks in order to encourage healthy growth and flowering in the future.
By storing your amaryllis bulbs with care and consideration, you are setting them up for success in their next growing season. Remember to provide regular check-ups during storage to ensure that they remain in good condition until it’s time to bring them back into bloom!
To browse through our beautiful selection of Amaryllis, click here.
Have a suggestion or question?
Let us know at info@wildwoodoutdoorliving.com.
Sign up here for more blogs dedicated to better gardening!

by Wildwood Outdoor Living | Oct 18, 2023 | How To Grow
Understanding the Importance of Cover Cropping in Sustainable Agriculture
In this fast-paced world, where the focus is often on productivity and efficiency, it’s refreshing to witness a growing movement towards sustainable farming practices. One such practice that has gained considerable attention is the use of cover crops. These humble plants serve as a powerful tool in improving soil health, restoring ecological balance, and promoting organic gardening.
Cover crops are non-cash crops that are planted specifically to benefit the soil and surrounding ecosystem. They work tirelessly beneath the surface, capturing nutrients, preventing erosion, and suppressing weeds naturally. Their presence not only enhances soil fertility but also aids in water retention and reduces the need for chemical fertilizers or pesticides.
Cover Crop Benefits
By incorporating cover crops into agricultural systems, gardeners can enjoy numerous benefits. Firstly, these green companions help prevent soil erosion by anchoring themselves firmly with their roots. This prevents valuable topsoil from being washed away during heavy rains or blown away during windy conditions.
Furthermore, cover crops act as natural pest suppressants by attracting beneficial insects that prey on harmful pests. This reduces the reliance on synthetic pesticides and promotes a healthier ecological balance within farmlands.
The impact of cover crops is not limited to gardens alone; they extend beyond boundaries into our communities and environment. By enhancing soil health through organic practices like cover cropping, we contribute to cleaner waterways by minimizing nutrient runoff from fields. Additionally, healthier soils can sequester more carbon dioxide from the atmosphere – an essential step towards mitigating climate change.
How to Cover Crop in Your Garden
Choosing the right cover crop for your farm or garden is an important decision that can greatly benefit your soil health and overall crop productivity. In this step-by-step guide, we will walk you through the process of selecting cover crops, taking into consideration climate considerations, soil type analysis, and crop rotation planning.
Location: When it comes to selecting cover crops, it’s crucial to consider the climate in your region. Different cover crops thrive in different climates, so understanding your local weather patterns and temperature ranges will help you choose varieties that are best suited for your area. Whether you’re dealing with hot summers or cold winters, there are cover crops available that can withstand these conditions and provide maximum benefits for your soil.
Soil types: Next, conducting a thorough soil type analysis is essential. Different soils have different nutrient levels and drainage capabilities, which can impact the performance of cover crops. By analyzing your soil’s composition and fertility levels, you can identify any deficiencies or imbalances that need to be addressed. This analysis will guide you in choosing cover crops that can replenish specific nutrients or improve soil structure based on its needs.
Planning: Another critical factor to consider is crop rotation planning. Cover cropping is often integrated into a well-planned crop rotation system where different plants are grown in succession on the same land over time. This helps break pest cycles, improves soil health by diversifying root structures and nutrient uptake abilities, and reduces weed pressure naturally. By understanding which plants have been previously grown on a particular plot of land and considering their nutrient demands or disease susceptibility, you can strategically select cover crops that complement or enhance the growth of subsequent cash crops.
By following these steps – considering climate considerations, conducting a thorough soil type analysis, and incorporating crop rotation planning – you’ll be well-equipped to choose the right cover crop for your farm or garden. Remember that each decision plays a vital role in improving soil health, enhancing productivity, and promoting sustainable agricultural practices.
The Best Seeds for Cover Crop Planting
One of the key considerations when selecting cover crop seeds is their ability to effectively suppress weeds. Certain cover crops like annual ryegrass or crimson clover have excellent weed smothering abilities, making them ideal choices for areas with high weed pressure. Additionally, legume cover crops such as hairy vetch or clover species are known for their nitrogen-fixing capabilities, which can contribute to improved soil fertility.
Climate conditions also play a significant role in determining the best seeds for cover crop planting. Some cover crops are better suited for cooler climates while others thrive in warmer regions. For instance, winter rye is well-adapted to colder climates and can provide excellent ground coverage during winter months. On the other hand, sun-loving crops like buckwheat or cowpeas are more suitable for warmer regions where they can grow rapidly and provide effective weed suppression.
It’s important to consider your specific goals when choosing cover crop seeds. Are you looking to improve soil structure? Prevent erosion? Enhance biodiversity? Different cover crops offer unique benefits that align with these objectives. For example, radishes are known for their ability to break up compacted soils with their deep taproots while mixtures of diverse species like oats and legumes can promote biodiversity above and below ground. For a great option that covers many beneficial areas for cover cropping, gardeners love using Renee’s Garden Scatter Garden Seeds Cover Crop. Click the image below to learn how Renee’s has combined some of their best Cover Crop seeds to help gardeners get started on Cover Cropping their gardens.

In conclusion, selecting the best seeds for cover crop planting requires careful consideration of factors such as weed suppression abilities, climate adaptability, and desired outcomes. By making informed choices about which seeds to use in your cover cropping strategy, you can maximize the benefits they provide and contribute to a healthier and more sustainable agricultural system.
Have a suggestion or question?
Let us know at info@wildwoodoutdoorliving.com.
Sign up here for more blogs dedicated to better gardening!

by Wildwood Outdoor Living | Oct 3, 2023 | How To Grow
Scilla 101
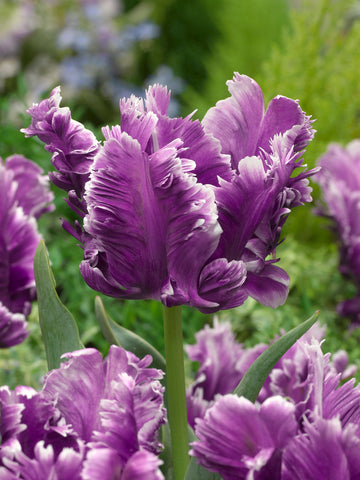
Welcome to the enchanting world of Scilla! Get ready to be captivated by the beauty of these delicate spring flowers. With their vibrant blue petals, Scilla siberica is sure to bring a burst of color and joy to any garden. These bulb plants are an absolute delight to behold, and you’re in for a treat as we explore their fascinating features further.
About Scilla

Also known as Siberian Squill. Scilla is a beautiful flowering plant that belongs to the Asparagaceae family. It is native to regions like Siberia and other parts of Europe. Scilla is known for its vibrant blue or purple flowers that bloom in early spring, adding a splash of color to gardens and landscapes. These delicate flowers are bell-shaped and grow in clusters on sturdy stems.
Naturalizing
Scilla has become a beloved choice among gardeners seeking low-maintenance plants. Its unique characteristic of spreading quickly allows it to create a captivating carpet of enchanting blooms in no time. For those looking to add beauty and charm to their gardens without the hassle, Scilla proves to be an exceptional choice for mass landscaping.
Symbolism
Scilla, with its breathtaking beauty, holds a deeper significance in various cultures. Beyond being a visual delight, this vibrant flower symbolizes rebirth and new beginnings. It blooms during the early spring season, marking the start of a fresh chapter in nature’s cycle. In many cultures, Scilla serves as a powerful reminder of the resilience and potential for growth that comes with embracing change. Its delicate petals carry messages of hope and optimism for those seeking to embark on new journeys or turn over a new leaf in their lives.
How to Grow Scilla

If you’re looking to add a burst of vibrant color to your garden, planting and propagating Scilla bulbs is a great choice. These hardy bulbs are known for their beautiful blue flowers and can thrive in various growing conditions. In this section, we will guide you through the process in 5 easy steps, ensuring successful growth and blooming.
Step 1: Soil Preparation
Preparing the soil is crucial for the healthy development of your Scilla bulbs. Choose a well-draining location with fertile soil. Fertilizing bulbs is another important aspect of their care routine. Before planting Scilla bulbs, incorporate well-balanced bulb fertilizer into the soil according to package instructions. This will provide essential nutrients for healthy growth and vibrant blooms. During the growing season, you can supplement with a slow-release fertilizer or liquid fertilizer specifically formulated for bulbs.
Step 2: Spacing
When it comes to planting Scilla bulbs, proper spacing is essential. Leave enough room between each bulb to allow for optimal growth and spread. Aim for a spacing of about 3-4 inches between each bulb, ensuring they have enough space to flourish without overcrowding.
Step 3: Depth of Planting
The depth at which you plant your Scilla bulbs plays a significant role in their overall health and blooming potential. Dig holes that are approximately 3-4 inches deep. Place the bulbs in the holes with their pointed ends facing upwards, gently covering them with soil.
Step 4: Watering Techniques
Once your Scilla bulbs are planted, it’s important to establish proper watering techniques. These plants prefer moist soil, so it’s crucial to water them regularly. However, be cautious not to overwater as it can lead to root rot. A good rule of thumb is to water deeply once a week, allowing the soil to dry slightly between waterings.
Step 5: Maintenance and Care
To ensure continued success with your Scilla bulbs, regular maintenance is necessary. Keep an eye out for any signs of pests or diseases and take appropriate measures if needed. In addition to regular watering, mulching can greatly benefit your Scilla plants. Applying a layer of organic mulch around the base of the plant helps retain moisture in the soil and suppresses weed growth. It also acts as insulation during extreme temperatures, protecting the bulbs from harsh weather conditions.
Common Problems with Scilla Plants

Maintaining a beautiful garden can sometimes be challenging, especially when it comes to dealing with pests and diseases that can harm our beloved plants. In the case of Scilla, these enchanting flowers are not exempt from facing their fair share of troubles. However, fear not! With the right knowledge and proper pest control methods, you can ensure the health and longevity of your Siberian squill garden.
When it comes to pests that commonly affect Scilla, there are a few culprits to watch out for. One such pest is the bulb mite, which feeds on the bulbs and can cause significant damage if left unchecked. Another common pest is the slug, known for its voracious appetite for tender plant leaves. Additionally, squirrels and mice may also pose a threat to your Scilla by digging up bulbs or nibbling on foliage.
Have Fun with Scilla

To enhance the beauty of these flowers even further, consider pairing them with companion plants that complement their colors and textures. For instance, daffodils or tulips can create a striking contrast when planted alongside Scilla. The combination of yellow or red blooms with the blue hues of the Scilla will create an eye-catching display that is sure to impress.
Additionally, you can experiment with different heights and layers by planting taller companion plants such as ornamental grasses or shrubs behind the low-growing Scilla. This will add depth and dimension to your garden design while providing a backdrop that allows the Scilla to truly shine.
So why not unleash your creativity and let these charming flowers inspire you? With their enchanting blue blossoms and countless companion plant possibilities, incorporating Scilla into your garden design is sure to bring joy and beauty for seasons to come.
Have a suggestion or question?
Let us know at info@wildwoodoutdoorliving.com.
Sign up here for more blogs dedicated to better gardening!
by Wildwood Outdoor Living | Sep 18, 2023 | How To Grow
How To Plant Fall Bulbs
Planting flower bulbs in the fall is a common topic of conversation, but understanding the reasons behind it, what types of bulbs to use, when to plant them, and how to do it can be quite intricate. Don’t worry – we’re here to support you. Below is a comprehensive guide that covers everything you need to know about planting flower bulbs during the autumn season.

Narcissus, Ice Follies
Cool Temperatures
To ensure the optimal growth of spring-blooming bulbs, including garlic, it is crucial to expose them to longer periods of cold temperatures. This helps create the perfect conditions for their development and ensures a beautiful display in the springtime, this process is referred to as Vernalisation.
The vernalisation process is truly amazing as it jumpstarts a plant’s growth by reducing its vegetative stage. This not only results in bigger and more abundant flowers, but also extends their lifespan. Furthermore, it strengthens the overall health of the plant, making it more resilient to both cold temperatures and fungal diseases.
In warmer regions, people need to refrigerate their spring-blooming bulbs to ensure proper growth. However, here in Canada, we are fortunate enough to simply plant them in the ground and let nature take care of the rest for us. It’s a convenient and natural way to enjoy the beauty of these bulbs without any extra effort.

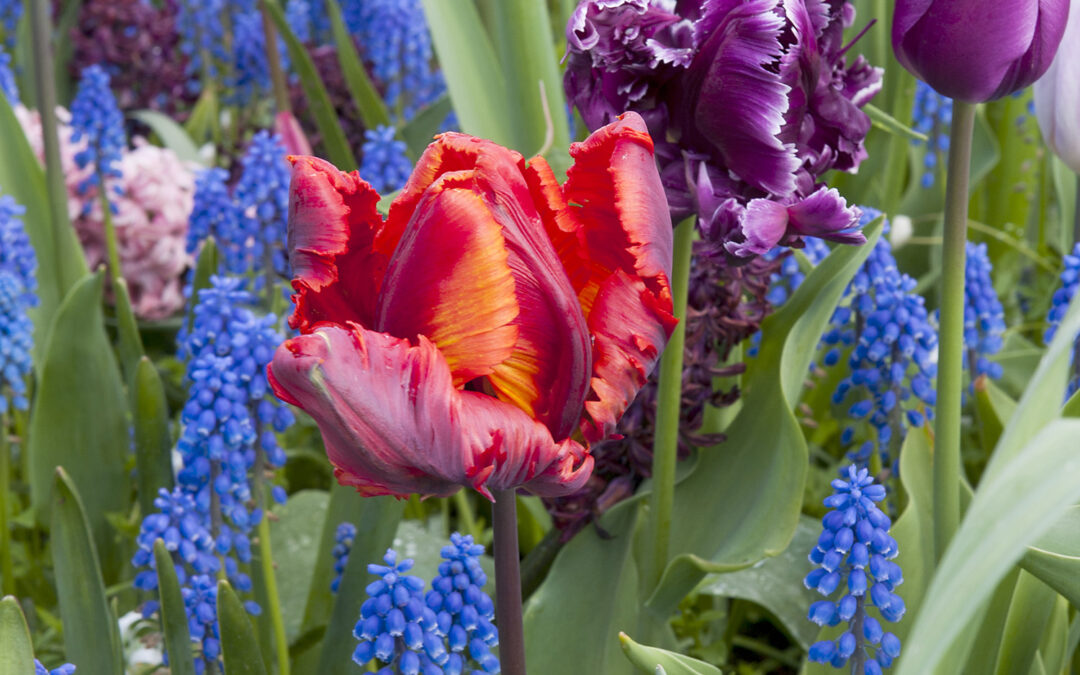
Tulip, Dolls Minuet
When To Plant Fall Bulbs in Canada
Planting fall bulbs can sometimes be overwhelming with all the different opinions and urban legends about the best time to do it. However, it doesn’t have to be a complicated and mythical process. If you prefer, you can track soil temperatures and wait until they consistently stay below 15ºC before planting. But don’t worry too much about being extremely precise – nature is resilient, and your bulbs will likely thrive regardless of the exact moment you choose to plant them.
A helpful tip for planting bulbs is to keep track of the weather. Once the temperatures start to drop and frost is a few weeks away, it’s a good time to begin. Aim to plant your bulbs during the week when frost is predicted. This way, you can ensure they have a successful start in their new home. By planting your bulbs just before the first frost, you’re giving them a chance to establish their root system before winter arrives. This helps them survive and flourish when spring comes around.
If October begins with unexpectedly warm weather, it would be ideal to wait for a week before planting. However, if waiting is not possible, there’s no need to fret. You can go ahead and plant them whenever you’re able to, whether it’s earlier or later. Just make sure to keep an eye out for any signs of green sprouting after you’ve planted them.
TIP: If you notice tiny leaves starting to emerge, it’s important to provide them with a protective layer of mulch. This will help keep them cozy and safe during the winter months.
Preparing Your Soil For Fall Bulbs
When it comes to preparing soil for bulb planting, there are a few helpful tips to keep in mind. First and foremost, choose an ideal location for your fall bulbs. Find an area that receives ample sunlight and has well-drained soil. Remove any weeds or debris from the planting site to give your bulbs a clean start. Next, loosen the soil using a garden fork or tiller, ensuring that it is not compacted which can hinder proper growth. Consider adding organic matter such as compost or peat moss to enrich the soil and provide necessary nutrients for your bulbs. By following these guidelines, you’ll create a compassionate environment that promotes healthy bulb growth and beautiful blooms in the future.

Tulip, Black Hero
How To Plant Fall Flowering Bulbs
To plant spring flowering bulbs in the fall, there’s no need to feel overwhelmed. In fact, it’s a straightforward process that can be easily followed by anyone with a green thumb or even those just starting out in gardening. To ensure successful blooming come springtime, there are three general guidelines that you should keep in mind. By following these simple steps, you’ll be well on your way to creating a vibrant and colorful garden for everyone to enjoy.
- When planting bulbs, it’s important to remember the recommended guidelines for depth and spacing. Plant them three times deeper than their height, allowing them to establish strong roots. Additionally, space them two times wider apart than their height to give each bulb enough room to grow. For example, if your bulb is 2 inches tall, plant it 6 inches deep and ensure a spacing of 4 inches between each bulb. This will provide the ideal conditions for healthy growth and thriving plants in your garden.
- When planting bulbs, it is important to remember that the pointy side should face upwards. This is because the leaves will emerge from this point, while the round bulb end is where the roots will develop. Taking care to plant them correctly will help ensure healthy growth for your plants.
- To ensure the bulbs have a good start, it’s important to give them a generous amount of water. Since they are planted at a deeper level, it’s best to provide them with a long, gentle watering after planting. This will allow the water to penetrate deep into the soil, encouraging strong root growth.

Protecting Your Fall Bulbs
During the winter season, it’s essential to take care of your fall bulbs and protect them from frost and freezing temperatures. By implementing some simple measures, you can ensure their survival and encourage their growth when spring arrives.
As winter approaches and the temperature drops, it’s important to remember that our fall bulbs need some extra care and protection. These little wonders of nature hold the potential for beautiful blooms in the spring, but they are vulnerable to frost and freezing temperatures. By taking a few simple measures, we can ensure their survival and give them the best chance to thrive when spring arrives.
1.) One of the first steps is to provide a layer of insulation around your bulbs. This can be done by adding a thick layer of mulch or straw on top of the soil where your bulbs are planted. This protective layer will help regulate temperature fluctuations and shield them from harsh weather conditions.
2.) Another important aspect is proper watering. While it may be tempting to water less during the winter months, it’s crucial to keep your bulbs adequately hydrated. Before the ground freezes, make sure they receive enough moisture so that they don’t dry out. However, be cautious not to overwater as this can lead to rotting.
3.) In addition to insulation and watering, consider providing some shelter for your fall bulbs. If you have potted bulbs or those planted in exposed areas, you might want to move them closer to a wall or under an overhang that offers some protection from strong winds and extreme cold.
4.) Lastly, don’t forget about pests! While many critters go into hibernation during winter, there are still rodents who might see your dormant bulbs as a tasty treat. To deter these unwanted visitors, place wire mesh or fencing around your bulb beds.
Remember that with proper care and attention, our fall bulbs will reward us with vibrant blossoms when spring finally arrives. By implementing these simple measures – insulating with mulch or straw, providing adequate water without overwatering, offering shelter from harsh elements and protecting against pests – we can ensure their survival and encourage their growth throughout the colder months.
Let’s take this opportunity to show our love for these resilient plants by taking the necessary steps to protect them during winter. They are an integral part of our gardens, bringing joy and beauty to our lives when we need it most.
Sit Back and Wait
Planting fall bulbs in your spring garden can yield truly satisfying results. The vibrant blooms that emerge are a testament to the beauty and resilience of nature. It’s a wonderful feeling to see your garden transform into a colorful paradise, with each bulb contributing its unique charm. The anticipation and patience required for this process make the eventual growth even more rewarding. So go ahead and enjoy the fruits of your labor, knowing that you’ve created something truly special in your own backyard. And check out our 2023 collection of Fall Bulbs to choose your favourite blooms.
Have a suggestion or question?
Sign up here for more blogs dedicated to better gardening!
by Wildwood Outdoor Living | Aug 2, 2023 | How To Grow
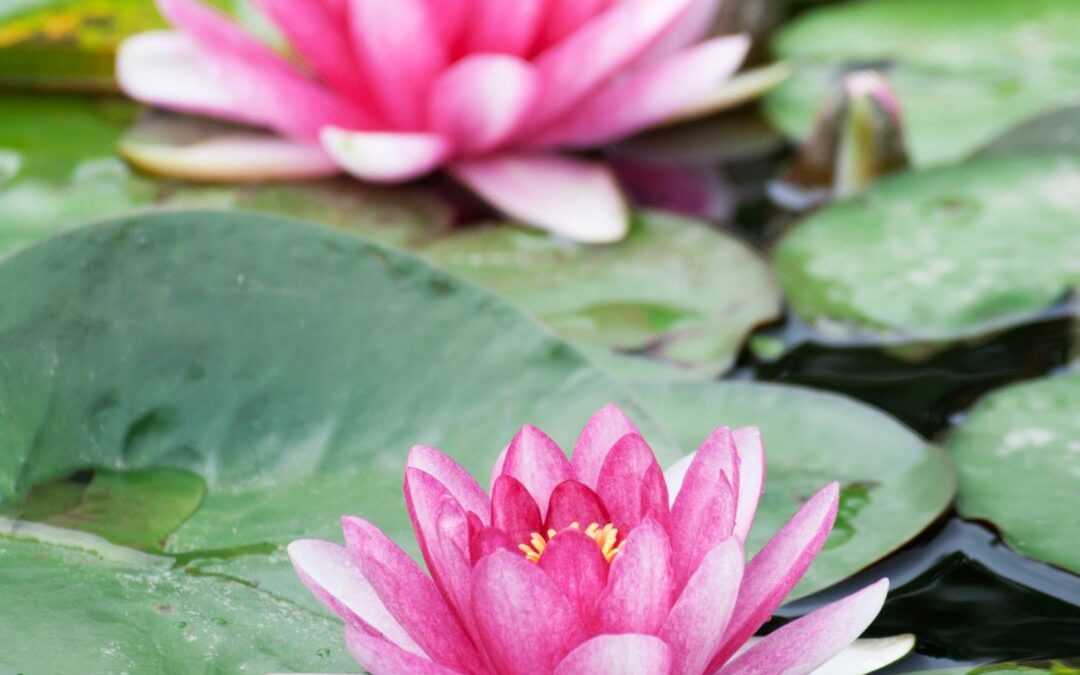
How to Grow Water Lilies
Whether you have a pond or simply want to add a touch of tranquility to your garden, water lilies are the perfect choice. Not only do they create a serene atmosphere, but they also provide shade and shelter for fish and other aquatic creatures. So if you’re looking to create a peaceful oasis or simply appreciate the beauty of nature, water lilies are sure to make a splash in your garden. Get ready to be mesmerized by these exquisite pond plants that bring both beauty and serenity wherever they bloom, by learning how to grow your very own Water Lilies!
Step 1: Choosing the Right Variety of Water Lilies
Alright, let’s dive into the wonderful world of water lilies! When it comes to choosing the perfect variety for your pond or garden, there are a few options to consider. You’ve got hardy water lilies, tropical water lilies, and even miniature water lilies to choose from.
Hardy water lilies are known for their resilience and ability to withstand colder temperatures. They come in a range of colors and sizes, making them a popular choice for many garden enthusiasts.
On the other hand, tropical water lilies bring a touch of exotic beauty to your space. These vibrant blooms thrive in warmer climates and can add a splash of tropical paradise to your pond or garden.
If you’re working with limited space or prefer something more compact, miniature water lilies might be just what you’re looking for. These petite beauties pack a punch with their small size but still offer stunning blooms that will catch anyone’s eye.
So take some time to explore the different varieties available and consider factors like climate, space constraints, and personal preference. With the right variety of water lily at your fingertips, you’ll be well on your way to creating a breathtaking aquatic oasis.
Step 2: Selecting the Ideal Location for Your Water Lily Pond or Container

Now that you’ve decided to create a beautiful water lily pond or container garden, it’s time to choose the perfect location for it. Finding the ideal spot is crucial as it can greatly impact the health and growth of your water lilies.
First things first, consider whether you want to have a traditional pond or opt for a container garden. This decision will determine the flexibility of your location options.
For a traditional pond, you’ll need to find an area in your yard that receives at least six hours of sunlight each day. Water lilies thrive in sunlight, so make sure there are no large trees or structures casting shadows over the chosen spot.
If you’re going for a container garden, you have more flexibility in terms of location. You can place it on your patio, balcony, or even indoors near a sunny window. Just ensure that wherever you choose, there is enough sunlight for your water lilies to flourish.
Keep in mind that water lilies also require some protection from strong winds. Placing them near tall shrubs or fences can help create a natural windbreak and prevent damage to their delicate leaves and flowers.
By selecting the right location with adequate sunlight and protection from strong winds, you’ll be setting up your water lily pond or container garden for success!
Step 3: Preparing the Soil and Planting Your Water Lilies Correctly

Alright, let’s dig into step 3: preparing the soil and planting your water lilies correctly. This is where we get our hands dirty and set the foundation for healthy growth.
Firstly, you’ll want to make sure you have the right soil mix. Water lilies thrive in a wetland soil mix that retains moisture while still allowing for proper drainage.
Now, let’s talk about planting depth. It’s important to know that different types of water lilies have different planting depth requirements. Generally, you’ll want to plant hardy water lilies at a depth of 12-18 inches, while tropical water lilies prefer a slightly deeper planting depth of 18-24 inches. Be sure to check the specific instructions for the variety you’re working with.
When it comes to dividing and repotting water lilies, it’s usually best to do this every couple of years or when they become overcrowded in their current container. Gently remove the plant from its pot and carefully separate any rhizomes or tubers that have multiplied. Then, repot them in fresh wetland soil mix, making sure they have enough space to grow and spread out. Remember, proper preparation and planting are key for your water lilies’ success.
Step 4: Providing Proper Care and Maintenance for Healthy Growth

Alright, folks, let’s dive into step 4 of our guide on providing proper care and maintenance for healthy growth in your water garden. This time, we’ll be focusing on three important aspects: fertilizing water lilies, controlling pests and diseases, and some handy pruning and deadheading tips.
First up, let’s talk about fertilizing those gorgeous water lilies. These aquatic beauties need a little boost every now and then to thrive. Make sure to use a slow-release fertilizer specifically formulated for water plants. Just sprinkle it around the base of the lily pads or follow the package instructions for best results.
Next on our agenda is keeping those pesky pests and diseases at bay. Nobody wants their water garden overrun by unwanted critters or plagued by nasty infections! Regularly inspect your plants for any signs of trouble like aphids or fungal diseases. If you spot any unwelcome visitors or suspicious spots on your plants, take action immediately with appropriate treatments recommended for aquatic environments.
Last but not least, let’s discuss pruning and deadheading – to keep your water garden looking tidy and vibrant. Remove any yellowing or decaying leaves from your plants to prevent them from rotting in the water. Deadhead spent flowers regularly to encourage new blooms and maintain a visually pleasing display.
Remember, taking proper care of your water garden is crucial for its healthy growth. So grab that fertilizer, keep an eye out for troublemakers, and give those plants a little trim when needed! Your flourishing aquatic oasis will thank you in full bloom!
Enjoying the Serenity of Blooming Water Lilies in Your Own Backyard Oasis

In conclusion, creating your own backyard oasis with blooming water lilies can bring a sense of serenity and tranquility to your life. Imagine stepping outside and being greeted by the vibrant colors and delicate fragrance of these beautiful flowers.
By incorporating water lilies into your outdoor space, you can create a peaceful retreat where you can unwind after a long day. Whether you choose to have a small pond or a larger water feature, the presence of these enchanting flowers will undoubtedly add an element of natural beauty.
For more information on growing your own water lilies at home, check out the latest episode of Get Up and Grow “How to Grow and Care for Waterlilies” with our President, Gord Nickel below!
Have a suggestion or question?
Let us know at info@wildwoodoutdoorliving.com.
Sign up here for more blogs dedicated to better gardening!