Have a suggestion or question?
Let us know at info@wildwoodoutdoorliving.com.
Sign up here for more blogs dedicated to better gardening!

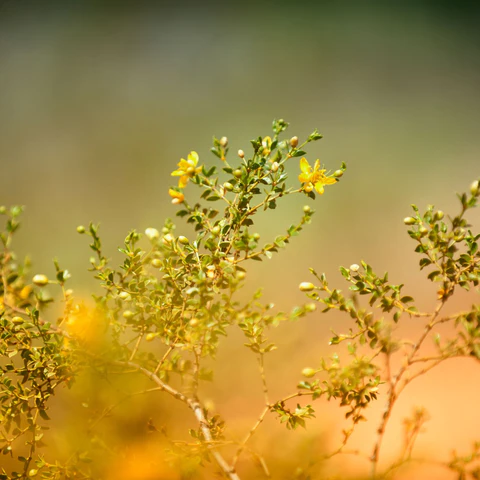
To extend the growing season, now is the best time to start planting your fall and winter veggies and even get some cover crops going. To get started, check out our mid-August seed sowing list, complete with handy tips and insights in this weeks blog Top 5 Mid-August Seeds to Sow!
If you’re looking to sow seeds in late summer, there are loads of great options that will thrive. In places like Lower Mainland BC and nearby areas, the first frost usually hits around November 2nd. But If you’re into gardening in a different area, just do a quick Google search with “first frost date” and the name of your town. You’ll find all the info you need to plan out your garden accordingly.

Radishes are all about that cool soil vibe, and the best part is they grow super fast when you plant them in the fall. Keep things exciting by planting short rows every couple of weeks so you can enjoy a non-stop supply of these tasty veggies.

Check out pac choi, the cool-weather champ! It’s a must-have for your fall garden. This veggie slows down its growth as autumn rolls in, which means you can easily snatch it at its best before it bolts. Harvesting made simple! You should totally give it a try and mix things up with your meals. Growing these veggies in containers or garden beds is super easy, plus they’re packed with both speed and nutrition. With different sizes and flavors to choose from, pac choi will bring endless culinary excitement to your kitchen.

Prepare yourself to be head over heels for carrots! These vibrant orange wonders are absolutely incredible. And guess what? You still have a whopping 75+ days to relish them this season. So, why not sow some seeds within the next couple of weeks? That way, you’ll be all set for an abundant autumn harvest. Don’t forget to keep the seed bed nice and damp until the seeds start sprouting, especially when it’s scorching hot and goes above 25°C (77°F). Gotta give those little seeds the best chance to grow!

Kale is seriously amazing! If you plant it in mid-August, you’ll have a bountiful harvest all winter long. And if you’re obsessed with its goodness from having it all summer, why not try planting it in winter too? This leafy green is not just any ordinary vegetable – it’s packed with more vitamins and nutrients than you can imagine. If you’re looking to level up your health game, kale is here to save the day!

You’ve got to check out the amazing Mustard family! From fancy Mizuna to the impressive Giant Red, these leafy greens bring a whole lot of variety to your salad game. These mustard greens are pretty chill. They actually love the cool soil and thrive in it. If you’re into arugula and corn salad, you should totally plant some mustard greens now. They’ll hang out with you through fall and winter, making your salads extra delightful.

And one for good-luck! Arugula is a fan of cool weather and soil. When the nights start getting chilly, around 15°C (60°F) or lower, it’s the perfect time to plant these awesome arugula seeds. Just keep an eye on the weather forecast before you get started! Don’t go crazy and plant all of them at once. Here’s the master plan: plant a small row every two weeks until around the third week in September.
Well look at that, it’s the middle of August and you’re all set with a whole new gardening adventure. Don’t forget to shop our huge selection of seeds online and in-store. Plus! If you order in time, you’ll get 20% off a whole lot of seeds before the end of the season.
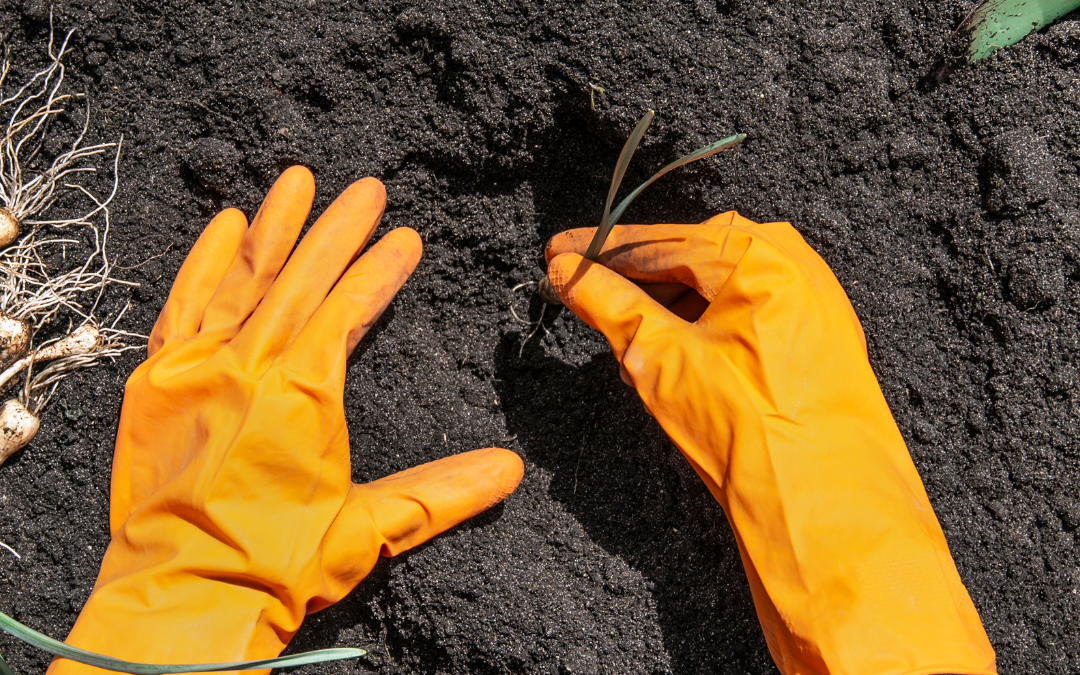
August is a crucial month for gardeners as it marks the transition from summer to fall. With the right tips and techniques, you can ensure that your garden thrives during this time of year. From nurturing your plants to preparing for the upcoming season, there is plenty to do in the garden in August.

One of the key tips for gardening this August is to stay on top of watering. As temperatures rise, plants can become easily dehydrated. Be sure to water your plants deeply and consistently, especially during dry spells. It’s also important to water early in the morning or late in the evening to minimize evaporation.

Another essential task for August gardening is deadheading and pruning. By removing spent blooms and trimming back overgrown branches, you encourage new growth and maintain a tidy appearance in your garden. This also allows more sunlight and air circulation, which helps prevent disease.

Additionally, August is an ideal time to start planning for fall planting. Take inventory of your current plants and consider what additions or replacements you might want for the upcoming season. Research which flowers, vegetables, or herbs thrive in your region during autumn and make a plan accordingly.

Take a moment to keep an eye on your fish! August is a critical period when these adorable aquatic creatures may develop ulcers. To ensure their well-being, it’s essential to administer necessary medications and maintain clean water and filters. By taking these proactive measures, you can help promote the overall health and happiness of your cherished fishy friends.

Lastly, don’t forget about lawn care! August is a great time to address any bare patches or weed issues in your lawn. Consider reseeding or overseeing areas that need attention and apply weed control products as necessary.

Don’t know what to get Dad for Father’s Day this year? Don’t worry, we’ve curated a list of the perfect gifts that are sure to make him feel special. Get ready to take your gift-giving game to the next level with The Top 5 Gifts for Dad this Father’s Day!

If you’ve got a Dad who loves his favorite chair, then you know how important it is to him. But why not take that special spot outdoors for an even more special experience? Introducing the Ergonomically designed, heavy-duty dream chair! With no painting, no slivers and no rot, this chair will be a lifetime companion for your Dad and his favorite spot outside.

Don’t have a pond? Get one! Whether Dad lives in an apartment or doesn’t have the space for a pond, The Aquascape AquaGarden Mini Pond Kit makes it simple and easy to add the sights and sounds of a water garden to any location. Not only a fun project to do together, but a relaxing way to unwind together this Father’s Day.
Looking for more fun? Add a few small fish and different types of plants to create your own unique aquatic paradise. The waterfall filter offers an ideal environment for plants, but also acts as a biological filter to keep the water clean and clear.

A great way to create lasting memories with Dad this Father’s Day is by completing a DIY project together! This Bird Feeder Kit comes with all the materials you need to build your own bird feeder. Not only will it be a fun and rewarding activity, but it will also give Dad the opportunity to watch and enjoy the birds that visit his creation. With this kit, you can create an enjoyable experience of bonding, learning, and appreciation for nature that will be remembered for years to come!

Are you looking for a unique way to put a smile on your Dad’s face this Father’s Day? Look no further than the Aquascape Naughty Dog Spitter! This lightweight and durable poly-resin ornament is easy to install and provides a fun, whimsical addition to any pond or water feature. Not only is it eye-catching, but it will bring life to your outdoor living space. Plus, it’s sure to be a hit with Dad!

Struggling for ideas on what to buy your Dad this Father’s Day? Get him a Wildwood Outdoor Living Centre gift card and let him pick the perfect gift himself. The card can be used for both in-store and online purchases, so it’s a great last-minute option with no expiration date!
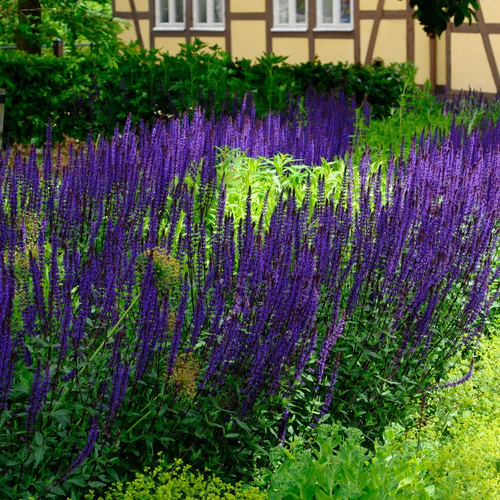
Salvia (or ‘sage’) is an attractive and fragrant addition to the summer garden. It is known to be quite resilient, being both deer & rabbit-resistant. If you are looking for a reliable hardy plant for your garden this June, check out everything there is to learn about Salvia in this weeks blog, Salvia 101.

Salvias belong to the family of Lamiaceae and are known for being colorful. The flowers are dense and have a tubular shape, while the stems & leaves are usually velvety. These plants can be found in various shades like purple, blue, red, pink & white.
Salvia, derived from the Latin word salvere meaning “to heal,” and has been used centuries ago by the Greek & Roman societies to improve memory and enhance cognitive functions.
Although “salvia” and “sage” are often used interchangeably, the former usually refers to ornamental plants, while the latter is for culinary herbs. Additionally, there are several varieties of garden sage that have attractive ornamental features.
Resistant
Salvia plants are lucky, as they are usually left undamaged by deer and rabbits due to the pungent odor of their distinctive leaves. This scent works as a natural deterrent to other pests in the garden.
Tolerant
Salvia plants are highly tolerant of both heat and drought, making them ideal for the summer garden. They come in a wide variety of shapes & sizes, ranging from 18 inches to 5 feet tall! Growing them in containers is also possible and can be beneficial if you have limited space.
Hardy
Before selecting salvias to add to your garden, it’s important to note that the hardiness of the species varies across different regions. Some are best kept as annuals while others can survive as perennials. There’s a large selection of both types available.

There are nearly a thousand species of salvias, of which some are perennial and tender. To make up for their lack of winter hardiness, they are often treated as annuals in regions where they cannot survive the cold weather.
For regions with warmer climates, certain Salvias are known to be perennial plants that persist from one season to the next. However, most of these varieties are usually grown as annuals that need replacing yearly. Popular Annuals include: Scarlet Sage or Texas Sage, Pineapple Sage and Bedding Sage.
This is an ideal group of plants for cold climates, ranging in height from 12-24 inches and producing blooms between late spring and early summer. The following salvias are usually grown as perennials; Azure Sage, Peruvian Sage, Autumn Sage and Hybrid Sage.

Salvia requires full sunlight and slightly acidic to neutral soil pH for proper growth. The blooming period typically ranges from spring to fall and flowers come in various colors like blue, pink, purple, red, white & yellow. This plant is hardy in the zone 5-10. To plant your own Salvia at home, follow these easy instructions:
1.) Dig the ground to a depth of 12 inches & remove any stones or roots. Then add in 3 inches of compost for extra nutrient content to make the soil more fertile.
2.) When growing plants in pots, it is advisable to add some grit or sharp sand to the compost in order for better water drainage. Plants planted in the garden soil don’t require additional feeding as they can gain nourishment from atmospheric conditions.
3.)After taking the plant out of its pot, put it in a hole that is three times the size of the plants container, so that the top of its root ball is even with the soil surface.
4.)Depending on the type of plant, space plants at a distance of 1 to 3 feet apart.
5.) After planting the desired species, be sure to pack the soil around it firmly yet gently. Afterwards, give the plant its first good soak of water.

For optimal hydration and weed prevention for your Salvia, add a 2-inch layer of mulch near the plant. If there are more than 7 consecutive days without an inch of rain in summer, water the plants accordingly. However, do not over-water them as Salvia does not enjoy excess irrigation during warm months.
During bloom season, Salvia plants do not need any additional fertilizers to flourish. Removing dead flowers periodically will help in creating a continuous blooming effect.
When the season comes to a close, it is beneficial to leave some flowers on the plants for reseeding and providing food for birds. Some plants may develop woody lower stems with age; prune these back if desired. The last step is to cut all of the stems down to an inch or two above soil line after the first killing frost.
It’s recommended to divide your perennial salvia plants every few years, preferably in the early spring before new growth begins. To do so, simply take the plant out of the ground, split it into smaller clumps and replant them where desired.
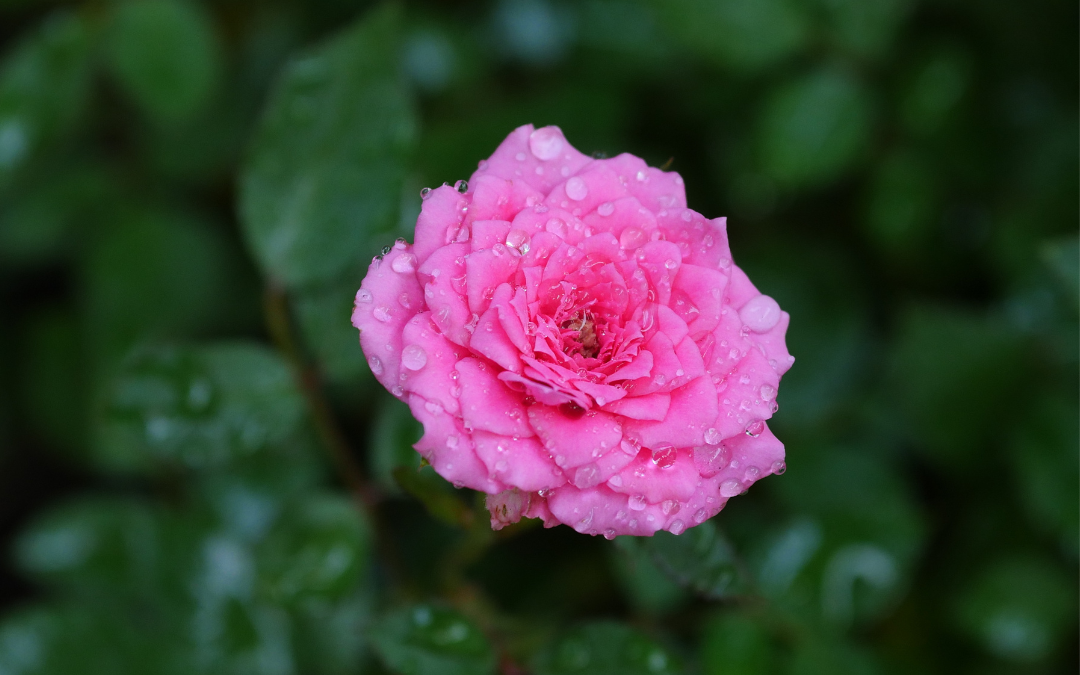
Miniature roses may feature smaller blooms, yet the wide variety of colours they come in is quite impressive. These petite beauties are a great way to add personality and colour to your garden. Not only are they beautiful, but they can also withstand even harsher winter conditions better than some other roses. Garden roses are some of the most popular flowers you can plant in your garden.

Miniature roses have been around since the 17th century and were mostly developed from China roses native to Asia. However, they still hold many of the same properties, and need to be planted in spring for optimal growth. There is an extensive range of miniature rose varieties that can reach between a foot to three feet in size. Just like other roses, these miniatures come in different colours, fragrances and are perennial plants. Popular varieties include Trailers, Climbers and Micr-mini.
Miniature roses, much like their larger counterparts, bloom from mid-spring through early fall. Some can even bloom year round when provided with the optimal living conditions – but not usually in Canada. Regular maintenance of your plants can help them to keep blooming for longer. Deadheading the faded blooms, before they form into hips, can be a great way to promote the plant’s growth and prevent it from going into dormancy, which is indicated by seed production.
Unfortunately, miniature roses are subject to the same problems as larger roses, including black spot, a fungal disease. Powdery mildew can also be an issue. To avoid both of these inflictions, improve the air circulation around your roses by planting each bush a few feet apart and watering the plant from the base of the roots instead of overhead.
Tip: It is essential to get rid of any diseased debris as soon as possible to avoid further infection. Be watchful for pests or insect damage such as Japanese beetles, thrips, mites or chafers; and take prompt action if there are signs of any kind of infection by using an insecticide.

These tiny blooms can be grown in containers, flower beds, or even as a border along a walkway. With their hardy, disease-resistant nature and easy maintenance requirements, miniature roses are perfect for beginners or experienced gardeners alike. Whether you’re looking to create an enchanting miniature rose garden or simply add some stunning color to your outdoor space, these petite blooms will surely get the job done. To grow miniature roses at home, follow the care instructions below and be sure to plant in zone 5-11.
Miniature rose plants require full sun to thrive, although they can tolerate some shade. However, if kept in shady surroundings for too long, their foliage and flowers may become sparse. If you want your bush to bloom at its fullest potential and ensure maximum disease resistance, make sure it gets at least six to eight hours of sun each day.
Roses thrive in nutrient-rich, well-drained and loamy soil. A great option for these blooms is to have them in patio containers. If you’re doing this, don’t use garden soil for your pot of roses since it won’t have the same effect. When it comes to container gardening, potting soil is the ideal choice as it is light and has all the nutrients needed for successful growth. Garden soil can be too dense and restrict water flow, potentially depriving the root system of air which can cause root rot. Potting soil drains well, so there are minimal chances of this happening.
As a thumb rule, roses need to be watered at least one inch in a week; either daily, alternate days or simply twice every week. While watering your plants, it is important to ensure they are watered deeply. This encourages the root system to expand and become stronger. Additionally, when you water them, aim the hose at the base of each plant rather than spraying the blooms directly. This helps preserve their delicate structure. The extent of water consumption for your rose bush varies depending on the type of soil and the climate conditions.
Tip: Miniature roses need more frequent watering than regular-sized roses when the temperature is scorching outside. This is because their root system is smaller, so they are more vulnerable to dehydration.
Miniature roses require heavy fertilization for them to bloom throughout the season. You can use any store-bought rose fertilizer or general all-purpose fertilizer, but make sure to follow the instructions written on the label accurately. For optimal plant health, it is important to nourish your roses when their first leaves sprout and after each bloom. It should be noted, however, that feeding should be stopped roughly six to eight weeks prior to the initial frost in order to prevent any fresh growth from being destroyed by the cold.
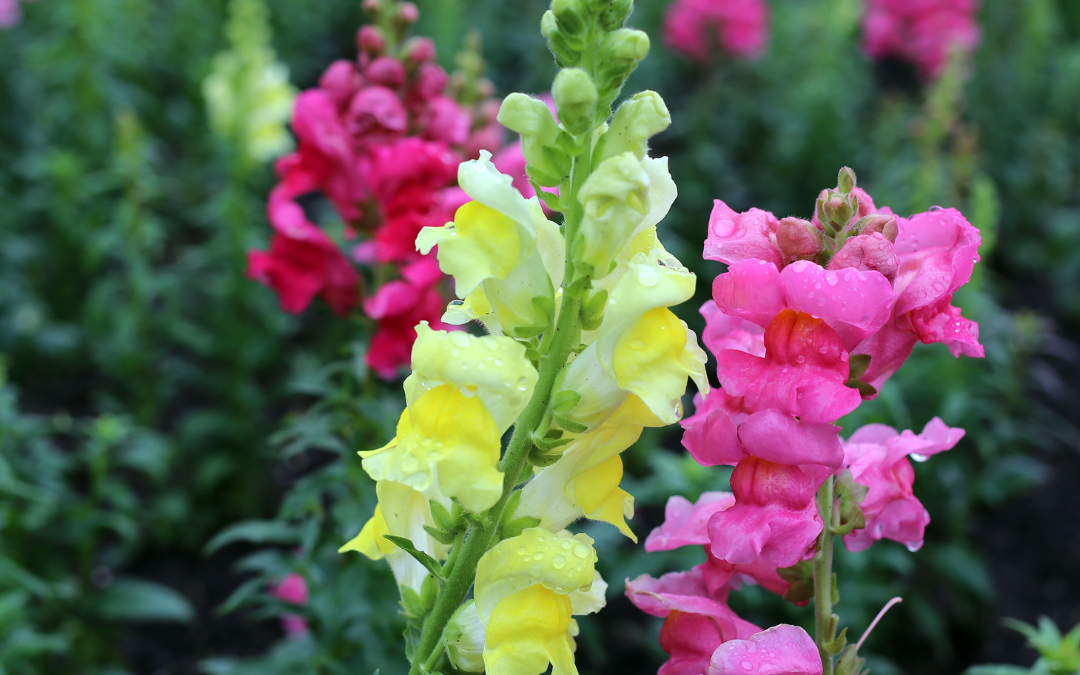
Snapdragons are perfect for any garden. Their beautiful and vibrant colours, long blooming season and easy-to-grow nature, make them a must-have. With the right growing tips and care, snapdragons can bring beauty and life to your garden all year round. In this article, we’re here to provide helpful information on successfully growing your snapdragons at home.

The snapdragon is a type of flower with four or five yellow, white, purple, and blue lobes. In addition to having a long stem that can grow up to three feet tall, the flower also has many tiny leaves along the stem.
Snapdragons were initially found in mountainous terrain stretching from Europe to North Africa, American and Canadian regions. Belonging to the Antirrhinum family, snapdragons were introduced to the Americas in the early 1800s.
Fun fact: Resembling the face of a dragon, squeezing the base on the flower can create the illusion of a dragon opening and closing its mouth as it’s pressed lightly.

To get the best results when planting snapdragons, it is important to understand the ideal soil conditions and when to sow the seeds. Knowing the optimal depth for planting will ensure that your snapdragon plants have all of the necessary nutrients and moisture they need to thrive. With some knowledge, you can have a vibrant display of snapdragons in no time.
When to Sow: Direct Outdoors, Late Spring Bloom
| Sprouts: | 7-14 days |
| Bloom: | Late spring-early summer |
| Location: | Full-partial sun |
| Difficulty: | Easy |
| Lifecycle: | Perennial |
| Planting depth: | 1″ |
| Seed Spacing: | Surface |
| Plant spread: | Approx. 8″ |

1.) For optimal results, starting your seeds indoors 6-8 weeks before the last spring frost is usually recommended.
2.) Space seeds at a distance of 1 inch and cover lightly.
3.) Keep the soil consistently moist and exposed to ample light until you transplant it outdoors.
4.) Once the seedlings have grown big enough, transfer them 2 inches apart into bigger containers or separate pots.
5.) For optimal growth, place your transplanted flowers in soil that is nutrient-rich and has good drainage, as well as being exposed to direct sunlight.
Tip: To keep flowers blooming longer, trim away any spent stalks after flowering. This encourages more blooms throughout the season.

1.) To successfully cut snapdragons, use garden shears and snip them at a 45-degree angle, just above the leaf node. The best time to do this is early in the day when the flowers from the lower one-fourth or one-third of the spike have blossomed.
2.) Then fill a clean vase with about half to two-thirds of cold water and add your favourite flower preservative.
3.)To keep your snapdragons fresh, start by taking each one out of the water and cutting 1 inch off the stem at a 45-degree angle while running warm water. Put them inside a vase immediately and set them in a cool, dark place away from direct sunlight.