by Wildwood Outdoor Living | May 10, 2023 | How To
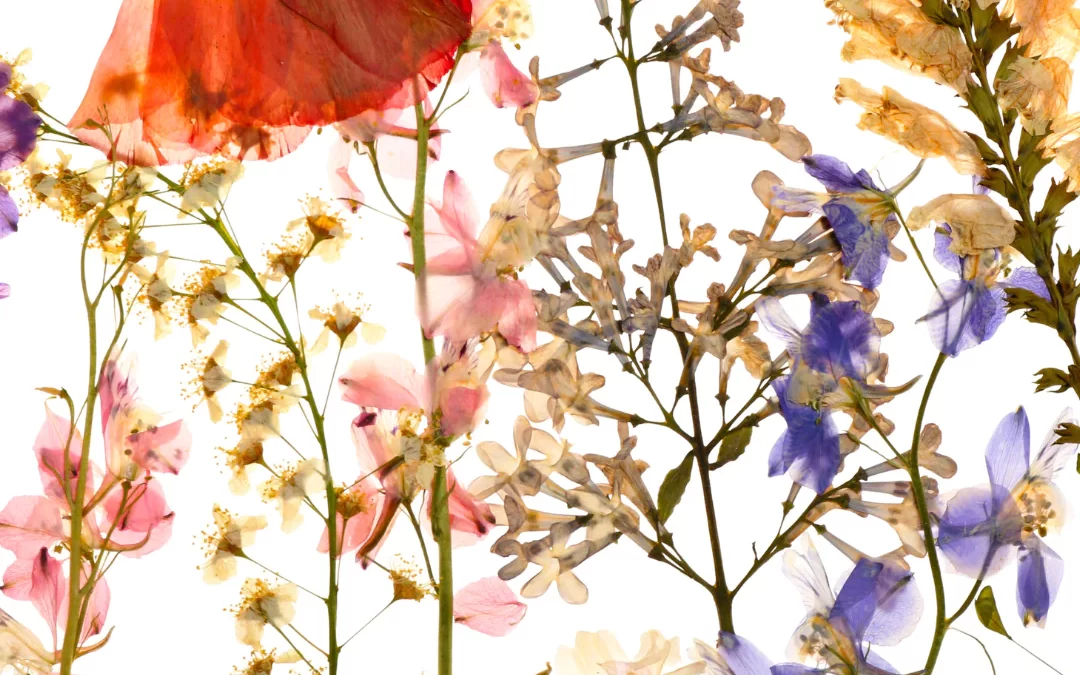
Have you ever wanted to preserve the beauty of a flower and turn it into a work of art? With the right tools and techniques, pressing and preserving flowers can be an enjoyable craft that can be used for decorating or gifting. This guide will provide all the information you need to get started pressing and preserving flowers for crafting and decorating. We’ll cover topics such as what materials are needed, how to press flowers and different methods of preservation. Not to mention it’s the perfect Mother’s Day Activity!
Pressed Flowers

Flower pressing is an age-old craft that has been used to preserve and decorate flowers for centuries. The art of flower pressing is one of the oldest known crafts, and its use in preserving and decorating flowers has been around for centuries. From ancient Egyptians to modern-day artists, the practice of pressing flowers has been used to create beautiful works of art that can be kept for years.
What You’ll Need

- A heavy book
- Large brick or rock
- Hanger or hook
- Fresh flowers
- Newspaper
- Tissue paper
- String
- Scissors/pruners
Choosing Your Flowers

Picking the right flowers for pressing is key, as the type of flower will determine the outcome of your project. Preparing the flowers before pressing or hanging is also essential, as it will ensure that they preserve their vibrant colors and shapes.
For the best results in preserving your flowers, you should always pick them on a day with no chance of rain. Otherwise their color and texture may be compromised when drying or pressing.
Tip: The most ideal time to pick flowers is in the morning when dew has already evaporated. Make sure you do it before their full bloom stage for maximum freshness. Some specific types of flowers are known to open more as they dry.
Pressed or Dried Flower Techniques
Preserving flowers is a popular craft that requires time and patience. Fortunately, there are now a few methods available that allow you to create beautiful pressed flower art with minimal effort. Whether you choose to use pressed flower techniques or hanging techniques, you can create beautiful artwork with ease.
Pressed Method

Follow the instructions below to make beautiful, timeless creations with dried flowers. With the pressing method, you can create stunning framed pieces of artwork that will last forever! It’s sure to be an enjoyable activity with endless possibilities for you & Mom.
1.) Select a piece of cardboard that is almost the same size as your book. Place a newspaper (also of comparable dimensions) atop the cardboard, followed by a tissue paper (which should be roughly the same size as well).
2.) Arrange the flowers on the tissue paper in such a way that none of them overlap or hang off the edge. Start the preparation process by placing a piece of tissue paper over the flowers, then newspaper on top of that and finally cardboard. Do this in layers until all your flowers are ready to be stored.
3.) Once your stack is assembled, secure it with a heavy book and a brick or stone. Then let gravity do its job; it should take two to four weeks to settle.
Hanging Method
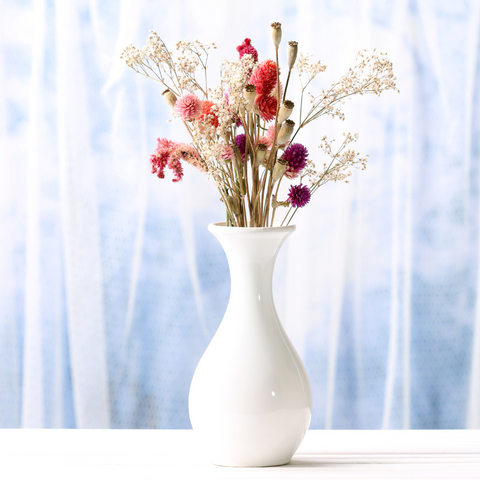
Flexibility and shape retention of dried flowers is key when it comes to making dried flower vases or for shadow boxes. We recommend the hanging method for best results. It’ll preserve the original shape of your blossoms and make them look stunning!
1.) Trim off unnecessary leaves, gather the flowers in petite bunches and secure them with string, yarn or elastic bands.
2.) Hang your flowers in warm, dry, and dark area upside down on a hanger or hook in order to preserve them.
3.) The process of drying flowers can take anywhere from a couple of weeks to several days, depending on the type of flower, the humidity and temperature in the environment. To ensure that your flowers dry properly and retain their vibrant colors, make sure to check them every two to three days – they should be dry to the touch when done.
Did we mention the nursery is filled with blooms, including our famous hanging baskets? Be sure to stop in with Mom this weekend, to collect all your favourite blooms for this memorable Mothers Day activity.
Have a suggestion or question?
Let us know at info@wildwoodoutdoorliving.com.
Sign up here for more blogs dedicated to better gardening!
by Wildwood Outdoor Living | Oct 26, 2022 | How To
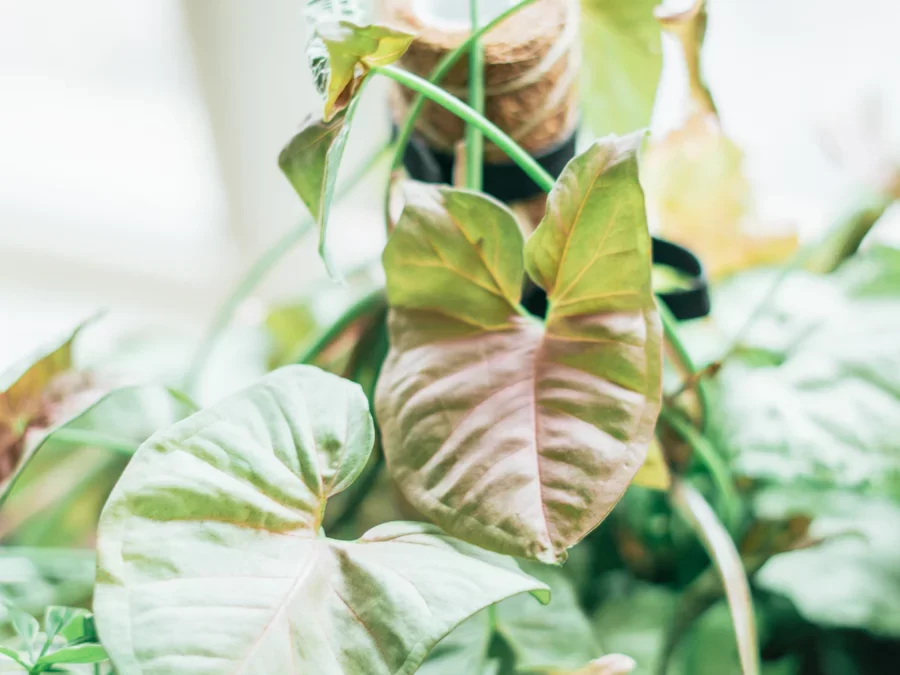
Are you tired of picking your plants up off the floors to clean your house? Or maybe you envision creating as much greenery as possible in a small space. In this week’s blog, we’re here to help your plants with a little ‘pick me up’ by showing you how to use one of our favourite tools, moss poles! From start to finish, our President Gord Nickel teaches Hannah Lepine his approach to using moss poles, plus we break it down for you in this week’s blog, How To Use Moss Poles!
What Are Moss Poles
Moss poles are a great tool used for helping plants grow in a specific direction. Most commonly, you can use moss poles to help plants to grow upwards instead of down. To do this, the moss pole is created using encased natural moss and plant wiring. This allows the pole to come in various widths and lengths for many different plant styles while also providing flexibility to bend in the direction you choose.
Not only do moss poles create direction and support for your plants, but the moss provides extra macro-nutrients that your plant would naturally get from living in the tropics. Plus! They retain moisture which is a fantastic way to add humidity.
Tip: Be sure to research your plant’s full growth potential to decide which size pole you need.
When to Use Moss Poles

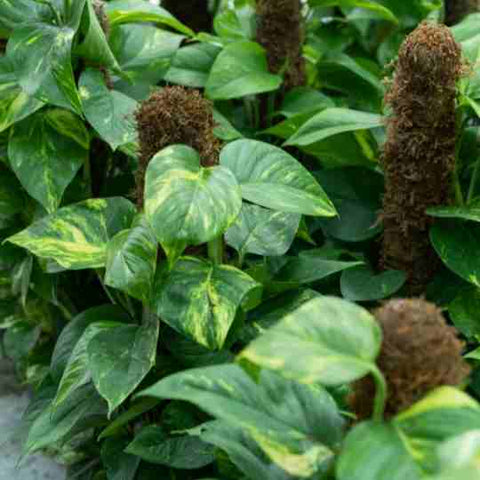
Using a moss pole isn’t for all plant types. Generally speaking, you’ll want a plant that grows longer than halfway up a small moss pole which is usually 16″ tall. Moss poles perform best on plants that trail or vine. The most common plants include Monestera, Philodendron and Pothos!
Tips: Be sure to pair the moss pole size for your plant with a sizeable pot to ensure the plant doesn’t tip over once it’s nice and tall!
How To Use Moss Poles
Have a suggestion or question?
Let us know at info@wildwoodoutdoorliving.com.
Sign up here for more blogs dedicated to better gardening!

by Wildwood Outdoor Living | Oct 3, 2022 | How To
Draining and Filling your tub at the first signs of fall is the perfect way to get your spa ready for heavier use in the colder seasons. I like to reference the bed sheets analogy – fresh water in the spa is like putting fresh sheets on the bed. The fresh feel is ideal and essential for maintenance. We’ll go over below how we’re going to achieve it!
Clean Up

First things first is to do some cleaning. If you’ve used your spa for a season, it’s good to flush out the pipes. Beachcomber tubs have a product called ‘Pipe Cleanse,’ which is used before emptying the water. This product helps dislodge any biofilm that builds up over time, which can lead to more significant problems down the road. Simply ensure all jets are in the open position, empty the entire bottle into the spa, and then run the jet cycle. Let this sit for 24 hours in the tub. If you can run the jets here and there, it will help get things moving!
Drain

Now it’s time to drain the tub and do some cleaning! Be sure to have a zero reading of your sanitizer of choice before draining the tub – this can be achieved by leaving the top off for a period while it gasses out naturally. Clean the acrylic surfaces with a mild cleanser, like the beachcomber tub clean or a cleanser of your choice, to make them sparkle.
Cover
Spa covers [or heat shields] also need attention, especially if they are constantly exposed to the sun. Clean the surface of debris and use a light soap and water mixture to get any harder stains. Let dry and apply a cover care chemical like beachcombers’ cover care’ or a vinyl UV protectant found in hardware stores. This will give extra vibrancy to the cover, and the UV coating will ensure minimal sun fade.
Replace
While emptying, it’s also a good time to do a little filter maintenance. Depending on how often you use the tub, replacing it at least once a year is recommended. We introduce body oils, and other chemicals build up on the filter, making it less effective. If it’s not time to replace just yet, take the filter out and spray it down with a hose to remove any visible debris. Now it’s time to soak it in a filter cleanser to help break down some of the stuff we can’t see, like mineral deposits and unwanted calcium buildup. I’d recommend the beachcomber Filter Cure for mineral buildup or Filter Pure, which breaks down oil buildup or grease.
Refill
Once our tub is shining, it’s time to refill the tub! Most municipalities have clean ready-to-use water. If you are like me in the Victoria, BC area, our water is so low in dissolved minerals that you need not worry. If you rely on well water; I’d strongly advise using a pre-fill filter attachment to your hose while filling – as all the extra minerals often found in wells can harm your spa in the long term.
Prevent
Once your tub is complete, it’s time for the Eliminate – a liquid product formulated to prevent the stain of iron, copper and magnesium on hot tub surfaces and equipment. It’s a one-time use at startup to protect your spa from the minerals to keep them in solution, preventing them from adhering to the hot tub equipment and fixtures. It will help keep your hot tub water conditioned and clear! This is an excellent time to consider using a product we recommend called Spa Marvel.

The enzymes contained in Spa Marvel Hot Tub Treatment & Conditioner are derived from plant extracts. Unlike chlorine, which sanitizes and essentially kills bacteria, the enzymes in Spa Marvel Hot Tub Treatment & Conditioner help remove the food (organic matter) necessary for bacteria to live, which is partly how lakes and aquariums can maintain themselves without using chlorine. Spa Marvel Hot Tub Treatment & Conditioner clears the path for chlorine, allowing it to work much more efficiently. In other words, it will take less chlorine to maintain desired levels with Spa Marvel in your spa than without.
Spa Marvel is a spa solution that reduces and eliminates many harsh chemicals used in traditional spa water treatment. Spa Marvel also conditions water for sensitive skin, leaving it feeling silky and soft. If you decide to use this, wait until the hot tub is to temperature and empty the entire bottle!
Lastly, it’s time to follow your wet-start instructions that would have come with your spa at the time of purchase, giving you directions on how much to add to each chemical for your spa model and size.
Save Time & Money
This fall, as a special to those who purchased a spa from Wildwood Outdoor Living, we’re offering this pre-packaged drain and fill tote for $40 off! The regular price is $159.99, now only $119.99 until the end of October or while quantities last! It has all the chemicals mentioned above, a pre-filter bag (for larger debris, making your filter last longer) and test strips. It also gives a sample of the Judy essence fragrance to take that spa experience to the next level.
And that’s it! Getting into a freshly filled spa is like getting into a fresh set of sheets. You’ll be thankful that you did and enjoy it in the cooler weather!

Have a suggestion or question?
Let us know at info@wildwoodoutdoorliving.com. Sign up here for more blogs dedicated to better gardening!

by Wildwood Outdoor Living | Aug 16, 2022 | How To, How To Grow
Whether their delicate presence provides you with symbolic reflection, calm enjoyment or healthy pollinated blooms, butterflies are one of the most beautiful critters to enter our gardens. Lucky for us, these floating beauties can be swayed to visit more often if the conditions are right. In this week’s blog, we’re going to share with you a few tips and tricks to getting more butterflies in your garden.
About Butterflies

[Canadian Tiger Swallowtail]
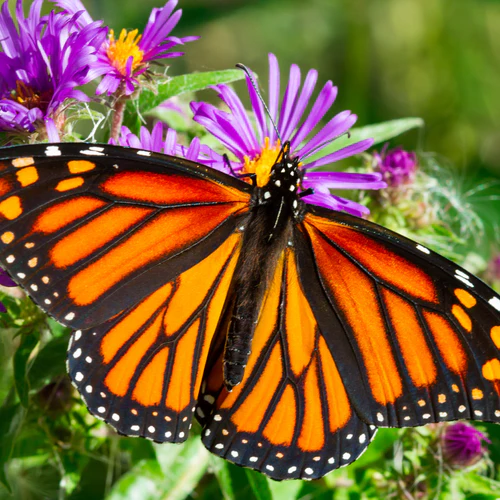
With over 300 species of butterflies in Canada, the majority of butterflies can be found fluttering between British Columbia and Quebec. As the most recognized butterfly, the Monarch Butterfly can be found on almost every continent around the world.
Unable to withstand Canada’s harsh winters, the Monarch butterfly flies over 4,000 kilometres to Mexico each year, where it spends six months soaking up the sun in the Oyamel Fir Forest of Central Mexico. As Spring starts to unfold in Canada, butterflies like the Monarch start to appear in early April.
Note: Though, with 2 to 6 weeks lifespans, not all butterflies make it to migration. Only the last generation of Monarchs in a single year makes it to the migration phase with an average lifespan of 8 to 9 months long.
Butterfly Habitats
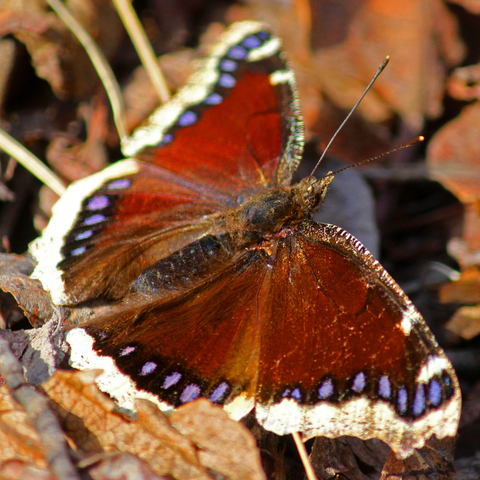
[Mourning Cloak]
Grasslands, deserts, forests, alpines and wetlands are all ideal environments for butterflies to thrive. Since butterflies can be found across many ecosystems, it’s essential to know a few ways butterflies choose their potential homes. Try some of the proven tips and tricks below to meet all the requirements needed to keep your butterflies happy and coming back each and every year.
Butterfly Food

[Milbert’s Tortoiseshell]
During the day, butterflies need rich sources of nectar to provide them with the energy they need to survive. The best nectar for them often comes from colourful and fragrant flower blooms. If attracting more butterflies to your garden is on your agenda, you’ll want to take note of these proven butterfly favourites.
Butterfly homes

After a busy day of pollinating and eating nectar from our gardens, butterflies need a safe place to rest at night. To prevent them from being carried away from the wind, they like to nuzzle themselves between blades of grass, rocks, under leaves or tightly between branches on trees. As gardeners, the best thing we can do to provide a safe shelter for butterflies is to introduce a manmade butterfly home! Place your butterfly home near your popular butterfly flowers to make sure it’s visible, and add some sticks and dry leaves to help entice them.
Hydration

[Dakota Skipper]
Since butterflies have straw-like tongues called ‘proboscis,’ they are restricted to a liquid-only diet. Some ways they can stay hydrated is through the nectar they get from flowers and fruit juices. As a fun activity, try setting out a bottle cap filled with honey water or fruit juice for them to drink from or place one near a butterfly to attract it to you. Or, place some fruit in the sun and see how long it takes for them to find it!
Sun Basking

[Clouded Sulphur]
Butterflies can’t fly when they’re cold. To keep them moving, they often stop to bask in the sun. To help your butterflies stay warm, add a few flat rocks in sunny areas to give them a safe place to soak up the sun!
Dislikes
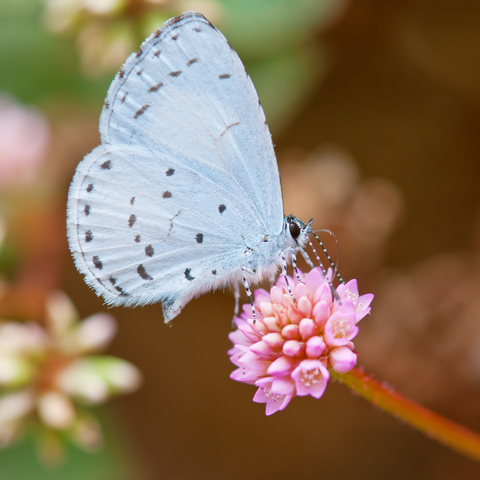
[Summer Azure]
Unfortunately, our poor butterfly friends have many predators, including birds, snakes, rats, wasps, ants, lizards and more. To save them from potential predators, try to be mindful when placing your resources. For example, don’t place your bird feeder and butterfly home in the same place.
Have a suggestion or question?
Let us know at info@wildwoodoutdoorliving.com.
Sign up
here for more blogs dedicated to better gardening!

by Wildwood Outdoor Living | Mar 17, 2022 | How To, news
Growing flowers for cutting is the best way to get the most out of your blooms! Whether you’re growing them for gifting, décor or fragrance, a constant supply of flowers is a beautiful gift from nature that will put a smile on anyone’s face. In this blog, we’re here to teach you everything you need to learn to grow your very own constant supply of cut flowers this year.
Step 1: Choosing Your Flowers

Choosing the best flowers for your cut garden isn’t as easy as picking the prettiest flowers you can find. After all, it doesn’t matter how lovely the flower is if all the petals fall off after it’s cut. A cut garden with a constant supply of blooms requires planning to ensure each flower’s needs are met and yours.
Long Stem
You will want to look for flowers with a long and robust stem for the best cut flowers. A long stem will allow your flower to absorb a healthy water supply, providing you with healthy, long-lasting blooms!
Bloom Times
In Canada, it’s common for most provinces to get up to 6 months of flower blooms. However, in 6 months, the flowers you choose to plant are likely to have different bloom times. When planning your cut-flower garden, be sure to check the package for bloom times and the duration of blooms. We recommend researching your favourite flowers to ensure you meet their growing requirements first. Then, using a pen, pencil, paper, computer, write out the following chart to help plan your bloom times. Here is an example of a successful cut-garden that will produce a combination of three or more blooms, all season long.
| FLOWER |
SOW |
MAY |
JUN |
JUL |
AUG |
SEPT |
OCT |
| Bachelor Button |
Direct, after last frost |
X |
X |
X |
X |
X |
X |
| Sweet William |
Direct, after last frost |
X |
X |
X |
|
|
|
| Poppy |
Direct, just before last frost |
X |
X |
|
|
|
|
| Foxglove |
Direct, after last frost |
|
X |
X |
X |
X |
|
| Dahlia |
Direct, April/May in warmer soil |
|
|
X |
X |
X |
X |
| Sunflower |
Direct, April/May in warmer soil |
|
|
X |
X |
X |
X |
| Zinnia |
Direct, after last frost |
|
|
X |
X |
X |
X |
Re-blooming
Another great way to get continuous blooms is to plant flowers that re-bloom. Re-blooming flowers produce more flowers even after you’ve harvested their blooms. It is essential to know that re-blooming flowers may take a while to produce more blooms, so be sure to time your flower harvest according to each re-blooming flower.
Step 2: Planning & Planting

Now that you have successfully planned a cut-garden that produces continuous blooms all season long, it’s time to plant them! For happy and healthy cut flowers, follow the below instructions for the best planting practices.
Tip: Consider planting contrasting colours together for a pop of colour!
Care instructions
Whether planting from seed or bulb, each flower you choose should come with care instructions. It’s essential to pay attention to the sun, water, spacing, planting depth and soil requirements for each flower you’re planting. We recommend keeping your seed/bulb package on hand for reference, as this information can be easily forgotten (plus, it’s also an excellent way to remember what you’ve planted!).
Soil & Fertilizer
If you are planting your flowers from seed or bulb, the soil requirements may vary. Seed Starter Mix will provide the best nutrients for seeds to grow healthy and strong. Once the seeds are ready to be transferred to the garden or pot, it is best to use well-draining soil like sandy loam, which is also best for bulbs. For added nutrition, mix compost in with your soil.
Tip: Add a layer of mulch to the top of your garden bed to reduce the chances of weeds and retain moisture.
Spacing
When planting your flowers, it’s important not to space them too close together, as this will create stress for your flowers, leading to disease and unwanted pests. If the flower packaging does not indicate the space needed for your flowers to grow, space your flowers according to size. As a general rule, space small flowers 6-12 inches apart, space medium size flowers 12-18 inches apart and space large/tall flowers 18-36 inches apart.
Tip: Mix your annuals and perennials for constant blooming, avoiding empty spaces.
Step 3: Cutting & Cut Flowers

There are two areas to consider when it comes to cutting your new blooms. The first is to cut your blooms safely to maintain the integrity of your plant. The second is to get as much life out of your flowers as possible once they’ve been cut and placed in a vase.
Cutting Flowers
Taking a pair of pruners to your beautiful new blooms can be scary. But, with our help, you’ll have nothing to worry about. Get a clean pair of pruners, 70-100% Isopropyl alcohol and a clean rag. Using your clean pruners, follow the steps below while using the alcohol and clean rag to wipe your pruners clean in between use. This will prevent the spread of disease.
1. Cut: After your flowers have retained moisture overnight and are firm to the touch in the morning. Cut a 45-degree angle, 1 inch from the bottom of the stem. This will provide a better water intake for your flowers and allow your flowers to stand on a point.
2. Water: Immediately place your freshly cut blooms in room temperature water or cold water (for bulbs). Placing your flowers in water immediately is important to prevent air absorption.
3. Feed: For longer-lasting blooms, flowers require nutrients to thrive. To make your flower food, try the following recipe.
Flower Preservative
1 tsp sugar
1 tsp bleach
2 tsp lemon or lime juice
1-quart lukewarm water
Tip: Use a plastic pale to place your flowers in, as metal can affect pH levels.
Cut Flower Health

Now that we’ve created a beautiful arrangement of homegrown cut flowers, it’s time to give them the best possible chance at survival by caring for them in their new habitat. Here are the best tips for keeping your cut flowers happy and healthy for as long as possible.
- Don’t overcrowd. Overcrowding could lead to poor air quality, resulting in disease.
- Keep flowers away from sunlight and drafts. The best place for flowers is somewhere they can stay cool.
- Refresh water frequently, no less than every 2-3 days.
- Check for limpness re-cut as needed to increase water intake.
- Prune wilted blooms to prevent disease.
- Remove any debris from the water to keep it clean.
- Re-feed flowers each time the water is refreshed.
- Re-cut flower stems slightly at a 45-degree angle before placing them back into a freshwater vase. To prevent build-up of dirty water and allow for proper water intake.
There you have it! With this handy guide, you’ll be growing fresh-cut flowers in no time. The only thing left to do is decide on your favourite arrangements – the possibilities are endless!
Have a suggestion or question?
Sign up
here for more blogs dedicated to better gardening!