Have a suggestion or question?
Let us know at info@wildwoodoutdoorliving.com.
Sign up here for more blogs dedicated to better gardening!

Are you looking for a way to ensure that you have an abundant harvest year after year? With proper storage, your seeds will remain viable for many years and you will be able to enjoy the fruits of your labor. In this article, we will discuss some of the best practices for storing your seeds so that they remain viable and can be used in future harvests. By following these simple steps, you can ensure that you are getting the most out of your seeds and maximizing their potential. Start storing your seeds the right way today and enjoy years of abundant harvests!
Seed storage is a critical component of successful crop production. To ensure consistent yields, it’s essential to keep seeds in the most optimal conditions. Proper seed storage can greatly improve seed longevity, germination rate, and even quality. By understanding the ins and outs of storing and preserving seeds, gardeners can maximize their return on investment while ensuring their crops thrive. Plus, it’s a great way to save money on seeds when they go on sale even when you might have to hold on to them for a year! Or, even when you have more seeds than you need to plant this season.
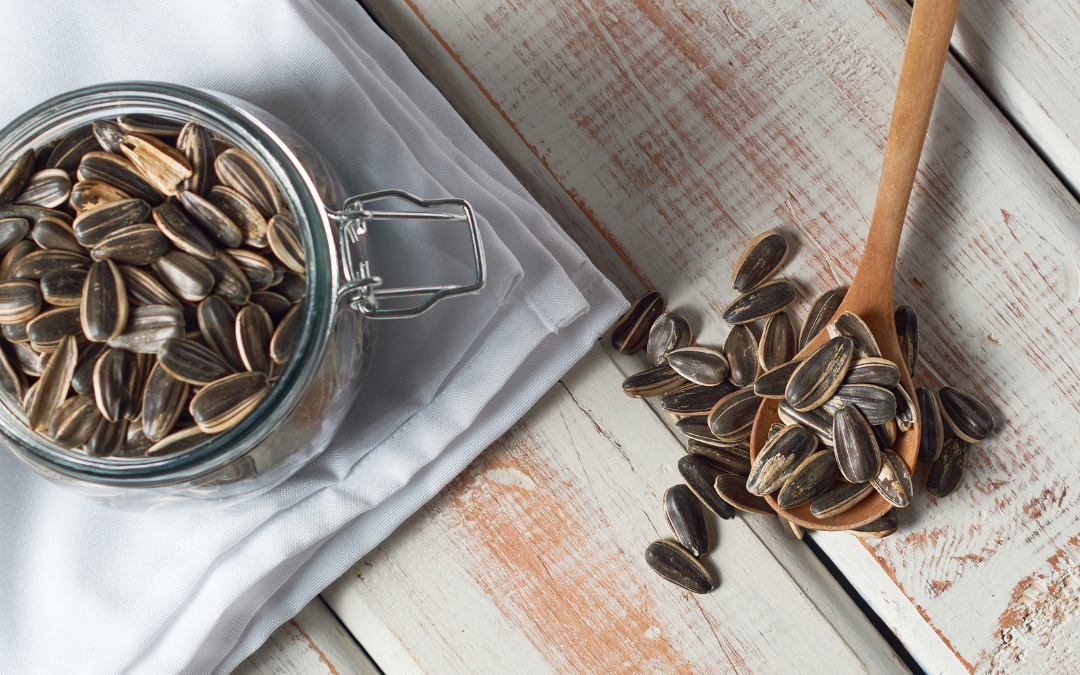
When stored the right way, some seeds can remain viable for more than 5 years – including Brassicas (Brussels sprouts, cauliflower, cabbage, collards and kohlrabi), chicories (endive, escarole, radicchio) and many other vegetables like cucumbers, kale, lettuce, melons, mustards, peppers, radishs rutabagas sunflowers tomatoes and turnips.
1.) Immediately – To ensure that your seeds remain fresh and in good condition, store them right when you get them.
2.) Container – Dry seed storage is an important part of successful gardening and farming. Airtight containers are the best way to store dry seeds for long-term use. These containers protect the seeds from moisture, pests, and oxygen, thus preserving their viability and ensuring a successful harvest.
3.) Label – Proper labelling and categorization of stored seeds is a must! You should keep the seed packet at hand for easy reference in the future. This way you’ll know exactly what type of seeds are in your container and when to plant them during the optimal time.
4.) Location – To ensure successful germination, it is vital to store seeds in a place with low temperatures and away from direct sunlight. Additionally, strong odors should be avoided as they can compromise the efficacy of the seeds.
5.) Store – Seeds should be stored between 4°C & 10°C (40 – 50°F). Avoid putting them in the refrigerator as its humidity levels fluctuate. Remember, freezing can destroy certain seed varieties.

1.) When planting seeds, it’s important to keep them moist so they don’t dry out. Oxygen is essential for proper germination, so flooding the soil can lead to a decrease in oxygen & stunt the growth of your seeds.
2.) On a sunny day, leaving the plastic dome on the seedling trays is not a good idea. If you see a lot of condensation, take it off or prop it open for ventilation. If it’s left on, your seedlings may get steamed by the trapped heat and moisture inside the dome.
3.) When transplanting seedlings outdoors, it’s important to harden them off gradually. A cold frame or cloche is useful for providing gradual exposure to colder temperatures. Otherwise, your plants may be too shocked by the conditions and either be stunted or die from the stress.
With these simple steps, you can easily store your seeds and save money. Not only that, but it also helps to reduce waste and promote sustainability. So why not give it a try?
Nowadays, many people are putting their houseplants outdoors due to its numerous benefits. Outdoor plants can help eliminate pollutants in the air, absorb carbon dioxide, and provide a presence of nature. Moving indoor plants outdoors can also be very advantageous as it allows them to get more sunshine and fresh air which can lead to healthier growth.
Creating an outdoor oasis can be a great way to enjoy a space with nature. To help you get started, there are plenty of houseplants to choose from to help create a cozier place to enjoy outside. Here are a few of our favourite houseplants that we often move outside during the summer months.


Fiddle Leaf Fig, 16 C minimum night temperature

Majesty Palm, 13 C minimum night temperature

Philodenron, 16 C minimum night temperature
Acclimating houseplants to the outdoors can be tricky and a little scary but here are some tips on outdoor plant care that may help.
Get your plant accustomed to the sun’s intensity gradually and avoid placing it in direct sunlight at first.
Check the soil often for moistness and water according to your plants needs.
Research the particular requirements of plants you own when it comes to temperature and other considerations. Print and save this information somewhere for quick reference.
To properly transition a houseplant from indoors to outdoors, a technique known as hardening off must be done in multiple stages for two weeks. Additionally, you should wait until the temperature has consistently been above 10°C at night before moving your houseplant outside.
Step 1 – The first step to ‘Hardening off’ your plants is to put them outside in a sheltered environment, away from direct sun exposure and wind. This should be kept up for around 5 days. If you observe that your houseplant is exhibiting signs of shock, it would be best to leave it in its current position until it starts to recover.
Step 2 – Once the initial 5-day waiting period is over, it’s time to move the plant to a shaded and unsheltered area. This helps the plant get used to more wind blowing in that environment and gradually starts making it stronger and hardier.
Step 3 – For your house plant to stay healthy, make sure it stays in the current position for five more days. In case the leaves start wilting or it begins to droop, leave it as is until its condition improves and its foliage is lively again.
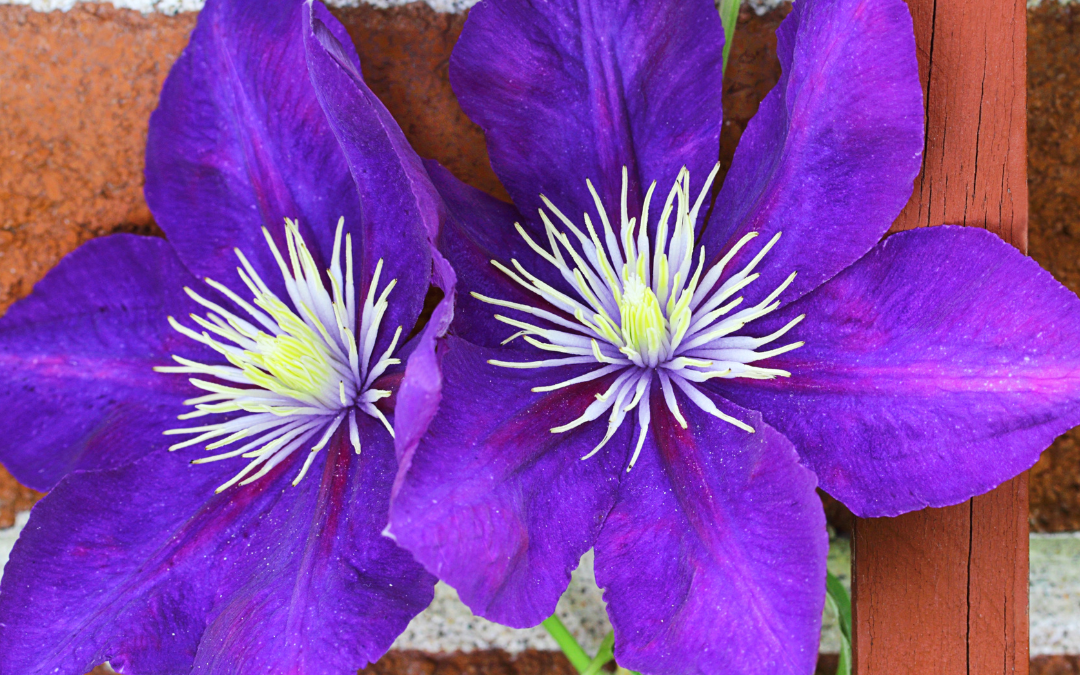
Clematis is a genus of climbing plants that are widely grown in gardens for their beautiful, showy flowers. They can be trained to climb trellises, walls or arbours, adding vertical interest and texture to any garden. Whether you’re looking for white, pink, blue or purple flowers, clematis plants provide a stunning display that is sure to delight gardeners of all kinds.

Planting in the cool spring is the optimal time for successful growth. The soil is warm and moist, providing ideal conditions for root development. With careful attention to timing and soil conditions, planting in the spring gives plants a better chance of taking root and thriving.
Clematis does best when it gets ample amounts of sunlight throughout the day. Ideally, it should get 6 hours of full sun for optimal blooming.
To ensure a successful planting, the soil should be light with good draining. Additionally, it must have a balanced pH level. Before planting, mix in compost or aged manure together with bonemeal for extra nutrition.
Regularly water the soil when the plant is in its initial year, to ensure that it stays moist. To help with moisture, add an extra layer of mulch around the plant.
Tip: Once planted, it’s best not to move or disturb your plant in any way.
1.) Dig a scoop in the ground as wide as two to three times the size of the root ball and make sure it is a few inches deeper than that.
2.) For optimum temperature & moisture control, ensure that the crown of the plant is situated around 4 inches underground. This ensures proper branching and stem growth beneath the soil surface.
3.) After that, mulch the region to maintain coolness around the roots and also limit weed growth.
4.) Place your favourite climbing structure! Whether you intend to place your Clematis against a wall while fixing it upwards or letting it grow along an arbour or trellis. Vertical blooms are the best part about growing vines!
 Clematis Jackmanii Superba Clematis Jackmanii Superba |
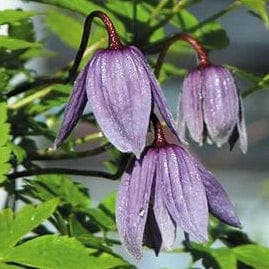
 Clematis Louise Rowe Clematis Louise Rowe |
 Clematis Multi Blue Clematis Multi Blue |
 Clematis Kilian Donachue Clematis Kilian Donachue |
 Clematis Alpina Pamela Jackman Clematis Alpina Pamela Jackman |
 Clematis The President Clematis The President |
Did you know? The name ‘clematis’ has its origin in the old Greek term ‘klematis’, which stands for a creeping or climbing plant.
Looking for more? Check out the latest episode of Get Up and Grow with our President Gord Nickel, as he teaches Hannah Lepine everything she needs to know to grow her own Clematis at home!
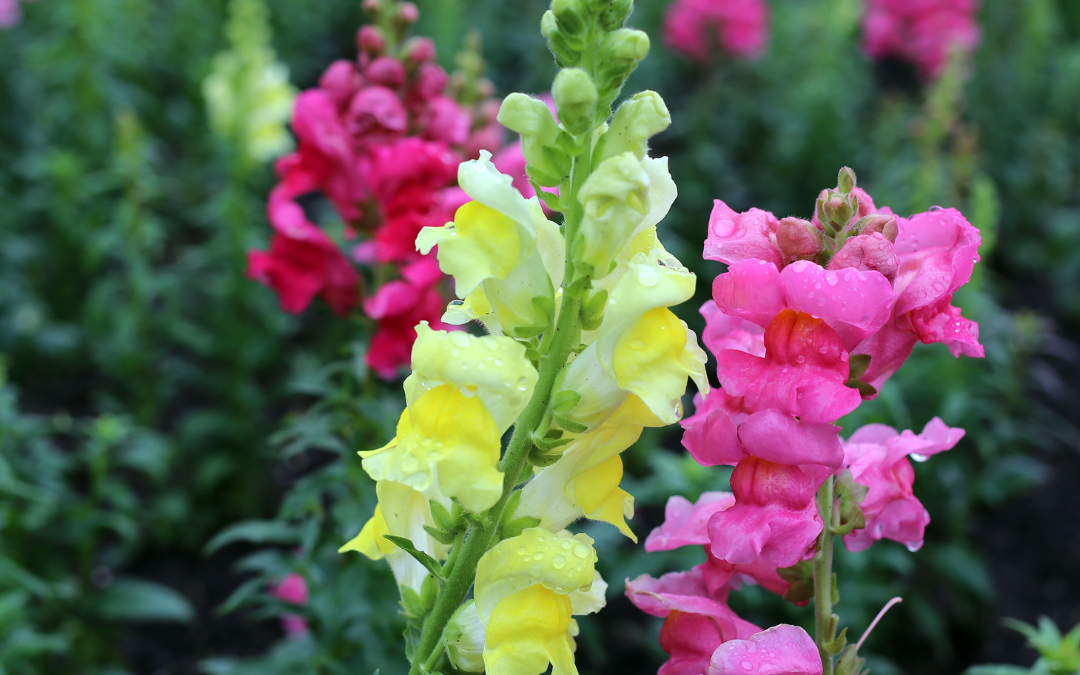
Snapdragons are perfect for any garden. Their beautiful and vibrant colours, long blooming season and easy-to-grow nature, make them a must-have. With the right growing tips and care, snapdragons can bring beauty and life to your garden all year round. In this article, we’re here to provide helpful information on successfully growing your snapdragons at home.

The snapdragon is a type of flower with four or five yellow, white, purple, and blue lobes. In addition to having a long stem that can grow up to three feet tall, the flower also has many tiny leaves along the stem.
Snapdragons were initially found in mountainous terrain stretching from Europe to North Africa, American and Canadian regions. Belonging to the Antirrhinum family, snapdragons were introduced to the Americas in the early 1800s.
Fun fact: Resembling the face of a dragon, squeezing the base on the flower can create the illusion of a dragon opening and closing its mouth as it’s pressed lightly.

To get the best results when planting snapdragons, it is important to understand the ideal soil conditions and when to sow the seeds. Knowing the optimal depth for planting will ensure that your snapdragon plants have all of the necessary nutrients and moisture they need to thrive. With some knowledge, you can have a vibrant display of snapdragons in no time.
When to Sow: Direct Outdoors, Late Spring Bloom
| Sprouts: | 7-14 days |
| Bloom: | Late spring-early summer |
| Location: | Full-partial sun |
| Difficulty: | Easy |
| Lifecycle: | Perennial |
| Planting depth: | 1″ |
| Seed Spacing: | Surface |
| Plant spread: | Approx. 8″ |

1.) For optimal results, starting your seeds indoors 6-8 weeks before the last spring frost is usually recommended.
2.) Space seeds at a distance of 1 inch and cover lightly.
3.) Keep the soil consistently moist and exposed to ample light until you transplant it outdoors.
4.) Once the seedlings have grown big enough, transfer them 2 inches apart into bigger containers or separate pots.
5.) For optimal growth, place your transplanted flowers in soil that is nutrient-rich and has good drainage, as well as being exposed to direct sunlight.
Tip: To keep flowers blooming longer, trim away any spent stalks after flowering. This encourages more blooms throughout the season.

1.) To successfully cut snapdragons, use garden shears and snip them at a 45-degree angle, just above the leaf node. The best time to do this is early in the day when the flowers from the lower one-fourth or one-third of the spike have blossomed.
2.) Then fill a clean vase with about half to two-thirds of cold water and add your favourite flower preservative.
3.)To keep your snapdragons fresh, start by taking each one out of the water and cutting 1 inch off the stem at a 45-degree angle while running warm water. Put them inside a vase immediately and set them in a cool, dark place away from direct sunlight.
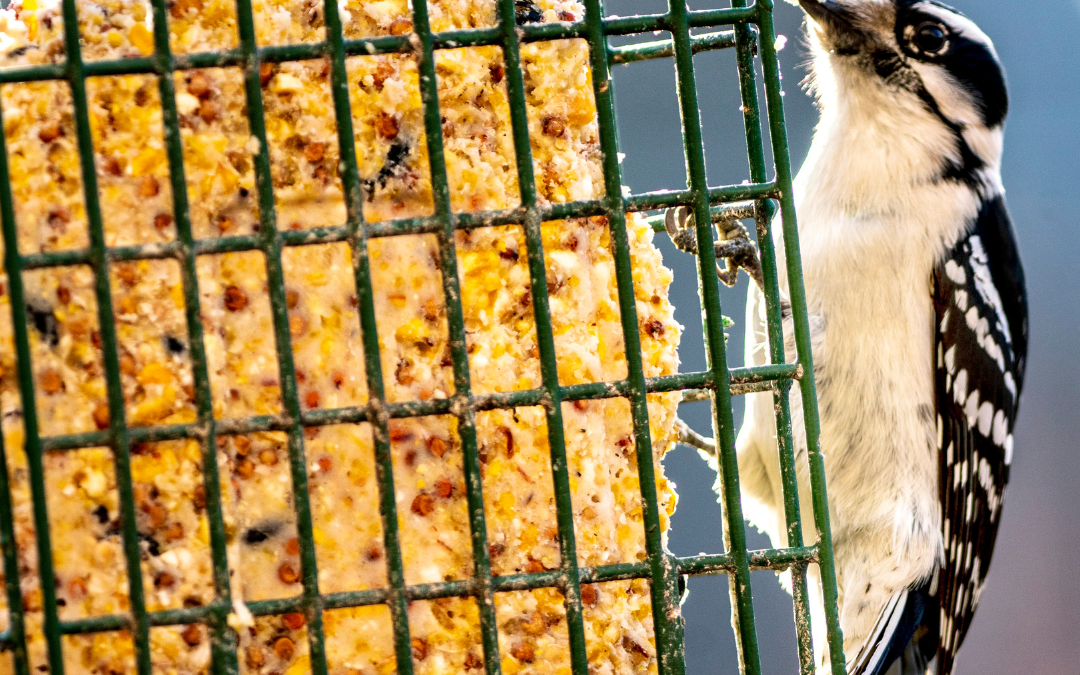
Winter can be a challenging time for birds, especially since they are exposed to extreme temperatures and lack of food. It is important to understand the basics of bird care in the winter in order to ensure that your feathered friends stay safe and healthy. In this article, we will discuss the basics of bird care in the winter, including bird feeding, cold weather tips, and safety precautions. With these tips in mind, you can make sure that your birds stay happy and healthy throughout the winter months!

As the coldest time of year approaches, it is important to consider how we can best care for our feathered friends. Winter bird food and proper shelter are essential for birds during the winter months. By providing them with adequate food and shelter, we can ensure that they stay healthy and safe during the coldest time of year.
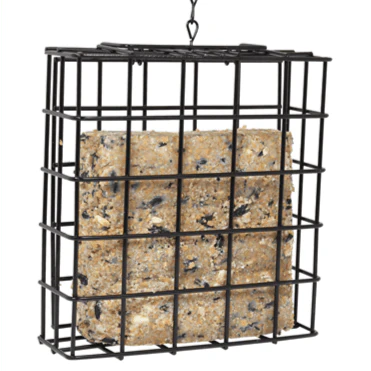
There are a variety of winter bird foods available on the market, so it is important to choose one that contains high-quality ingredients that birds need to survive the cold weather such as our most popular suet, C&S High Energy Suet. Additionally, providing birds with a sheltered area will help them stay warm and safe from predators. With some simple steps, we can help our feathered friends get through even the coldest winter days. For best practices, try placing your birdfeeder close to your bird’s home.


Maintaining your bird feeder and water source throughout the winter is essential for keeping your feathered friends happy and healthy. With these tips, you’ll be able to provide a safe and comfortable environment for your feathered friends all year round!
Tip 1 – Clean your bird feeder at least once a week and change it out with a fresh bag of seed or suet each time. You can either clean your feeder outside or indoors in the kitchen sink, filling the sink with soapy water and using a clean sponge or rag to scrub away any buildup. Try not to use harsh chemicals as they can damage the birds’ respiratory systems! A natural solution of warm water and baking soda can also be used to clean a feeder.
Tip 2 – Clean the Base of Your Bird Feeder Regularly. The base is where your birds are getting their feet wet when they walk into your bird feeder, so keeping it as clean as possible will help prevent debris from building up and causing unpleasant odors.
Tip 3 – Change Out Your Bird Food. Like you, birds have preferences for different types of seeds ( sunflower seeds, safflower seeds, etc). When you aren’t able to use your bird feeder regularly, change out the type of seed you are using and make sure it’s fresh.

With the onset of winter, wild birds need extra care and attention to survive the cold. It is important to provide them with a suitable environment in order to ensure their safety and well-being. This can be done by creating a safe habitat for them and helping them find shelter during the cold season.
By providing a suitable environment for wild birds during winters, we can help ensure that they have enough food and water sources, as well as protection from predators. We can also make sure that they have access to places where they can find shelter from the harsh weather conditions. By doing so, we will be helping these creatures survive in their natural habitats even during the harshest of times.
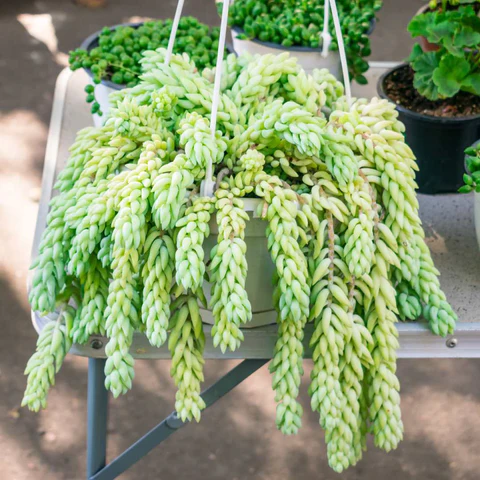
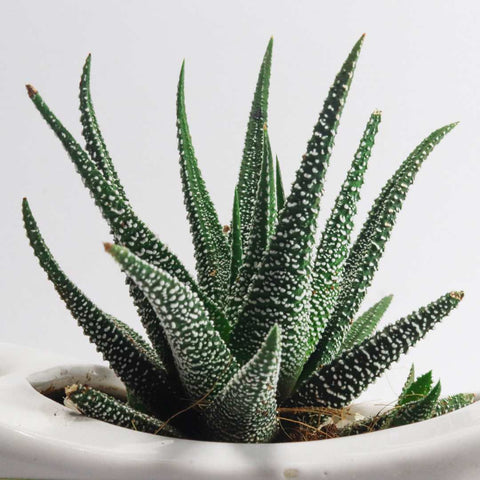
The colder it gets outside, the more time we get to take care of our indoor plants! – Is one way for us gardeners to look at it. If you are already counting down the days until spring, it’s time to try something new to keep you busy this winter. In this week’s blog, we’re here to teach you everything there is to learn about growing your own succulents. Plus, follow along as our President Gord Nickel shows us exactly how he does it himself.
plants that enjoy sunny, warm climates with very little moisture. Increasingly popular, you might notice them in various intriguing shapes and colours with leaves that swell with stored water. Succulents are native to desert areas such as North and South Africa but can also be found in some rainforested and mountainous regions.

Aloe Vera |

Burro’s Tail |
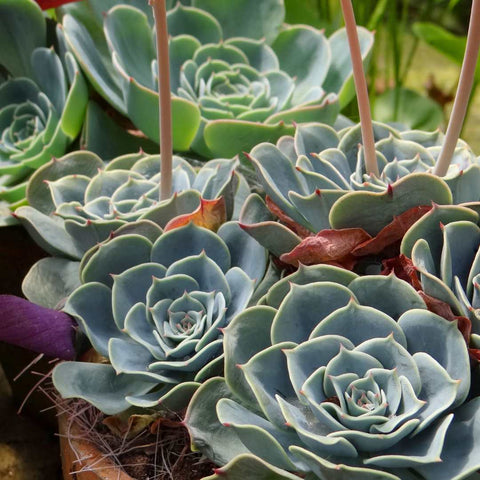
Hens-and-Chicks |

Pincushion Cactus |

Living Stone |
Zebra Cactus |
If no leaves have dropped, you can carefully remove “pups” or “hens” from the mother plant for use. If using the small pups or hens, you can directly plant these into well-draining soil (cactus or succulent soil is best). Place them in direct sunlight and wait a day until providing them with water sparingly.
TIP: Pups and hens are another way to say ‘plant babies! Look for mini-succulents surrounding the host plant for re-planting.