by Wildwood Outdoor Living | Nov 25, 2021 | Gardening 101
Pruning might be the best trick there is to helping your plants grow to their fullest potential. By removing dead or dying branches, you’re removing the risk of disease to the entire plant. With the proper tool, you can expect your plant to recover faster from clippings. A clean pruning cut will remove the risk of unwanted mites and insects from entering your plant, causing further damage.
Pruning Tools
To start, let’s make sure you have the right tools for the job. Choosing the right tool for your pruning task is important. Using the right tool will allow you to create the perfect cuts safely for you and your plants. Here are the top 5 must have pruning tools for all your pruning needs.
1. Pruners

The number one pruning tool for all gardeners to have is a good pair of pruners. The sharp curved blade creates a clean-cut, allowing plants to heal faster. Great for small clippings like branches, flower stems and shrubs.
Pro-tip: When shopping for your pruners, look for a light pair with grip, this will allow you to work easily and more efficiently with one hand and will also prevent hand cramping.
2. Loppers

Loppers are the next level up from pruners. Used to cut through thicker branches, up to 2 inches thick. Use loppers to remove branch stubs and branches that rub together, inviting more light to access your plants. Great for fruit trees, nut trees and vines.
Pro-tip: Look for loppers that offer more power and grip. Using a lopper can require lots of force or very little depending on the enhanced power it provides. It is also important to test the weight of the product beforehand, to ensure that you’re capable of working with it safely.
3. Pole Pruners

Also known as ‘tree shears’. Pole pruners are the perfect tool to use for reaching dead branches. With a reach of up to 8 ft long, the pole pruner removes the unsafe need for using ladders. Great for cutting through branches up to 1 ¼ inch thick.
Pro-tip: For an easier way to prune tall and hard to reach branches, try using an electric pole pruner.
4. Hedge Shears

Great for small shrubs, hedges, evergreens, and perennials. Also known as ‘manual hedge trimmers’. Hedge Shears do the perfect job for shaping and trimming hedges, all while promoting new growth. Capable of cutting up to 2 ¼ inch thick branches and shrubs.
Pro-tip: Hedge Shears come in a variety of different blade types. Straight blades, wavy blades, and serrated blades all perform differently, so be sure to choose the right blade for the job.
5. Pruning Saw

For wood up to 5 inches thick. Pruning saws are the last manual pruning tool used to take care of a pruning tasks before upgrading to power tools. With sharp teeth, the pruning saw only requires a quick push and pull to make a clean cut through branches.
Pro-tip: Be sure to wear gloves with a good grip when handling a pruning saw. You want to maintain a tight grip with every push and pull to ensure full control when handling this tool. Safety first!
Clean Tools, Healthy Plants
Always, always, always keep your garden tools clean! Pruning with dirty tools doesn’t only make working with the tools much harder when they’re covered in sap and saw dust but it’s actually unhealthy for your plants. By not cleaning your tools you can transfer disease from branch to branch and even from plant to plant defeating the entire purpose of pruning. To prevent the spread of disease, clean your tools in-between each use and before storing. When cleaning your pruning tools be careful not to rust them. To do this you’ll want to spray your tools with rubbing alcohol, allow the alcohol to disinfect your tool for 20 seconds then wiping it off with a clean rag. This will not only kill bacteria but also clean stubborn sap.
Pro-tip: Keep a rag and 91% alcohol in your back pocket for quick access in between clippings.
When to Prune
For more pruning tips, check out the latest episode of ‘Get Up and Grow: When You Should Prune Your Plants, The Three D’s of Pruning’. Where our president Gord teaches Jasmine how to take care of her plants by showing her when to prune them and how.

by Wildwood Outdoor Living | Nov 18, 2021 | Gardening 101
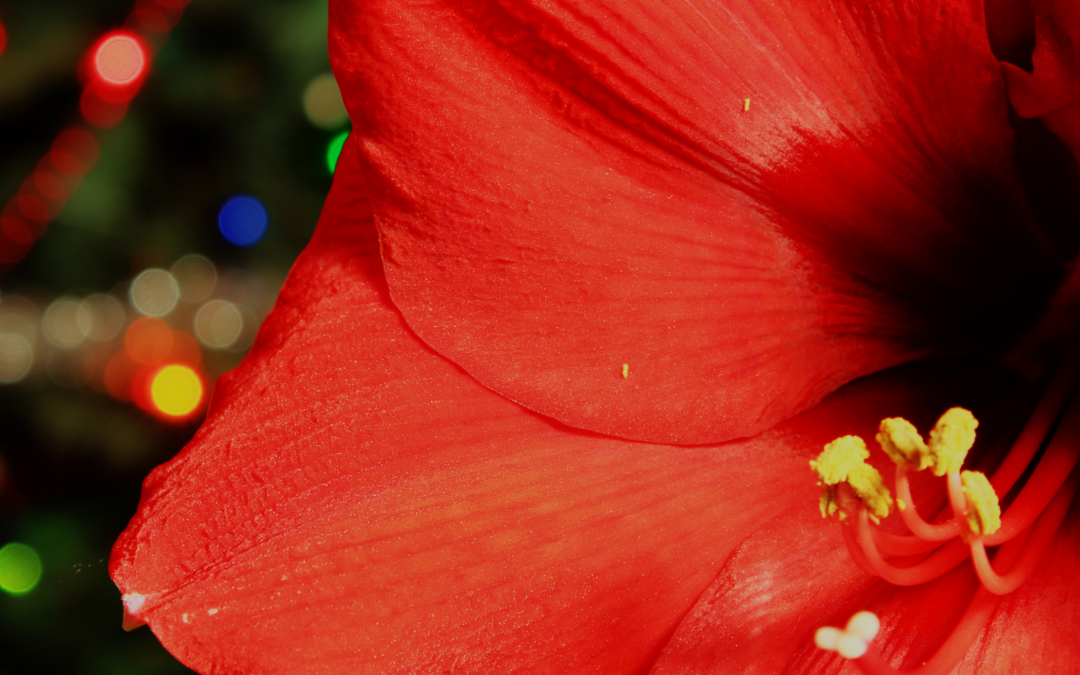
It is that magical time of year again for all of us plant lovers to shop Christmas cactus, poinsettias, Christmas trees, wreaths, greens, garland and more! The holiday season is taking over and we’re all in. One of everything please! Including that thing over there, whatever it is? Not sure, but it is covered in Christmas coloured wax and it seems like a good idea! Let’s do it! If a waxed amaryllis bulb has made its way into your shopping cart you will not regret it! These bulbs are one of the most popular bulbs to grow indoors during the holiday season, here’s why…
What Are Waxed Amaryllis?
With many different wax and bloom colours , the waxed amaryllis is the perfect way to enjoy large indoor blooms in the winter. By delicately dipping the amaryllis bulb in wax, moisture gets sealed into the bulb. No pot, planting or watering necessary! The base of the bulb is lifted by a wire stand holding the bulb upright for tall straight growth.
How to Grow Waxed Amaryllis
When using a large Amaryllis bulb (26-30 cm in diameter), you can expect your amaryllis to grow up to 45cm tall. Each bloom should take 4-6 weeks with 3-4 flowers per bulb. To care for your amaryllis, all you need to do is place a the bulbs upright in a well-lit, warm area, out of direct sunlight. After they have finished blooming and the bulb is depleted, simply thank the bulb for its natural beauty and discard it in the compost.
Tip: Remember to rotate your bulb so that it grows straight- like all plants your Amaryllis will grow towards sunlight.
Holiday Decor
For an added holiday look, try placing amaryllis in a vase, nestled in with pinecones and berries or potpourri. Amaryllis make perfect centerpieces or focal point features in all areas of your home. Waxed amaryllis bulbs are even great for kids to enjoy decorating with glitter and sequins. To learn more about waxed amaryllis, check out the Get Up and Grow segment below where Gord teaches Jasmine how to grow her very own.
Sign up
here for more blogs dedicated to better gardening

by Wildwood Outdoor Living | Nov 16, 2021 | Gardening 101
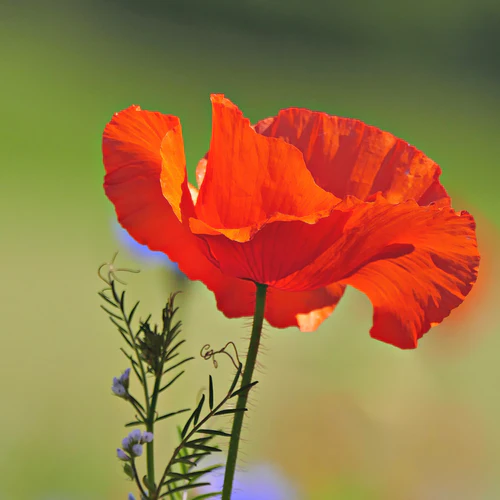
Belonging to the Papaveraceae family, the poppy can be found in many shades of white, purple and red. However, when the red poppy comes to mind we often reflect on those we have lost to war. It is a symbol of consolation, remembrance and death. Placed upon our heroes tombstones for an eternal rest in peace.
Grew From Rubble
The Word War I battlefields from Southern Belgium to Northern France were torn- explosions shook the earth, eroding soil and lifting wild poppy seeds to the surface. Buildings filled with lime crumbling to the ground, combed with nitrogen from explosives created ideal growing conditions for fields of poppies. We remember this battlefield as Flanders Fields, where the poppies blow.
Inspired by a poem
In 1915, after losing a fellow soldier, Medical Officer John McCrae penned a poem only 13 lines long on a piece of scrap paper. This poem was published in a magazine that same year. For over 100 years now “In Flanders Fields” has been imprinted in our hearts. Each year recited and shared for generations to remember and reflect on the lives sacrificed for us to live in peace.
In Flanders fields the poppies blow
Between the crosses, row on row,
That mark our place; and in the sky
The larks, still bravely singing, fly
Scarce heard amid the guns below.
We are the Dead. Short days ago
We lived, felt dawn, saw sunset glow,
Loved and were loved, and now we lie
In Flanders fields.
Take up our quarrel with the foe:
To you from failing hands we throw
The torch; be yours to hold it high.
If ye break faith with us who die
We shall not sleep, though poppies grow
In Flanders fields.
Lieutenant-Colonel John McCrae
~ May 3, 1915
The Royal Canadian Legion
Legion.ca
Before WWI
The poppy has been used since ancient times for it’s medical properties. Poppies contain small amounts of morphine and codeine. The poppy was given to patients by doctors to help relieve pain.
Symbolism
Given the symbol of sleep, peace and death: the meaning of death represented by the blood red color of the poppies petals. Sleep, represented by the opium (poppy tears) extracted as a sedative from poppy seeds. And peace, for external rest when placed on the tombstone of those lost.
When Worn
We wear the poppy to honor our veterans and to show our pride. ‘”The Lapel Poppy” should be worn from the last Friday in October until November 11th for Remembrance Day. It is also encouraged to be worn at the funerals, memorials and anniversaries of veterans. To wear your poppy, respectfully place your poppy on your left lapel over your heart, unobstructed. When removing your poppy, it should be stored or discarded respectfully. It is tradition to place your poppy on a wreath following Remembrance Day services.
Helping Veterans
Each year in Canada you can purchase your “Lapel Poppy” from cadets outside most public shopping areas or inside most stores. The donation given to purchase your poppy is collected by the Royal Canadian Legion. Members of the Legion use these donations to help veterans with expenses for medical equipment, research, home visits, long term care and more.
Memorial Flowers
Over time flowers have been used to represent significant moments in history. Below Gord shares with Jasmine two historical flowers created to represent moments in history for Canada. Watch below to learn the meaning behind the Canadian Liberator and the Canadian Celebration Tulips, and how you can plant your very own memorial garden.
Sign up
here for more blogs dedicated to better gardening

by Wildwood Outdoor Living | Nov 5, 2021 | Gardening 101
Tis the season! To climb around the garage looking for the box marked “x-mas”, pulling it out and taking a big deep breath in. Untangle the string lights, test the bulbs, replace the bulbs, test the bulbs again, map out your route and set up that ladder! If this doesn’t sound like fun to you, step off that ladder and follow us, we’ve got a better option to lighting up your home this season and all year round.
Landscape Lighting
Instead of using holiday lighting try landscape lighting. Landscape lighting will compliment your home all year long and it only requires a one time setup. Depending on your bulb choice, you can get around 50,000 hours of light and when set up on a timer, even longer! And when you want to join the festivities, it’s as easy as switching out a few light bulbs.
Inspiring Lighting
There are many places you can add lighting to your outdoor space. Sometimes all we need is a little inspiration to open up our imagination. Below are a few inspirational photos to help you think of your home in a ‘new light’.

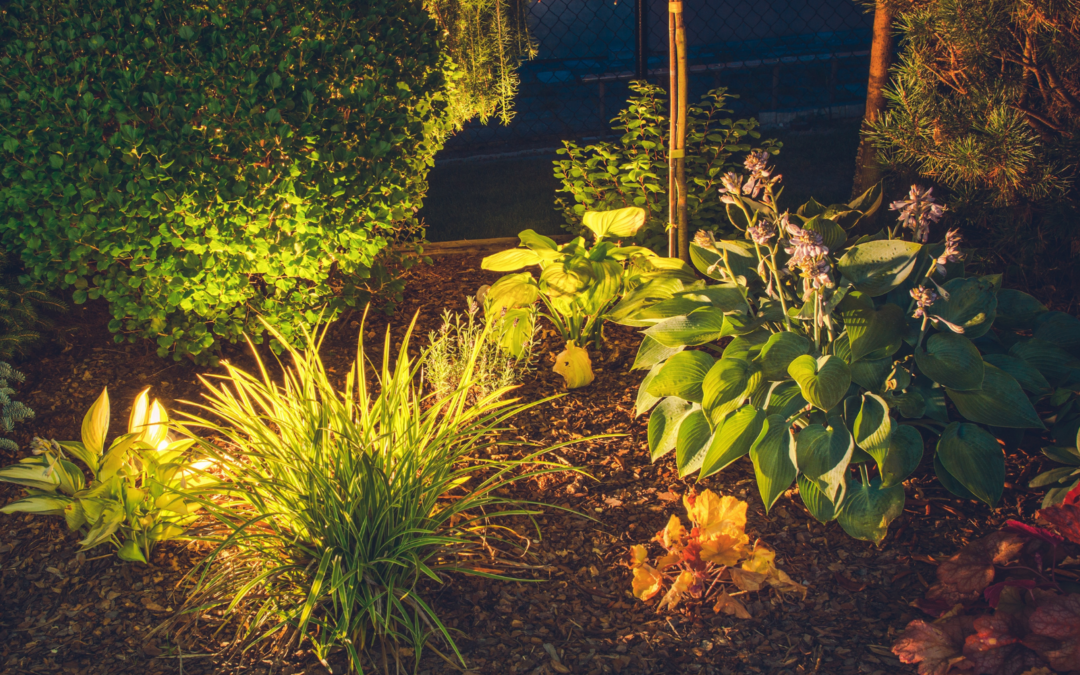
The Garden – Gardens lights are great for entertaining in the backyard and for creating a landscape view from inside your home at night. When placing landscape lighting in your garden not only are you able to experience your garden for longer hours of the day but you’re also going to create pops of colour that aren’t visible in the sunlight. As seen above, up lighting is a technique used to create vibrant colors by placing a light underneath your plant’s foliage. This looks especially beautiful with deciduous plants that glow vibrant reds, greens and yellows.

The Front Yard – Lighting at the front of your home is a great way to increase security, provide lighting for guests and highlighting accent trees. As mentioned earlier in this article, front yard landscape lighting is also a great way to save time and energy during the holidays. After a one time installation, you can get creative by changing lights to reflect holiday colours or spotlight holiday décor like wreaths or reindeer to put them on display.

The Pond – If you’re lucky enough to have a pond, pond lights are a must. They’re a safe, non-invasive method to highlighting a water feature that could save humans and wildlife from falling in in the dark. Pond lighting is a great choice for keeping an eye on sneaky critters who steal fish and the lights create a calm rippling effect with a beautiful reflection.

Walkway/Backyard – Placing your lights along a walkway is a safe way to keep an eye on all traffic, coming and going. It’s great for your guests to safely find their way. There are several methods to placing your walkway lights, but we really enjoy up lighting on trees. Placing your lights from the bark upwards will create a more visible walkway, with a view. From a distance, your trees will create additional accent lighting to better compliment your home and landscape.
What You Need
If you’re interested in creating a night display of your own there are a few items you will need to get the job done. First you should determined what your landscaping objective is and then you will need to decide how much effort you’re willing to put in. Solar lights are a great option for the easiest method. However, there likely isn’t enough natural sunlight available to power these lights in dark spaces (like under your plants). If you’re interested in creating a more grand and customized look, you will need to purchase lighting fixtures, stands/stakes, a transformer, LED bulbs and timer. If you choose to create your own display with individually purchased products, be sure to purchase waterproof products and speak to an expert.
Kits
The most affordable and easy option for landscape lighting are outdoor lighting kits. They are affordable, easy and customizable. Outdoor lighting kits include everything you need in order to create the outdoor atmosphere of your dreams. The kit we carry captures everything you need to get started on pond and garden lighting. 
Garden and Pond LED spotlight kit by Aquascapes.
Ask Gord
Whether you’re new to outdoor landscape lighting or you’re an expert, there are always ways to change your displays. Creating something new and exciting each and every time. Need more inspiration? Check out what our President Gord has to say below about adding lighting to your pots, plants and trees.
Sign up
here for more blogs dedicated to better gardening

by Wildwood Outdoor Living | Nov 1, 2021 | Gardening 101
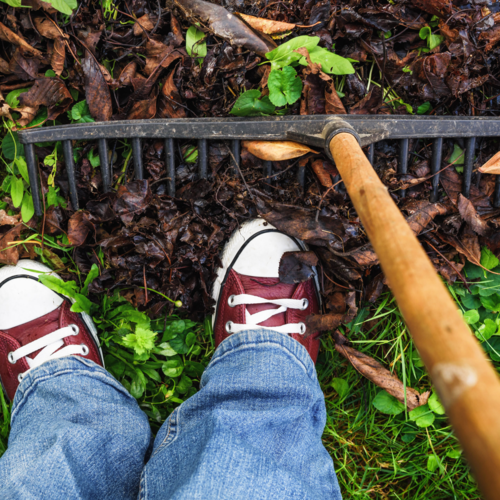
Depending on where you live, you might be faced with drastic seasonal changes. One day it could be a beautiful fall day and the next you could be buried under what feels like a hundred feet of snow! That’s why it’s always a good idea to get a good head start on your outdoor to-do list! Not only will you feel great getting things done ahead of time, but your spring self will thank you for turning a messy task into an exciting fresh start on a clean canvas!
October Checklist
Before looking at what needs to be done in November, let’s make sure we’re caught up with our October to-do’s. Here is a quick checklist for you to make sure that your garden is ready to take on November.
 |
Remove pond netting and clean the bottom of the pond after the leaves have fallen. |
 |
Prune out all dead, diseased, and dying branches and leaves off shrubs and trees. |
 |
The best selection of fall bulbs is available now. Be sure to plan out your garden ahead of your visit to make sure you have the right growing conditions for your bulb choices. |
 |
Lower the blade on your lawn mower to keep grass cut shorter for fall. Keeping your lawn shorter in fall will prevent fungus like snow mold from forming in the spring. |
 |
Start taking fuchsias and geranium cuttings. This will allow your plants to become dormant during the winter, saving their energy for Spring. |
 |
Apply dolomite lime to prevent the soil from becoming too acid over the winter months. If the PH level is too high, your grass won’t be able to absorb nutrients properly. |
 |
Begin storing onions, carrots and beets in dry peat moss or “Beats Peat” to absorb excess moisture and keep them well insulated. This will also prevent small rodents like mice from getting to them. |
 |
Plant fall bulbs and fall perennials now, for beautiful spring blooms! |
 |
Use gypsum lime and organic compost in heavy clay areas to change into workable soil. |
 |
Apply Fall & Winter lawn fertilizer 6-10-20. For the best results, be sure to apply your fertilizer earlier in the month, between October 1st-15th. |
November Checklist
No two gardens are alike. Which means you’re welcome to pick and choose what applies to you when it comes to transitioning your garden from fall to winter. We know that November isn’t the most exciting month for Gardeners because It’s a lot of prepping, storing, and tidying up. But, if you’re like us and don’t like wasting time when the weather is nice. It’s the perfect opportunity to give you a head start when spring comes. Here’s how we plan on getting a good start to our spring gardens.
 |
Divide overgrown perennials and replant. No room? They make a good Christmas present in a pot for a gardening friend (make sure to tag them). |
 |
If you run your pond pump during the winter, raise it on to a ledge in the pond to recirculate only the top layer of water. |
 |
Start paper whites and other indoor forcing bulbs for Christmas color. They need approximately seven weeks to bloom. |
 |
Plant evergreens, perennials, containerized fruit & shade trees. |
 |
All your bulbs should be dusted with sulfur or bulb dust prior to storing them away. |
 |
Prune back Rose of Sharon and P.G. hydrangeas. Tidy up perennials. |
 |
Construct a comport bin and create your own organic rich soil with garden refuse and leaves. Use Rot-it to quicken the process. |
 |
There’s still time to apply dolomite lime to your lawn. |
 |
Tie up cypress and globe cedar trees so heavy snows will not destroy their shape. |
Once you’re finished outside, bring your gardening indoors! A great way to garden indoors is by sowing seeds to create your very own starters. November is also a great time to get indoor plants on sale, as they can’t be shipped during cold months. Herb gardens are a key staple in many homes during the winter months and produce herbs quickly. Or, as Gord suggest below you could try forcing indoor bulbs to for beautiful indoor color during cold, gloomy months.
Sign up
here for more blogs dedicated to better gardening


