
by Wildwood Outdoor Living | Nov 8, 2023 | news
With many of our online shoppers living across Canada, we thought it would be a great idea to sit down with our Nursery Manager, Shawn to give our online readers a glance at how our nursery is cared for. Check out what’s happening in the Wildwood Nursery, from our Nursery Manager Shawn himself, below.
Q: Tell us a little bit about your background?
“It is good to be here! I have been in the horticultural trades for 30+ years now. Started out doing commercial installations as a happy roustabout, had my own design and build company on Gabriola Island and finished up doing estate gardening before moving into Retail Nursery. Found time to raise a family, go to school, built some houses, and skippered a commercial fishing boat for a season.”
Q: You recently took over the nursery managers position at Wildwood, how is that going? What is the best part for you?
“It has been exciting and challenging; the best part is the people. We have a great staff here and I really enjoy talking with our customers and learning about their gardening dreams and challenges.”
Q: As the Nursery Manager, you must get a lot of questions on how to care to plants. Is there anything you’re running into a lot lately?
“The big topics are privacy and adapting their landscapes to a changing climate. People want to forest bathe in their own back yard, they want food security, and they want to help the pollinators.”
Q: What’s happening in the Nursery this month?
“Good question. In the nursery and perennials, we will be focusing on more drought tolerant plants, more of the Mediterranean style that adapt to the dry conditions and still look great. A big part of the drought tolerant plants and pollinator plants will come from our native plant collection.
Food forests and vegetable gardens and we have expanded and our small fruit section and continue to bring in PNW adapted fruit trees. We are working with our vendors to bring in more Open Pollinated and Heirloom varieties of vegetable and tomato starts so folks can collect their own seed.”
Q: Why have you chosen to work with Wildwood Outdoor Living Centre?
“Wildwood is a true local hero. Wildwood is a family business with two generations of the Nickel family working here. Gord lives in the neighborhood all our taxes go into our streets our services. We spend our money here and in turn support other local businesses.
Many report to be ‘‘Local’ but their head offices are in the mainland with a chain of stores. We have one outlet. We live and work with our customers.”
Q: What is one last thing you would like to share with our blog audience?
“So many people have shared stories with me about coming to the Nursery as children with their parents how they had tricycles to ride and the Cannor’s Kids program and so much more. Now they are here with their children, and I feel I am, we are, part the fabric that has made Victoria a great place to live with strong connections to the people and the landscape.”

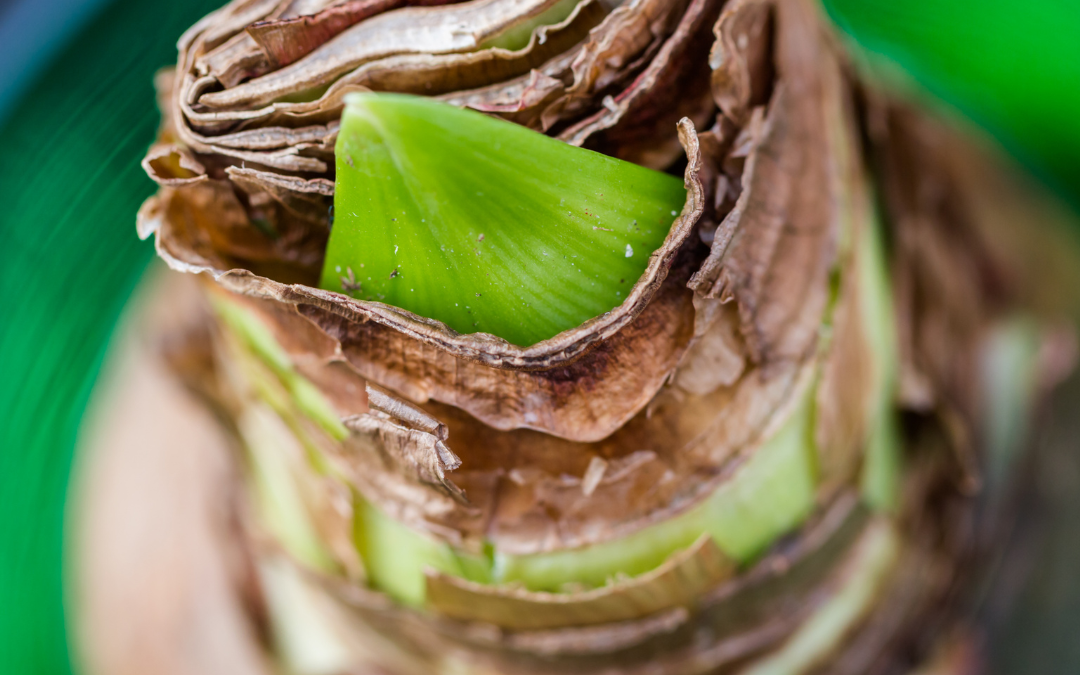
[Photo by Shawn]
Whether you live in Victoria or Manitoba, Shawn is a talented horticulturist who can help with a huge variety of plant topics. We are so glad to have him at Wildwood Outdoor Living Centre to help us and our customers grow. If you ever need assistance online, or in-store be sure to ask for Shawn and he will be happy to point you in the right direction. Thank you Shawn!
Looking for more from the Wildwood Nursery? Check out the latest episode of Get Up and Grow, with our President Gord Nickel below!
Have a suggestion or question?
Let us know at info@wildwoodoutdoorliving.com.
Sign up here for more blogs dedicated to better gardening!

by Wildwood Outdoor Living | Nov 1, 2023 | Monthly Garden Tips
Welcome to November 2023, where the gardening season is slowly coming to an end. However, there’s still plenty you can do this month to prepare your garden for the upcoming year. Take a look at our helpful list of November gardening tips in this week’s blog post, and make the most of your time outside before freezing temperatures arrive!
-
Take care of fallen leaves and debris. Consider tidying up your garden by removing leaves and debris. This not only helps create a neat appearance but also promotes a healthier environment for your plants. You can choose to compost the leaves or use them for mulching, which benefits the soil and provides nourishment to your plants.
-
During winter, it can be beneficial to raise your pond pump onto a ledge within the pond. This way, it will only recirculate the top layer of water, which can prevent freezing and keep your pond healthy. Additionally, once all the leaves have fallen, make sure to remove any pond netting and take the time to clean the bottom of your pond for optimum maintenance.
-
Cover your compost piles as it helps in retaining vital nutrients that are essential for the decomposition process. By covering your compost piles, you create a protective layer that prevents the loss of valuable nutrients through evaporation and leaching. This compassionate act ensures that your composting efforts are optimized, resulting in nutrient-rich soil amendments that can nourish your plants and contribute to a healthier environment.
-
It is highly recommended to continue diligently and conscientiously removing weeds from your garden or landscaping as much as you possibly can.
-
Why not consider dividing your overgrown perennials and replanting them? If you don’t have enough space in your garden, they can also make a thoughtful Christmas present for a gardening friend.
-
Consider planting a variety of evergreens, perennials, and containerized fruit and shade trees. These beautiful plants will bring life and color to your space throughout the year, providing you with a vibrant and refreshing environment.
-
Gently trim the waterlilies, making sure to cut them two inches above the crown. This will help them thrive and create a beautiful display in your pond. Remember to carefully relocate them to a deeper area of the pond, providing them with the right conditions to grow and flourish.
-
Incorporate organic compost into your beds and borders as it can greatly enhance the health and vitality of your plants.
-
During the winter, it is essential to add a pond de-icer to maintain the good condition of your pond and add cold-water beneficial bacteria.
-
Take care of your perennials by giving them a little trim and clearing out the flower beds. By doing this, you are ensuring their health and preparing them for the winter season. Don’t worry, it’s a simple process that will help your plants thrive in the long run.
-
Keep mowing as long as the grass is growing! And maintain a clean lawn by removing leaves, toys and tool to keep it healthy.
-
Experience the joy of vibrant colors blooming in your garden by planting spring-flowering bulbs. Transform your outdoor space into a breathtaking display that will bring beauty and happiness to your surroundings. Now is the best time to take advantage of sales for the end of season!
-
Why not bring in some festive cheer by starting paper whites and other indoor forcing bulbs now? In just around seven weeks, they will burst into beautiful blooms, adding vibrant Christmas colors to your home.
-
Start seeds indoors during the month of November, taking into consideration the unique requirements of your specific region. This thoughtful approach ensures that your seeds have the best chance of thriving when they are eventually transplanted outside. By starting your seeds indoors, you provide them with a nurturing and controlled environment where they can establish strong roots and grow into healthy plants.
-
Gently prune back the lovely Rose of Sharon and P. G. hydrangeas to encourage their healthy growth and maintain their beauty. By carefully tending to these plants, you’ll help them thrive and bloom abundantly in the coming seasons.
-
Properly taking care of your gardening tools is essential, especially during the winter months. Here are some tips to help you clean and store your tools effectively:
a. Clean: Before storing your tools, make sure to remove any dirt, debris, or moisture from them. Use a brush or rag to wipe off any mud or soil. This helps prevent rust and prolongs the lifespan of your tools.
b. Sharpen: Take this opportunity to sharpen any blades on your gardening tools such as pruners or shears. Sharp blades make cutting easier and more efficient when you start using them again in the spring.
c. Lubricate: Applying a thin layer of lubricant, like oil or grease, helps protect metal parts from rusting during storage. Focus on hinges and moving parts that may be prone to corrosion.
d. Store in a dry place: Find a cool and dry area for storing your gardening tools throughout the winter season. Avoid damp areas as excess moisture can cause damage over time.
e. Hang or rack storage: To keep everything organized and readily accessible for next season, consider hanging or using a rack system to store your gardening tools vertically on walls or inside sheds. By following these winter tool maintenance tips with care and compassion for your garden equipment, you’ll ensure they stay in great shape until it’s time to get back out into the garden again!
-
Envision how you want your garden to look throughout the year. Map out which flowers will bloom when, which vegetables will be ready for harvest at different times, and how they will all come together in harmony. By planning ahead now, you’ll set yourself up for a successful gardening journey filled with beauty and abundance.
By wisely utilizing the gardening tasks and opportunities that November presents, you are demonstrating your commitment and dedication to nurturing your garden. This thoughtful approach sets the stage for a flourishing and vibrant garden when spring arrives. Embrace this wonderful opportunity to connect with nature, as you witness the breathtaking transformation that takes place when the dormant beauty of your garden comes alive once more. Your efforts in tending to your garden will surely yield fruitful results, bringing you joy and satisfaction. Wishing you a gratifying and fulfilling gardening experience!
Have a suggestion or question?
Let us know at info@wildwoodoutdoorliving.com.
Sign up here for more blogs dedicated to better gardening!
by Wildwood Outdoor Living | Oct 24, 2023 | How To Grow
It is crucial to store your amaryllis bulbs correctly. By doing so, you ensure their well-being and promote their future growth and blooming. Proper storage reduces the risk of damage or diseases that can hinder their vitality. Taking the time to store them appropriately demonstrates your care for these beautiful flowers, allowing them to thrive and bring joy for seasons to come. As we introduce our newest collection of Amaryllis Bulbs, we thought we would share the best way to store your bulbs so that they grow strong and beautiful blooms this season,
How To Store Amaryllis Bulbs

When it comes to storing amaryllis bulbs, proper care and attention are essential to ensure their health and longevity. By following a few simple steps, you can help your bulbs thrive and prepare them for future growth.
Step 1: Clean Your Amaryllis Bulbs

Firstly, it’s important to clean the bulbs before storing them. Gently remove any excess soil or debris from the bulb, being careful not to damage any of the roots. This will help prevent the spread of disease or pests during storage.
Step 2: Inspect Amaryllis Bulbs

Next, inspect the bulbs for any signs of damage or rot. Discard any bulbs that appear soft or diseased, as they may not survive storage. It’s crucial to only store healthy and intact bulbs for optimal results.
Step 3: Where to Store Amaryllis Bulbs

Once cleaned and inspected, choose an appropriate storage location for your amaryllis bulbs. A cool, dry place with good air circulation is ideal. Avoid areas with extreme temperatures or high humidity levels, as this can negatively impact bulb health.
Tip: Consider using a breathable container such as a mesh bag or paper sack to store your amaryllis bulbs. This allows for proper airflow while also protecting them from excessive light exposure.
Step 4: How Long To Store Amaryllis Bulbs

Finally, be mindful of the duration of storage. Amaryllis bulbs typically require a period of dormancy before they can be replanted and bloom again. Aim for a storage period of around 8-12 weeks in order to encourage healthy growth and flowering in the future.
By storing your amaryllis bulbs with care and consideration, you are setting them up for success in their next growing season. Remember to provide regular check-ups during storage to ensure that they remain in good condition until it’s time to bring them back into bloom!
To browse through our beautiful selection of Amaryllis, click here.
Have a suggestion or question?
Let us know at info@wildwoodoutdoorliving.com.
Sign up here for more blogs dedicated to better gardening!
by Wildwood Outdoor Living | Oct 18, 2023 | How To Grow
Understanding the Importance of Cover Cropping in Sustainable Agriculture
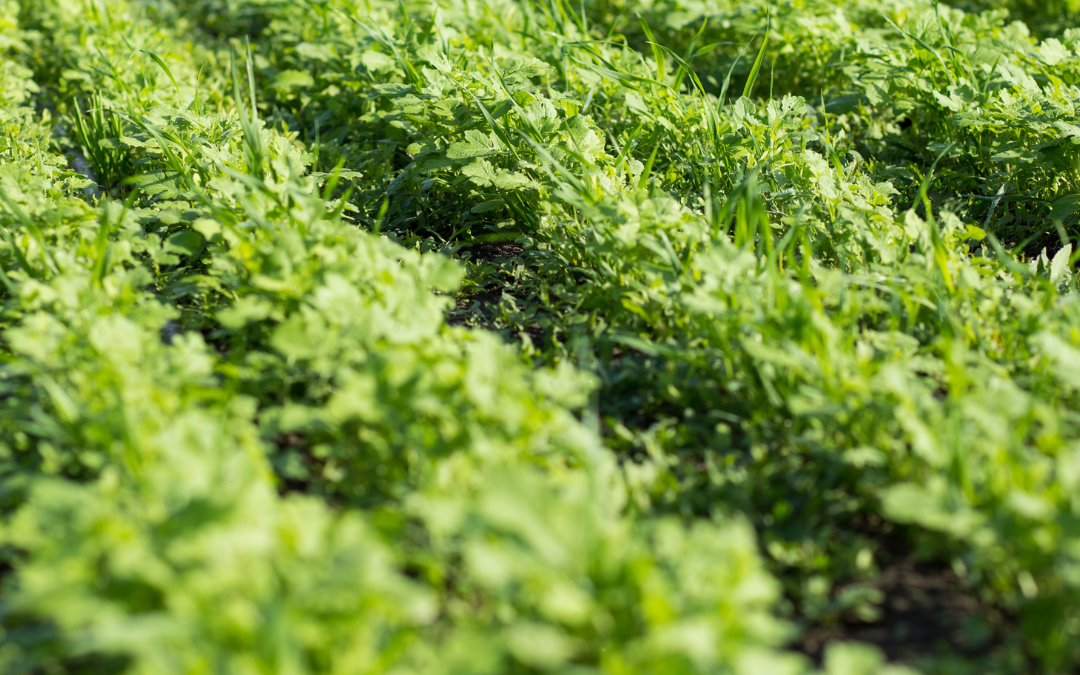
In this fast-paced world, where the focus is often on productivity and efficiency, it’s refreshing to witness a growing movement towards sustainable farming practices. One such practice that has gained considerable attention is the use of cover crops. These humble plants serve as a powerful tool in improving soil health, restoring ecological balance, and promoting organic gardening.
Cover crops are non-cash crops that are planted specifically to benefit the soil and surrounding ecosystem. They work tirelessly beneath the surface, capturing nutrients, preventing erosion, and suppressing weeds naturally. Their presence not only enhances soil fertility but also aids in water retention and reduces the need for chemical fertilizers or pesticides.
Cover Crop Benefits
By incorporating cover crops into agricultural systems, gardeners can enjoy numerous benefits. Firstly, these green companions help prevent soil erosion by anchoring themselves firmly with their roots. This prevents valuable topsoil from being washed away during heavy rains or blown away during windy conditions.
Furthermore, cover crops act as natural pest suppressants by attracting beneficial insects that prey on harmful pests. This reduces the reliance on synthetic pesticides and promotes a healthier ecological balance within farmlands.
The impact of cover crops is not limited to gardens alone; they extend beyond boundaries into our communities and environment. By enhancing soil health through organic practices like cover cropping, we contribute to cleaner waterways by minimizing nutrient runoff from fields. Additionally, healthier soils can sequester more carbon dioxide from the atmosphere – an essential step towards mitigating climate change.
How to Cover Crop in Your Garden
Choosing the right cover crop for your farm or garden is an important decision that can greatly benefit your soil health and overall crop productivity. In this step-by-step guide, we will walk you through the process of selecting cover crops, taking into consideration climate considerations, soil type analysis, and crop rotation planning.
Location: When it comes to selecting cover crops, it’s crucial to consider the climate in your region. Different cover crops thrive in different climates, so understanding your local weather patterns and temperature ranges will help you choose varieties that are best suited for your area. Whether you’re dealing with hot summers or cold winters, there are cover crops available that can withstand these conditions and provide maximum benefits for your soil.
Soil types: Next, conducting a thorough soil type analysis is essential. Different soils have different nutrient levels and drainage capabilities, which can impact the performance of cover crops. By analyzing your soil’s composition and fertility levels, you can identify any deficiencies or imbalances that need to be addressed. This analysis will guide you in choosing cover crops that can replenish specific nutrients or improve soil structure based on its needs.
Planning: Another critical factor to consider is crop rotation planning. Cover cropping is often integrated into a well-planned crop rotation system where different plants are grown in succession on the same land over time. This helps break pest cycles, improves soil health by diversifying root structures and nutrient uptake abilities, and reduces weed pressure naturally. By understanding which plants have been previously grown on a particular plot of land and considering their nutrient demands or disease susceptibility, you can strategically select cover crops that complement or enhance the growth of subsequent cash crops.
By following these steps – considering climate considerations, conducting a thorough soil type analysis, and incorporating crop rotation planning – you’ll be well-equipped to choose the right cover crop for your farm or garden. Remember that each decision plays a vital role in improving soil health, enhancing productivity, and promoting sustainable agricultural practices.
The Best Seeds for Cover Crop Planting
One of the key considerations when selecting cover crop seeds is their ability to effectively suppress weeds. Certain cover crops like annual ryegrass or crimson clover have excellent weed smothering abilities, making them ideal choices for areas with high weed pressure. Additionally, legume cover crops such as hairy vetch or clover species are known for their nitrogen-fixing capabilities, which can contribute to improved soil fertility.
Climate conditions also play a significant role in determining the best seeds for cover crop planting. Some cover crops are better suited for cooler climates while others thrive in warmer regions. For instance, winter rye is well-adapted to colder climates and can provide excellent ground coverage during winter months. On the other hand, sun-loving crops like buckwheat or cowpeas are more suitable for warmer regions where they can grow rapidly and provide effective weed suppression.
It’s important to consider your specific goals when choosing cover crop seeds. Are you looking to improve soil structure? Prevent erosion? Enhance biodiversity? Different cover crops offer unique benefits that align with these objectives. For example, radishes are known for their ability to break up compacted soils with their deep taproots while mixtures of diverse species like oats and legumes can promote biodiversity above and below ground. For a great option that covers many beneficial areas for cover cropping, gardeners love using Renee’s Garden Scatter Garden Seeds Cover Crop. Click the image below to learn how Renee’s has combined some of their best Cover Crop seeds to help gardeners get started on Cover Cropping their gardens.

In conclusion, selecting the best seeds for cover crop planting requires careful consideration of factors such as weed suppression abilities, climate adaptability, and desired outcomes. By making informed choices about which seeds to use in your cover cropping strategy, you can maximize the benefits they provide and contribute to a healthier and more sustainable agricultural system.
Have a suggestion or question?
Let us know at info@wildwoodoutdoorliving.com.
Sign up here for more blogs dedicated to better gardening!
by Wildwood Outdoor Living | Oct 11, 2023 | news
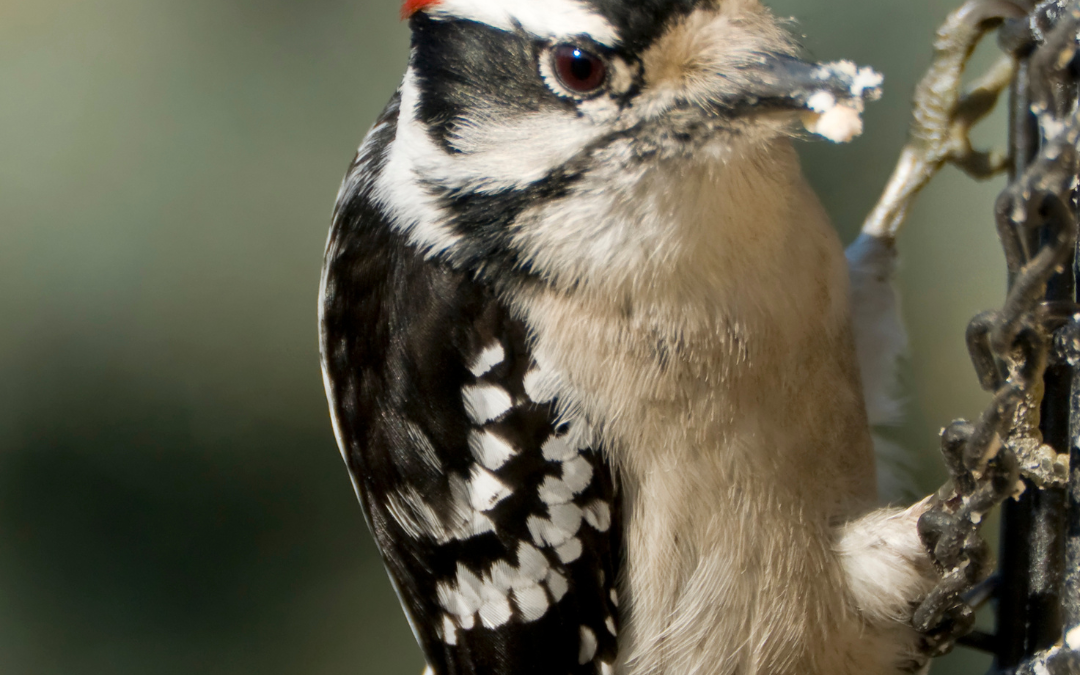
Birdwatching can be a delightful and rewarding hobby, but it’s important to ensure that our feathered friends have the right kind of sustenance. Choosing the right bird feeder is crucial in attracting a diverse range of birds to our gardens or outdoor spaces. By providing them with the appropriate feeding stations, we not only help them thrive during winter and fall months, but also create an enchanting environment for ourselves. Follow these top 5 bird feeding mistakes, to ensure your bird feeders are ready and reliable for your feathered friends this fall.
Mistake #1: Using Incorrect Bird Feeders or Feed

It’s important to create a welcoming environment for our feathered friends by providing them with the right bird feeders and feed. However, one common mistake that many people make is using incorrect bird feeders or feed, which can deter birds from visiting our yards.
When selecting a bird feeder, it’s crucial to consider the types of birds we want to attract. Different birds have different feeding habits and preferences. Some may prefer platform feeders, while others may be more attracted to tube or hopper feeders. By understanding the specific needs of the birds in our area, we can choose an appropriate feeder that accommodates their feeding styles.
Equally important is choosing the right bird feed. Birds have varying seed preferences, and offering a variety of seeds can help attract a diverse range of species. For example, sunflower seeds are popular among many backyard birds, while nyjer seeds are favored by finches. By providing a mix of seeds that cater to different bird species, we can increase the chances of attracting a wider array of beautiful visitors.
Taking the time to educate ourselves about the specific needs and preferences of local birds will ensure that we select suitable bird feeders and feeds. By doing so, we create an inviting space where our avian friends can flourish and delight us with their presence.
Mistake #2: Placing Feeders in Inconvenient or Unsafe Locations
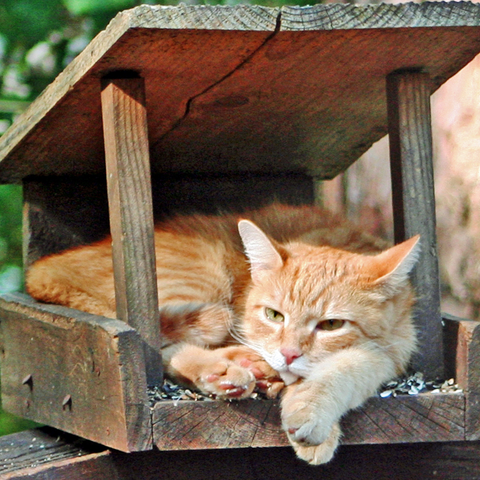
When it comes to bird feeder placement, ensuring convenience and safety is crucial for our feathered friends. Placing feeders in inconvenient or unsafe locations can lead to unintended consequences and potential harm.
One common mistake is placing feeders in areas that are difficult for birds to access. This could include spots that are too high, too low, or obstructed by obstacles such as branches or fences. By considering the accessibility of the feeder, we can make it easier for birds to enjoy their meals without unnecessary struggle.
Equally important is selecting a safe location that minimizes the risk of predators. Placing feeders near dense shrubs or trees can provide cover for birds while they eat, making it harder for predators to approach unnoticed. Additionally, keeping feeders away from windows and reflective surfaces can prevent bird collisions and injuries.
We must also be mindful of keeping cats away from feeders. Cats are natural hunters and pose a significant threat to birds. Placing feeders in locations where cats cannot easily access them, such as on poles with baffles or in elevated areas out of reach, helps protect our avian visitors from potential harm.
By being conscious of these considerations and avoiding the mistake of placing feeders in inconvenient or unsafe locations, we can create a welcoming environment for birds while ensuring their well-being and enjoyment at our feeding stations.
Mistake #3: Using Low-Quality Bird Seed or Not Offering a Variety of Foods

It’s important to provide our feathered friends with high-quality bird seed and a diverse range of food options. Using low-quality bird seed can have negative effects on the health and well-being of the birds that visit our feeders.
Birds require a balanced diet to thrive, just like any other living creature. By offering a variety of foods, we can attract different species and provide them with the nutrients they need. This includes not only seeds but also fruits, nuts, and insects.
Suet feeders are another great option to consider. Suet is a high-energy food that is especially beneficial during colder months when birds need extra fuel to keep warm. By incorporating suet into our feeding routine, we can attract a wider variety of birds and support their overall health.
Additionally, consider adding nyjer seed to your offerings. This tiny black seed is particularly loved by finches and other small songbirds. It provides them with essential oils and proteins that are vital for their well-being.
By avoiding low-quality bird seed and providing a diverse array of foods in our feeders, we can create an inviting environment for birds while ensuring they receive the nutrition they need to thrive.
Mistake #4: Neglecting Regular Cleaning and Maintenance of Bird Feeders

Regular cleaning and maintenance of bird feeders is crucial for creating a safe and healthy environment for our feathered friends. Neglecting this important task can lead to the spread of diseases among birds, which can be detrimental to their well-being.
Cleaning bird feeders not only helps to prevent the accumulation of mold, bacteria, and other harmful contaminants but also ensures that the food remains fresh and appealing to birds. By regularly cleaning and disinfecting the feeders, we can minimize the risk of disease transmission and create a welcoming space for our avian visitors.
It is important to remember that birds rely on these feeders as a source of sustenance, especially during times when natural food sources may be scarce. By neglecting regular cleaning and maintenance, we are potentially putting their health at risk.
Taking the time to clean bird feeders not only benefits the birds but also provides us with an opportunity to observe them up close and appreciate their beauty. It is an act of compassion towards these creatures who bring joy and life to our surroundings.
Let us not overlook the importance of cleanliness in our bird feeding areas. By incorporating regular cleaning and maintenance practices into our routine, we can help prevent disease spread among birds while fostering a vibrant ecosystem in our own backyard.
Mistake #5: Forgetting to Provide Water and Shelter for Birds

It is crucial that we create a safe and welcoming environment for our feathered friends. One common mistake that people make is forgetting to provide water and shelter for birds. By offering bird baths and nesting boxes, we can ensure that they have access to clean water and a secure place to rest and raise their young.
Bird baths are not only a source of hydration for birds, but they also provide an opportunity for them to bathe and keep their feathers clean. It is essential to regularly clean and refill these baths to maintain a healthy environment for our avian visitors.
Additionally, nesting boxes play a vital role in providing birds with suitable shelter. These boxes mimic the natural cavities found in trees, offering protection from predators and harsh weather conditions. By placing these boxes strategically around our outdoor spaces, we can encourage birds to nest and thrive in our surroundings.
Let us not forget the importance of creating a safe haven for birds by providing water sources like bird baths and offering them suitable shelter through nesting boxes. Together, we can contribute to the well-being of our feathered friends while enjoying their presence in our lives.
By being aware of these common feeding mistakes and taking proactive measures to avoid them, we can truly enhance our backyard birding experience while promoting the well-being of our feathered companions. Let us continue to enjoy their presence with compassion and responsibility.
Have a suggestion or question?
Let us know at info@wildwoodoutdoorliving.com.
Sign up here for more blogs dedicated to better gardening!
