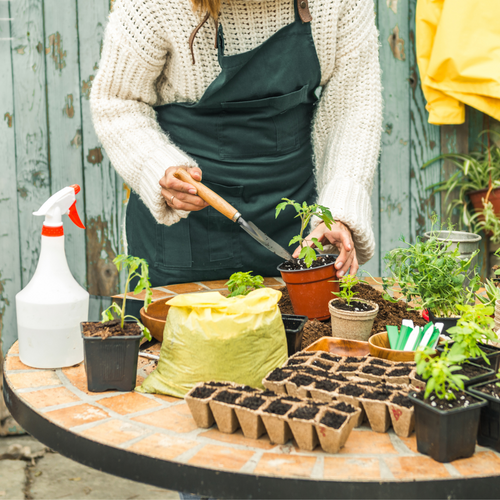
by Wildwood Outdoor Living | Mar 31, 2022 | Monthly Gardening Tips
Spring has arrived, and we couldn’t be more thankful for all the warmer and brighter days ahead! Depending on where you live, you could be knee-deep in the dirt by now or patiently awaiting the snow to melt away. Either way, it’s Spring, and it’s time to shine! Get those gloves on. It’s time to check off all our April gardening to-dos!

Patio & Planters

Clean up & Compost
 |
Clean up winter debris in flower beds; this will disturb slugs from their overwintering areas. |
|
Improve drainage in heavy soil areas by mixing in plenty of compost. |
|
Look for signs of pests and disease. Remember, prevention is always easier than repair. |

Plants
|
Start planting perennials. |
|
Divide last year’s perennials as needed. |
|
Before planting, powder your potatoes in Sulphur to prevent disease. |
|
Divide or thin all summer blooming perennials. |
|
Transplant Lettuce, Peas, Radishes, Carrots, Cabbage, Broccoli, Beets, Spinach. |
|
With more hours of sunlight, houseplants require more water & attention. A great time to transplant them into large pots. |
|
Start feeding the garden with Nurseryland Vegetable, Flower & Garden 12-16-12. |

Lawn & Pond
|
Rake moss out of lawns re-seed where necessary. |
|
To green up your lawn with Nurseryland lawn food 6kg. |
|
Spring is the best time to introduce water plants and fish to your pond. Try Clean For Ponds to reduce build-up and start running your pump. |

Miscellaneous & More!
As you can tell, there is plenty for us to do in the garden in April. If you need more to do, we suggest getting the power washer out to clean up those patio stones and paved areas. Afterwards, you can take care of those pesky reoccurring weeds by applying your favourite weed-killing spray. Plus, now might be a good time to start thinking of the most crucial time of the year, Mother’s Day!
Have a suggestion or question?
Let us know at info@wildwoodoutdoorliving.com.
Sign up
here for more blogs dedicated to better gardening!

by Wildwood Outdoor Living | Mar 17, 2022 | How To, news
Growing flowers for cutting is the best way to get the most out of your blooms! Whether you’re growing them for gifting, décor or fragrance, a constant supply of flowers is a beautiful gift from nature that will put a smile on anyone’s face. In this blog, we’re here to teach you everything you need to learn to grow your very own constant supply of cut flowers this year.
Step 1: Choosing Your Flowers

Choosing the best flowers for your cut garden isn’t as easy as picking the prettiest flowers you can find. After all, it doesn’t matter how lovely the flower is if all the petals fall off after it’s cut. A cut garden with a constant supply of blooms requires planning to ensure each flower’s needs are met and yours.
Long Stem
You will want to look for flowers with a long and robust stem for the best cut flowers. A long stem will allow your flower to absorb a healthy water supply, providing you with healthy, long-lasting blooms!
Bloom Times
In Canada, it’s common for most provinces to get up to 6 months of flower blooms. However, in 6 months, the flowers you choose to plant are likely to have different bloom times. When planning your cut-flower garden, be sure to check the package for bloom times and the duration of blooms. We recommend researching your favourite flowers to ensure you meet their growing requirements first. Then, using a pen, pencil, paper, computer, write out the following chart to help plan your bloom times. Here is an example of a successful cut-garden that will produce a combination of three or more blooms, all season long.
| FLOWER |
SOW |
MAY |
JUN |
JUL |
AUG |
SEPT |
OCT |
| Bachelor Button |
Direct, after last frost |
X |
X |
X |
X |
X |
X |
| Sweet William |
Direct, after last frost |
X |
X |
X |
|
|
|
| Poppy |
Direct, just before last frost |
X |
X |
|
|
|
|
| Foxglove |
Direct, after last frost |
|
X |
X |
X |
X |
|
| Dahlia |
Direct, April/May in warmer soil |
|
|
X |
X |
X |
X |
| Sunflower |
Direct, April/May in warmer soil |
|
|
X |
X |
X |
X |
| Zinnia |
Direct, after last frost |
|
|
X |
X |
X |
X |
Re-blooming
Another great way to get continuous blooms is to plant flowers that re-bloom. Re-blooming flowers produce more flowers even after you’ve harvested their blooms. It is essential to know that re-blooming flowers may take a while to produce more blooms, so be sure to time your flower harvest according to each re-blooming flower.
Step 2: Planning & Planting

Now that you have successfully planned a cut-garden that produces continuous blooms all season long, it’s time to plant them! For happy and healthy cut flowers, follow the below instructions for the best planting practices.
Tip: Consider planting contrasting colours together for a pop of colour!
Care instructions
Whether planting from seed or bulb, each flower you choose should come with care instructions. It’s essential to pay attention to the sun, water, spacing, planting depth and soil requirements for each flower you’re planting. We recommend keeping your seed/bulb package on hand for reference, as this information can be easily forgotten (plus, it’s also an excellent way to remember what you’ve planted!).
Soil & Fertilizer
If you are planting your flowers from seed or bulb, the soil requirements may vary. Seed Starter Mix will provide the best nutrients for seeds to grow healthy and strong. Once the seeds are ready to be transferred to the garden or pot, it is best to use well-draining soil like sandy loam, which is also best for bulbs. For added nutrition, mix compost in with your soil.
Tip: Add a layer of mulch to the top of your garden bed to reduce the chances of weeds and retain moisture.
Spacing
When planting your flowers, it’s important not to space them too close together, as this will create stress for your flowers, leading to disease and unwanted pests. If the flower packaging does not indicate the space needed for your flowers to grow, space your flowers according to size. As a general rule, space small flowers 6-12 inches apart, space medium size flowers 12-18 inches apart and space large/tall flowers 18-36 inches apart.
Tip: Mix your annuals and perennials for constant blooming, avoiding empty spaces.
Step 3: Cutting & Cut Flowers

There are two areas to consider when it comes to cutting your new blooms. The first is to cut your blooms safely to maintain the integrity of your plant. The second is to get as much life out of your flowers as possible once they’ve been cut and placed in a vase.
Cutting Flowers
Taking a pair of pruners to your beautiful new blooms can be scary. But, with our help, you’ll have nothing to worry about. Get a clean pair of pruners, 70-100% Isopropyl alcohol and a clean rag. Using your clean pruners, follow the steps below while using the alcohol and clean rag to wipe your pruners clean in between use. This will prevent the spread of disease.
1. Cut: After your flowers have retained moisture overnight and are firm to the touch in the morning. Cut a 45-degree angle, 1 inch from the bottom of the stem. This will provide a better water intake for your flowers and allow your flowers to stand on a point.
2. Water: Immediately place your freshly cut blooms in room temperature water or cold water (for bulbs). Placing your flowers in water immediately is important to prevent air absorption.
3. Feed: For longer-lasting blooms, flowers require nutrients to thrive. To make your flower food, try the following recipe.
Flower Preservative
1 tsp sugar
1 tsp bleach
2 tsp lemon or lime juice
1-quart lukewarm water
Tip: Use a plastic pale to place your flowers in, as metal can affect pH levels.
Cut Flower Health

Now that we’ve created a beautiful arrangement of homegrown cut flowers, it’s time to give them the best possible chance at survival by caring for them in their new habitat. Here are the best tips for keeping your cut flowers happy and healthy for as long as possible.
- Don’t overcrowd. Overcrowding could lead to poor air quality, resulting in disease.
- Keep flowers away from sunlight and drafts. The best place for flowers is somewhere they can stay cool.
- Refresh water frequently, no less than every 2-3 days.
- Check for limpness re-cut as needed to increase water intake.
- Prune wilted blooms to prevent disease.
- Remove any debris from the water to keep it clean.
- Re-feed flowers each time the water is refreshed.
- Re-cut flower stems slightly at a 45-degree angle before placing them back into a freshwater vase. To prevent build-up of dirty water and allow for proper water intake.
There you have it! With this handy guide, you’ll be growing fresh-cut flowers in no time. The only thing left to do is decide on your favourite arrangements – the possibilities are endless!
Have a suggestion or question?
Sign up
here for more blogs dedicated to better gardening!

by Wildwood Outdoor Living | Mar 10, 2022 | Gardening 101
Microgreens are kind of like the new kid on the block when it comes to seeds, we’ve all heard of them but do we know that much about them? After reading this blog not only are you going to know what microgreens are and why they’re amazing! But you’ll learn everything there is to plant your very own at home!
About Microgreens
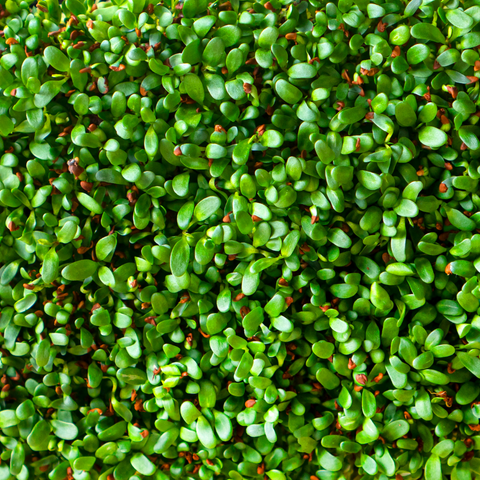
Not quite a green, not yet a sprout. Microgreens are young seedlings of vegetables and herbs that get harvested when they’re only 1-3 inches tall. After only 2-3 weeks microgreens are harvested for their concentrated nutrients and robust flavours.
Depending on the variety, microgreens can have up to nine times more nutrients than mature vegetables! A great way to get your daily dose of copper, iron, magnesium, zinc, potassium, calcium, vitamin C…the list goes on!
Microgreens can be enjoyed cooked but are mostly prepared raw to keep their full nutritional value. A few tasty ways to enjoy microgreens are on sandwiches, salads, smoothies, burger toppings, pizza toppings, salsas and more!
Varieties of Microgreens

Whether you’re looking to add a spicy, sour, peppery or bitter taste to your dishes, microgreens come in a wide variety of flavours and variations. To help you discover what each microgreen has to offer, we’ve created a helpful cheat sheet that’s full of flavour profiles and nutrients.
Variety
|
Flavour
|
Nutrients
|
| Alfalfa |
Nutty & mild flavour with a crunch. |
Rich in vitamins A, B, C, E & K. calcium, folic acid, magnesium, phosphorus, potassium, sodium, and zinc. |
| Arugula |
Softly sweet, tangy, peppery, nutty and earthy. |
Rich in vitamins A, B, C, and E, as well as calcium, iron, magnesium, niacin, phosphorus, potassium, and essential amino acids. Arugula microgreens contain up to 25% protein! |
| Beets |
Mild spinach-like flavour. |
Rich in Vitamin B6, C, Folate, Iron, Magnesium, Manganese, potassium and copper. |
| Brown Mustard |
Intense flavour with some heat. |
Rich in vitamin B6, A, C, E, Omega-3, Fatty Acids, Copper, Phosphorus, Folate, Manganese, Zinc, Folate, Niacin, Iron, Potassium, Calcium. |
| Chard |
Softly salty, earth with hints of veggie flavour. |
Rich in vitamins K, A, C, full of protein, dietary fiber, and antioxidants. |
| Cilantro |
Citrus and grassy flavour. |
Rich in vitamins A, B, C, E, K, Calcium, Iron, Potassium and Zinc. |
| Mung Bean |
Slightly sweet flavour similar to green peas. |
Rich in vitamin B, C, K and high in fiber. |
| Fenugreek |
Refreshing, spicy, grassy, curry-powder-like. |
Rich in vitamin A, C, high in fiber, folic acid and thiamine. |
| Green Peas |
Fresh, crunchy, slightly bitter. |
Rich in vitamin C, A, high in fiber, |
| Radish |
Peppery, radish-like taste. |
Rich in vitamin c, B1, B6, copper, iron, magnesium, folate, zinc, dietary fiber. |
| Red Clover |
Mild and fresh, nutty and sweet. |
Rich in vitamin A, B-12, C, E and K. High in protein, minerals, iron, magnesium and silicon. |
Planting Microgreens

Growing microgreens at home can be a fun experience for everyone including kids! Each variety includes its growing instructions and conditions. Though, for the most part, microgreens love bright sunlight and plenty of water. Microgreens take up very little space, making the kitchen or windowsill a popular place to grow them.
1.) Container – Using a shallow container with drainage, fill the bottom with a few centimeters of seedling soil.
Note: Be sure to use sterilized soil to prevent pathogens and mold.
2.) Sowing – If planting small seeds, sprinkle seeds evenly on top of the soil. Medium-large seeds should be inserted into the soil, lightly covered by soil and evenly spaced.
3.) Water – Using a mister, soak the seeds well from above. Alternatively, seeds can be soaked from the bottom in the sink and removed to drain. Keep microgreens consistently moist, not wet.
Harvesting Microgreens
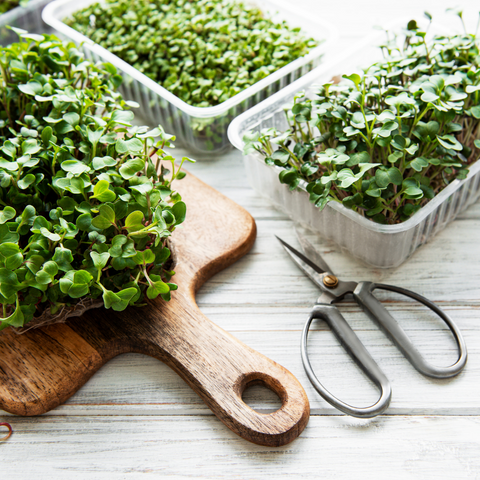
Microgreens are fast growers. In just 2 weeks you’re ready to harvest your first batch! Although regrowth isn’t likely, the leftover matter from growing microgreens is highly nutritious for other plants. To harvest your microgreens, it’s important to know the difference between True Leaves and Cotyledons.
Cotyledons are the surface embryos of microgreens that look similar to baby leaves. These can be harvested but will produce much less. True Leaves are the final form of the leaf that resembles a fully developed leaf. For a healthy harvest, cut your microgreens when they form True Leaves. Be sure to cut the bottom of the stem to get as much as you can.
Do not allow your microgreens to develop munch longer after the plant develops its True Leaves. Microgreens will overdevelop, turning yellow, losing their flavour and nutrients.
Storing Microgreens

Once you have cut your microgreens, you can expect to keep them happy and healthy in the fridge for up to 2 weeks! Plenty of time to add them to sandwiches, salads, smoothies and more! All you have to do is place them in a baggie or container with a wet paper towel to keep them hydrated. Looking for more microgreen options? Check out our new Microgreen collection here.
Have a suggestion or question?
Sign up
here for more blogs dedicated to better gardening!
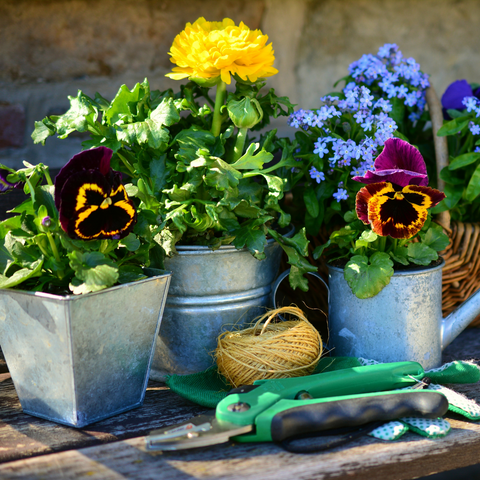
by Wildwood Outdoor Living | Mar 3, 2022 | Monthly Gardening Tips
Well, gardeners, it’s just about our time to shine! The month is March and the sun is starting to shine more and more, every day! If you’re overwhelmed or excited to get growing, we’re here to help. Let’s get ourselves organized with a few gardening tips for March so that we can enjoy each sunny day coming our way!
March Checklist
Whether you still have snow on the ground or you’re blessed with green grass, Spring is on its way and it’s time to get busy! For us gardeners, March is a great month for fertilizing, pruning, re-potting, sowing and more! To help get ready for a new planting season, check out our handy March to-do list below.
 Watch for arrival of fresh and new nursery stock. We’re starting to get more and more each day! Watch for arrival of fresh and new nursery stock. We’re starting to get more and more each day! |
| Build up your soil with bone meal, manure, or with your own garden compost. |
| Feed established outdoor plants with Nurseryland All purpose 20-20-20 plant food. |
| Start Tuberous Begonias inside now, transport outdoors when the soil is workable. |
| Do a clean-up rose pruning now. |
| Try building raised beds in your vegetable garden this year, drainage is much improved and the soil temperature is 8-13F or higher. |
| Check for drainage! Walk your lawn to see where water has collected and make repairs as needed. |
| Plan out your garden to make sure the growing conditions for all your plants are met. Consider growing vertical gardens for extra space and privacy! |
| Feed houseplants with garden prod Palm & Tropical Fertilizer, 9-3-3 and repot houseplants for optimal growth. |
Sowing In March
We’ve said it before and we’ll say it again, sowing seeds indoors is one of the best things you can do as a gardener! Not only is it nice to get a head start on your garden when you’re cooped up indoors but it also gives you more time to enjoy everything your plants have to offer. What you’re able to sow now will depend on where you’re located, so we’ve made a handy cheat sheet for you to check what you can sow indoors for March in your region.
| South Coastal, BC |
Broccoli, Sage, Mint, Cabbage, Rosemary, Sweet Pea, Tomato, Viola |
| Interior, BC |
Pepper, Onion, Tomato, Artichoke, Pea, Broad Bean, Oregano, Marjoram, Dianthus, Agastache |
| Canadian Prairies |
Leek, Onion, Pepper, Artichoke, Pea, Oregano, Thyme, Lemongrass, Digitalis, Lavender |
| Southern Ontario |
Asparagus, Arugula, Pea, Sesame, Lettuce, Parsley, Catnip, Mint, Bergamot, Digitalis |
| Southern Quebec |
Lavender, Rosemary, Sage, Mint, Nigella, Viola, Sweet Pea, Claytonia, Onion, Pepper |
| Maritimes |
Thyme, Oregano, Catnip, Alyssum, Digitalis, Sweet Pea, Leek, Onion, Broad Bean, Artichoke |
| Northern Canadian Regions |
Artichoke, Leek, Onion, Oregano, Rosemary, Mint, Sage, Digitalis, Viola, Columbine |
Potting In March
For more fun in the garden, check out what Gord has to teach Jasmine about creating and transplanting seasonal potted displays on this week’s episode of Get Up and Grow, Potting Up Heathers and Other Plants Before Moving Them Into The Garden.
Have a suggestion or question?
Sign up
here for more blogs dedicated to better gardening!