Have a suggestion or question?
Let us know at info@wildwoodoutdoorliving.com.
Sign up here for more blogs dedicated to better gardening!


Springtime is the perfect time to plant fruits in your garden or backyard. Whether you’re looking for a delicious snack or a beautiful addition to your landscape, there are plenty of options available. From strawberries and cherries to blueberries and kiwis, here are the top five best fruits to plant this spring.
1.) Strawberry Plants

Strawberries are one of the most popular fruits in the world. They come in various shapes, sizes and colours and are known for their sweet flavour and bright red colour. Many different strawberries are available today, each with unique characteristics and flavours. From the classic June-bearing strawberry to the exotic Alpine strawberry, there is something for everyone!
The nutrient-rich content of strawberries makes them an ideal addition to any healthy diet. Strawberries are an excellent source of vitamin C, potassium, magnesium, iron, and dietary fibre. They also contain potent antioxidants, which help protect against various diseases. Additionally, the high levels of polyphenolic compounds found in strawberries may help reduce the risk of certain types of cancer.
2.) Blueberry Plants

Blueberries are one of nature’s most potent superfoods. Packed with antioxidants, vitamins, and fibre, blueberries have been linked to numerous health benefits, including improved heart health, better brain function, and a reduced risk of certain cancers. The sweet-tart flavour of blueberries makes them a great addition to any diet! Planting blueberry plants in the spring when temperatures warm up will ensure that your plants have enough time to establish themselves before winter arrives. You can enjoy a bountiful harvest of delicious blueberries with proper care throughout the summer months.
3.) Haskap Plants

Haskap plants are a type of berry that has been gaining popularity recently. They have a sweet-tart flavour and are packed with essential nutrients and vitamins. Haskap plants are high in antioxidants, which can help fight off free radicals and protect against chronic illnesses. They also contain Vitamins C and A, iron, calcium, magnesium, manganese, and zinc. In addition to their nutritional benefits, Haskaps are easy to grow and require minimal maintenance.
4.) Raspberry Plants

Growing raspberries in your garden is a great way to enjoy the sweet taste of this delicious fruit. They are a healthy snack and can also be used to make jams, pies, and other treats. Raspberries come in wide varieties, each with its unique flavour and texture. Knowing the difference between these types of raspberries can help you choose the right one for your garden. In addition to their delicious taste, growing raspberries offers several benefits, such as providing habitat for beneficial insects, reducing erosion, and improving soil quality!
5.) Kiwi Plants

Kiwi plants are a unique species of woody vines native to New Zealand. They have become popular in recent years for their sweet, tangy fruits, as well as for their ornamental value. Kiwi plants are easy to care for and can be grown in various climates, making them an ideal choice for gardeners looking to add some exotic appeal to their landscape. They require little maintenance and can provide an abundance of delicious fruits if cared for properly.
All varieties of these plants are members of the Actinidia genus and produce edible fruit with an intensely tangy flavour. They serve as tasty additions to salads and can be used in many different culinary applications. Additionally, the flowers of these plants provide an attractive ornamental value for those looking to add colour to their landscape. Each variety has specific care requirements, but there are some similarities.
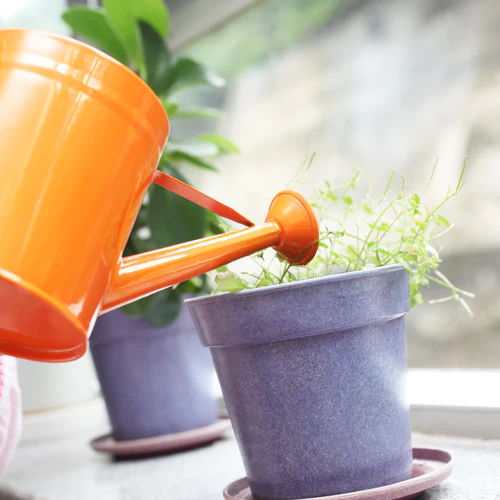
Like animals (and some humans!), most houseplants go into a hibernation state called ‘dormancy’ during winter. With less sun, our plants can conserve energy until the sun returns for extended periods to help them store nutrients – plants start photosynthesis at a much slower rate. Feeding them nutrients during the winter can cause more harm than good, resulting in lifted roots, stunted growth, yellowing leaves, and even killing the plant.

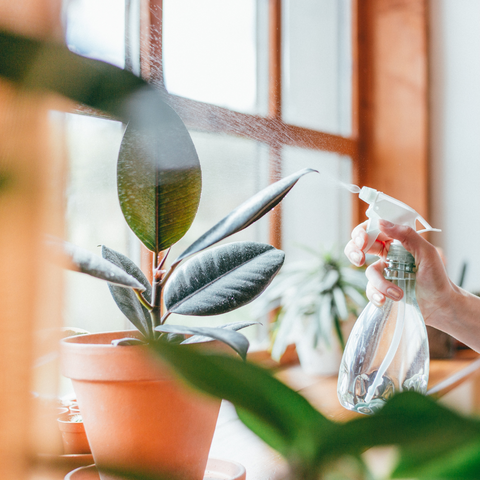
Although it may seem like a good idea to place your houseplant in a sunny location, like the windowsill, it’s usually not a good idea. More often than not, the Canadian windowsill can be drafty in the winter – sending chills down your plant’s stems! Even without a draft, window temperatures cause frostbite to your plant leaves, killing them. This can be especially dangerous when watering your plant near a cold window, as the water that leads into your plant’s root system can freeze, killing your plant.

As Gord mentioned, pruning your houseplants in the winter is an excellent way to maintain their health. The collection of dead leaves is the perfect place for insects and pests to find the warmth they need to multiply! So, it’s best to steer clear of any build-up. Don’t forget, if you happen to clip your plant by accident, use a water bottle to seal any “bleeding” such as sap (which attracts more insects).

You might have guessed it, but over-watering your houseplants in the winter is never a good idea -since there is less sunlight to help your plant absorb water. Over-watering your plant could result in root rot, disease and mold. If you’re unsure, try filling a sauce, as Gord mentioned, to help add a more-regulated amount of moisture to your houseplant if it’s looking a little on the dry side.

If you can’t place your plant in a sunny window or put it outside, there’s still hope! All you need to do is purchase a 13-watt lightbulb to provide the extra light you need. Just place your plant near the lamp to give it the daily light exposure it needs to survive the winter. Be sure to check your plant’s dormant light requirements, as too much light is not good either.
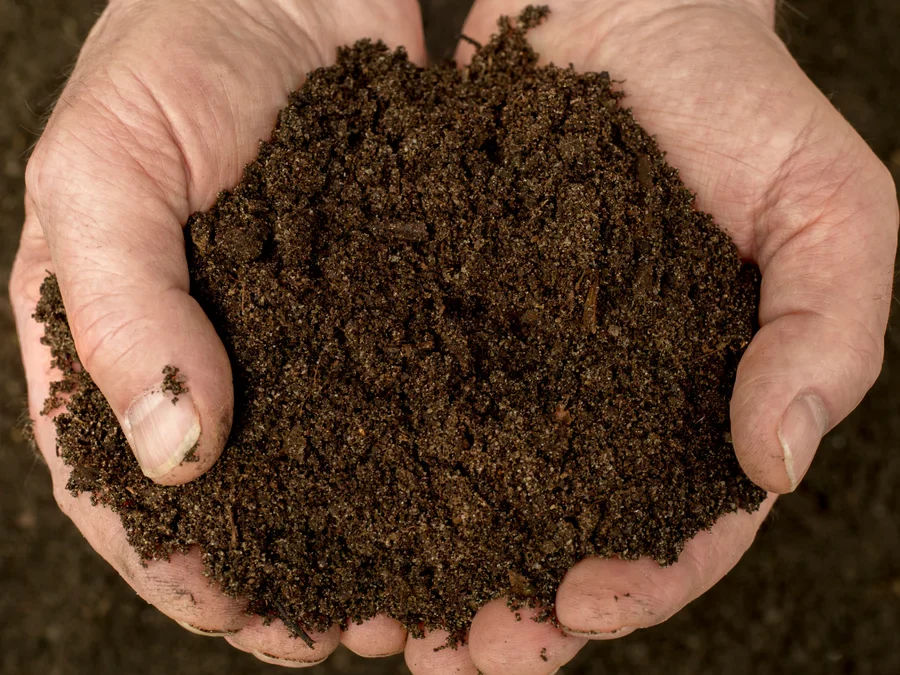
It’s 2022, and sustainable gardening is a crucial way to save your money and your plants too! In this week’s blog, we’re here to share the top five important reasons to start your own compost bin from scratch! Plus, follow along as our President Gord Nickel Shows Hannah Lepine the perfect way to start your compost bin at home!
Growing your own supply of compost is the best way to retain as many nutrients as possible in soil without using chemicals and providing your plants with a rich collection of micronutrients, potassium, phosphorus and nitrogen! While your scraps decay, they create good bacteria and fungi, which work to block unwanted pathogens from infecting your soil.
One of the best reasons to grow your own compost is its ability to retain moisture. Though each compost is different, the ability to hold moisture is entirely up to you and what you feed your own compost. However, due high impact of nutrients and microbiomes, composts can retain water for longer, which will also help your plants to establish good healthy roots!
Though you can’t expect to add compost to a dying plant to save it immediately, you can expect to prevent a vast amount of disease when growing from compost. The build-up of microbiomes creates a more significant amount of microbes which work together to fight pathogens—reducing unwanted diseases from infecting your plants so that they can grow big and strong!
As you’ll learn from Gord, compost bins are great for putting waste to good use. Like food scraps that are returned to the earth after decomposing, yard waste can also feed your compost. Think of all the space you’re saving by breaking down matter and returning it to the planet instead of taking up space in landfills.
Why buy the cow if the milk is free? Not only have you got the most out of your money when you put your scraps to good use, but when you compost, you’re cutting down on annual gardening supplies. Think of the money you’ll save on soil, fertilizer and even water year after year!
With only 23 days remaining in summer, gardeners all over Canada are excited about a new growing season! And we all know that with a new season comes a lot of work cleaning, pulling, storing and planning, of course! If your plans include adding something unique, you’re in the right place. In this week’s blog, we’re here to share a few of our unique vegetable seeds that will spark interest!


Also commonly known as Pumpkin Tree, Pumpkin Bush or Mock Tomato. Pumpkin-on-a-stick has a mild, slightly bitter taste when green, turning peppery as it matures into orange skin. Although it isn’t quite a pumpkin, Pumpkin-on-a-stick is an eggplant that looks just like a pumpkin and is ready just in time for the pumpkin festivities! When planted in the spring, you can expect unique spiky pumpkin sticks to add to beautiful fall displays and bouquets when dried!
To grow your own Pumpkin-on-a-stick, sow your seeds or plant them directly in the Spring. These fast growers are ready to harvest in only 70 days and work well in containers, indoors or outdoors! In well-drained, loamy soil these annuals bloom from summer until fall when grown in full sun. Be careful, these unique vegetables are toxic to pets when consumed.
Tip: For beautiful arrangements that last years, cut your stems from the bottom of the plant and hang them upside down in a warm, dry place until the skin turns pumpkin-like orange!


With an amazingly sweet and crisp flavour, Carrot Purple Sun is fantastic when eaten raw or cooked! Noticeable deep purple hues with bright yellow-sun centers create a unique garden addition that is sizeable and full of antioxidants!
In well-worked soil, Carrot Purple Sun prefers full sun in zones 4-8. In Spring, sow seeds 1/4 inch deep and 1/2 inch apart. Plant again, three months first expected fall frost for a late crop. Germination can be expected in just 10-20 days with harvest in only 73 days!
Tip: For best-growing results, patiently allow your Carrot Purple Sun to mature fully in size and colour before harvesting – your taste buds will thank you! Pair well with dill, tarragon, chives, mint, or cilantro!


“You’re entirely bonkers, but I’ll tell you a secret. All the best ones are.” – Alice in Wonderland. There is no guessing why we’ve chosen Pepper Mad Hatter as one of the most unique vegetable seeds! These award-winning peppers are a variety of hybrid Bishop’s Cap peppers. With flattened hat-shaped pods that are perfect for snacking, the Pepper Mad Hatter is crisp and crunchy with a sweet-mild flavour that heats up around the seeds.
When grown in container or garden beds, you can expect an impressive yield in just 65-70 days for green peppers and 85-90 days for red. Just start indoors 6-8 weeks before the last frost. Transplant outdoors when the nighttime low is above 12C. Plant in full sun and pair with compatible neighbours like basil, carrots, rosemary, swiss chard, endives and more!
Tip: Allow your Pepper Mad Hatter to mature in colour for the most packed vitamin C content!


A tangy tomato with zebra-like markings and crazy green colour! These conversation starters are perfect for slicing and eating raw or cooked. Producing uniformly round, high yields, you’d never believe tomatoes like these could be so sweet!
Start seeds indoors with bottom heat and plenty of sunlight. Transplant your seedlings into pots when plants become rootbound. Once temperatures are above 10C transplant them into rows 50-75cm apart. Germination takes only 7-14 days and 75 days from transplanting!
Tip: Plant in well-drained soil with at least 6 hours of direct sunlight per day!


Glow-in-the-dark green skin with crispy, juicy texture! Also known as “yard-long Cucumbers” with few seeds and thin skin, you don’t need to peel it! These garden wonders are not only tasty but decorative when sliced. Armenian Cucumbers are high in vitamins C, A, K and potassium.
Sow in average, well-drained soil in full sun in Spring after the danger of frost has passed. Keep evenly moist and seedlings will start to emerge in just 7-14 days! Great for trellises and garden beds!
Tip: Best for eating when 12 inches long and 2.5 inches thick.
Looking for more unique seeds? Check out a few of our staff favourites for sowing over the winter season below!
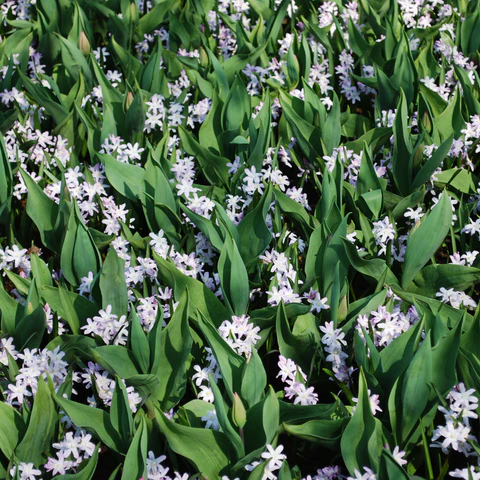
With the approach of a new season, comes plenty to do in the garden! Perhaps the best place to start is to think about what might have gone wrong this year so that we can do our best at preventing it from happening the following year. One problem area that we are always asked about is how to deter deer from gardens. Well, if you have plans on planting fall bulbs and happened to have a deer problem this year, now is the best time to put a fool-proof plan into action! To help your garden perform at its best, deer-free, we’ve come up with our favourite deer-proof fall bulbs to get you one step ahead with the fall planting season approaching.

Also known as Schubert’s Allium or Tumbleweed onion. Allium Schubertii produces enormous 12-inch blooms with tiny, shooting-star-like florets. Unlike common densely packed Allium, Schubertii Allium has sparse blooms, creating a strikingly unique garden giant worth noting!
Plant new bulbs 4″ deep and 8″ apart in the fall (Sept-Dec) for a late Spring (May – June) bloom. This easy-to-grow variety is resistant to deer, however, note that alliums are poisonous if ingested by pets. Add “Schubertii” to cut flower arrangements, whether fresh or dried, to make any bouquet “pop”!
|
Colour |
Pink |
|
Bulb Size |
14-16 cm |
|
Bloom Size |
12” W |
|
Sun Requirements |
Full to Part Sun |
|
Water |
Moderate to dry |
|
Fragrant |
Yes |
|
Height |
16” |
|
Plant |
Sept-Dec |
|
Bloom |
May – June |
|
Planting Depth |
4″ |
|
Space Apart |
8″ |
|
Deer Resistant |
Yes |
|
Skill Level |
Easy |
|
Zone |
Zones 3-9 |
|
Toxic |
Toxic to pets |

Part of the Dwarf family, Iris ‘Katherine Hodgkin’ is a hybrid award-winning iris known for its short flowers with detailed pale blue-veined petals with yellow blotches. Growing only 6 inches tall, Iris Katherine Hodgkin is a fantastic naturalizing bloom that can also perform well in containers all while deterring pesky grazers like deer.
Plant bulbs 2 inches deep and 3 inches apart in well-draining soil, ensuring they get exposed to full or partial sun. Dwarf irises do well in a variety of locations; containers, borders, rock gardens, and lawns are all great choices! Be sure to plant these flowers in large groups if used on a lawn, as they can be otherwise easily lost due to their small stature.
| Colour | Blue |
| Bulb Season | Fall, Sept-Dec |
| Bulb size | Top size |
| Bloom | Feb – April |
| Lighting | Full to partial sun |
| Water | As needed |
| Fragrant | No |
| Size | 6” (15cm) |
| Plant Depth | 2” |
| Space Apart | 3” |
| Deer Resistant | Yes |
| Skill Level | Easy |
| Zone | Zone 5 |
| Toxic | Toxic to pets and humans |
| Other Benefits | Great for naturalizing |

Anemone De Caen “Sylphide” shines with its bright, violet-pink, poppy-like flowers adorned with a powdery dome of black stamens at the center. This easy-to-grow variety is very prolific as well, with as many as 18 flowers per plant! Its long stem makes it a great choice for use as a cut flower. To be planted during the fall months (Sept-Dec) in preparation for a springtime (Mar-May) bloom.
In most, well-draining soil plant the bulbs at a depth of approximately 2”, leaving 4” of space between each bulb. Loves the sun, however, in hotter areas, a bit of shade is appreciated! Anemones are beautiful deer-resistant flowers that will light up your garden with rays of dazzling pink, all while attracting bees, butterflies, and other pollinators!
| Colour | Pink |
| Bulb Size | 6 – 7 cm |
| Bloom Size | 4” |
| Sun Requirements | Full to Part Sun |
| Water | As needed, about 1″ of water per week |
| Fragrant | No |
| Height | 10” |
| Plant | Sept-Dec |
| Bloom | Mar-May |
| Planting Depth | 2″ |
| Space Apart | 4″ |
| Deer Resistant | Yes |
| Skill Level | Easy |
| Zone | Zones 5 – 10 |
| Toxic | Toxic to humans and pets |

Chionodoxa (Glory of the Snow) “Pink Giant” is an early spring (March-April) blooming variety that boasts loose one-sided racemes of up to 12 upward-facing, large pink flowers with a diffused margined white eye. Its charming blossoms are borne atop the foliage of 2 – 3 narrow semi-erect, basal leaves. This bulbous perennial naturalizes easily, once established, returning to your garden year after year.
Plant in autumn (September – December) in well-draining soil, under full sun or partial shade. Plant the bulbs at a depth of 2”, while leaving 3” of space between each bulb. A deer-resistant variety that is suitable for growing in hardiness zones 3 through 8. “Pink Giant” provides a pretty display when planted among many kinds of perennial plants in garden borders. They can also be planted near other very early-flowering perennials to create complementary colour combinations.
| Colour | Pink |
| Bulb Size | 5 – 6 cm |
| Sun Requirements | Full to Part Sun |
| Water | As needed |
| Fragrant | No |
| Height | 6” |
| Plant | Sept-Dec |
| Bloom | Mar – Apr |
| Planting Depth | 2″ |
| Space Apart | 3″ |
| Deer Resistant | Yes |
| Skill Level | Easy |
| Zone | Zones 3 – 8 |
| Toxic | No |
| Other Benefits | Disease tolerant |

[Snowdrops Galanthus Woronownii]
Also known as ‘Snowdrops’, ‘Giant Snowdrop’ or ‘The Green Snowdrop’, Galanthus Woronownii are native to Turkey, Russia, and The Republic of Georgia and are named in honour of the Russian plant collector, Georg Woronownii. As one of the very first signs of spring, Galanthus Woronownii can be found pushing their way through the frozen ground with white blooms with green accents stretching their pedals into bloom in February and March. They make the perfect blooms for woodland margins, lawns, under deciduous trees, rock gardens, border fronts and walkways.
Plant Galanthus Woronownii in zones 3-8, 3 inches deep and 4 inches apart in fall. Galanthus Woronownii prefers full sun to partial shade environments and are toxic to humans and pets when consumed. These fantastic neutralizers are easy to grow and require less than an inch of water per week, in well-drained soil.
| Colour | White |
| Bulb Season | Fall, Sept-Dec |
| Bulb size | 5-6cm |
| Bloom | Jan-Mar |
| Lighting | Full to partial sun |
| Water | Little, less than 1 inch per week in well-drained soil |
| Fragrant | No |
| Size | 10cm/4 inches |
| Plant Depth | 2” |
| Space Apart | 3” |
| Deer Resistant | Yes |
| Skill Level | Easy |
| Zone | Zones 3-8 |
| Toxic | Toxic to humans and pets |
| Other Benefits | Great for naturalizing |
Whether you’re looking to add more plants to your pond or looking to add some to your indoor or outdoor space, water plants hold a special place in many gardeners hearts. These easy growers come in many different shapes, blooms, vines, and more! Though they’re not as easy as just adding water, they are low maintenance. Check out our top five favourite water plants, what makes each one so special and how you can grow your own at home.

Also known as Iris Ensata, the Japanese Water Iris is a prized water plant that has been said to be celebrated in Japanese culture since the mid-ninetieth century. A tradition known as ‘The Act’ is the practice of patiently meditating and watching as the Water Iris slowly unfolds its blooms over the course of three days (The Japanese Iris, Currier McEwen, 1990).
When growing Japanese Water Irises, you can expect tall blooms reaching up to 4 feet high in June and July. In zones 4 to 9, sow seeds in a small container with loamy aquatic mix and cover with potting mix. Once the seeds are established, transplant them into pond plant baskets!
Tip: Remove dead foliage to promote healthy growth. Cutting just above the water line in the fall for dormant growing months.

Native to African regions, Papyrus is also known as Nile grass named for its natural instinct to grow along rivers, lakes, swamps, and ponds. Though capable of growing in soil and in pots, the Papyrus flourish best when grown in water. Historically, Egyptians have widely used Papyrus to make paper, food, chairs, shoes, rope and much more. Now, you can find Papyrus as a pond plant favourite!
When grown as a plant, you can place your Papyrus in a three feet deep hole in muddy soil. Cover the hole to the top with mud to secure the papyrus structure in an upright position. Alternatively, you can plant Papyrus from rhizomes in a container with fertile-moist soil and then transfer it to your pond.
Tip: Remove broken stems and feed in spring with a balanced fertilizer.

A symbol of pleasure and peace. With over 70 species, the Water Lily belongs to the Nymphaeaceae family and can be found all over the world in ideal climates. With giant blooms stretching out their petals early in the morning and closing back up at night. The Water Lily is a water plant perennial that can live for fifteen to twenty years or more!
Water Lilies are not only a popular pond favourite to many of us gardeners, but it’s also a favourite to fish. The Water Lily provides fish with food and shelter from the sun, while also preventing algae by keeping your pond cool.
Using a container with or without drainage holes, fill your container with soil (avoid peat soils, perlite and vermiculite). Prune your Water Lily plants and place them along the side of the container to allow for hanging over the edge. To keep your soil inside the container, top it off with stones like gravel. Submerge your pot 12-18 inches deep, allowing the leaves to float to the top!
Tip: Try to maintain cooler pond temperatures by having 60% of the pond covered by plants like water lilies to prevent unwanted bacteria.

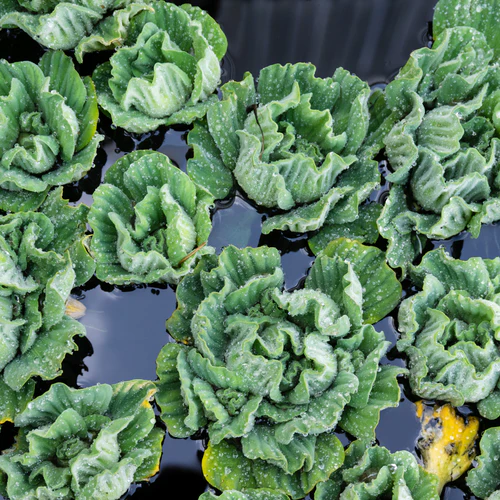
Not to be confused with regular lettuce, water lettuce can be deadly to eat! However, it’s beautiful large rippled foliage unfolds beautifully in ponds and waterscapes, creating the perfect shade to protect fish and other aquatic wildlife. Water Lettuce is also known for its ability to clean water by producing oxygen and eliminating large amounts of nitrate nitrogen, phosphate and ammoniacal.
To grow your own Water Lettuce from seed, bury your seeds in sand, cover with soil and water. Submerge slightly underwater, watch as your Water Lettuce begins to sprout and transfer to your aquatic environment!
Tip: Performs best in temperatures between 21C-26C.

The Broadleaf Arrowhead, also known as Duck-Potato or Sagittaria Latifolia. Producing edible tubers, Native Americans have traditionally used the Broadleaf Arrowhead to treat indigestion, kidney and urinary ailments. Named after its arrow-shaped foliage, unique white blooms appear in bunches of threes during the summer months.
Broadleaf Arrowhead performs amazingly in swampy areas like ponds and streams. When placed in a container, they prefer shallow water and look beautiful in waterside gardens. To grow your own Broadleaf Arrowhead, sow your seeds in late fall via tray method in 1-3 inches of water and maintain wet to highly moist soil. Once your seedlings are strong enough to be potted, transplant them to larger pots. As your plant forms new and stronger stocks, you can migrate them further into your pond, keeping their foliage above water.
Tip: Monitor for aphids and spider mites! Treat immediately.
For more inspiration for growing the best water plants, check out the latest episode of Get Up And Grow, ‘How to Get Rid of Algae in Ponds’.