by Wildwood Outdoor Living | Oct 12, 2022 | news
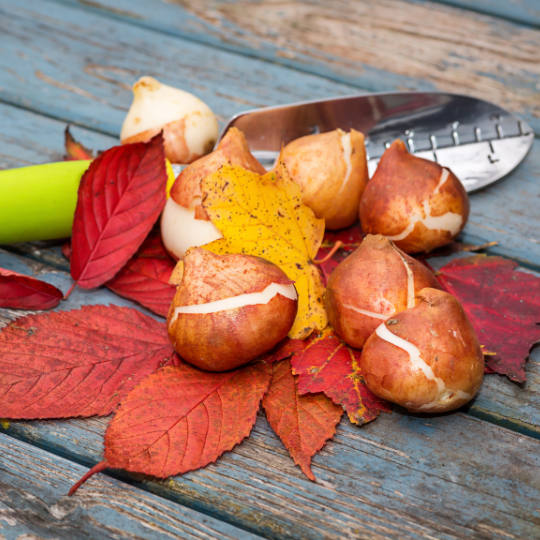
When one season ends, another begins! And you know what the best thing to plant in the fall is? Fall bulbs! On the latest episode of Get Up and Grow, our President Gord Nickel teaches Hannah Lepine everything she needs to know to plant all her favourite spring flowers now, while the timing is just right. Check out our Top 5 Tips for Planting Bulbs below, and follow along for expert advice on growing your best bulbs.
Tip #1 – Space
When planting your fall bulbs, map out your garden for adequate space. Each type of bulb you grow requires a specific amount of space which can normally be found on the bulb’s packaging or description. Suppose you’re ever unsure how to space your bulbs. A general rule of thumb is to plant smaller bulbs closer together (approx. 4 inches) while planting larger bulbs further (approx. 5 inches).
Tip #2 – Naturalize
If you’re not particular on where your flowers grow, grow more of them! Naturalizing refers to “informal” or natural growth patterns. Look for bulbs that are “great for naturalizing” and watch them multiply! These self propagating plants create sweeps of large flowers and are ideal for mass landscaping.


Tip #3 Colour Planning
There are a few tips for creating jaw-dropping displays to get an extra pop of colour in the garden. One of our favourite tips for planting bulbs is simply referring to a contrast colour chart. Adding contrasting displays will not only create a more vibrant burst of colour but will also add depth. When planting contrasting colour displays, try to layer your blooms with shorter rows in front of tall flowers for the best views!
Bonus tip: Try planting white flowers in shady areas to make it appear lighter.
Tip #4 Timing
It’s always the best time to plant fall bulbs in the fall, right? That is not always true. An essential aspect of planting fall bulbs is to plant them five to six weeks before the ground freezes, which can be different for every region. To make sure your bulbs are going to perform their best, make sure they establish their roots while the soil is still warm by monitoring the expected frost in your region and planting them before it’s too late.
Tip #5 Containers
Planting fall bulbs in a container is just as easy as it is to plant them in the ground. The great part about planting your fall bulbs in a container is that you can plant almost every type of fall bulb there is. Even better, you can layer your fall bulb arrangement in your container, giving you blossom after blossom! To start, choose a fall bulb assortment that will thrive in the environment you’re going to place them in. If you have plenty of sun, you’re in luck and you can choose just about any bulb you like. If your container will be placed in shade for most of the day, you’ll want to consider bulbs that can tolerate shade, like Snowdrops, Crocuses, Scillia, Daffodils, or Fritillaria .

Have a suggestion or question?
Let us know at info@wildwoodoutdoorliving.com. Sign up here for more blogs dedicated to better gardening!

by Wildwood Outdoor Living | Jul 18, 2022 | news
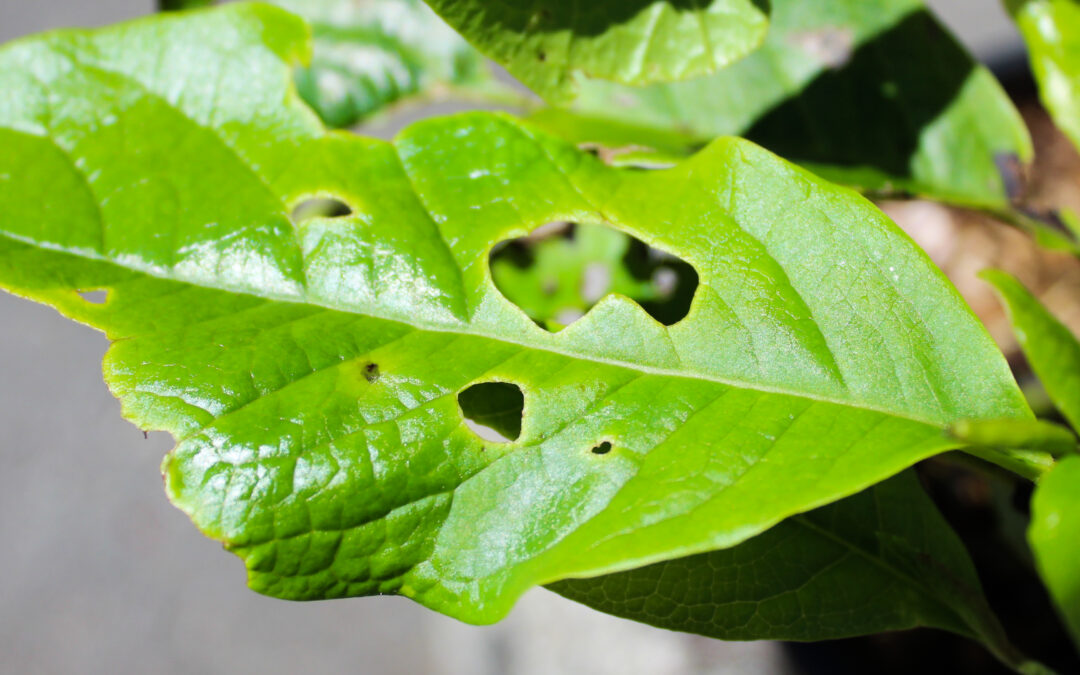
With only four types of slugs in Canada, it sure feels like there are more than enough to go around! For as long as we can remember slugs have always been one of the worst pests in the garden. Nibbling tiny little holes in just about everything invites unwanted diseases into our plants, killing all our hard work! Don’t worry, if slugs are causing you problems we’re here to help solve them. In this week’s blog, we turned to our Nursery Experts to see what we can do in the garden to treat slugs.
Signs of Slugs
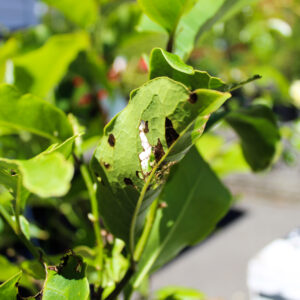
Since slugs like to feed at night, you will likely not catch them in the act until it’s too late. Once you notice tiny bite-size nibbles turning into large unsightly holes, it’s time to act. These tiny holes are an ‘open invitation for disease and infestation. Immediately prune off the dead leaves or any foliage that has been affected, to prevent further damage.
Ask Our Experts
 When we asked our expert Shawn what his treatment plan for slugs looked like, he sure had a lot to say. It seemed as if he’s tried everything there is and he was happy to share with us what works. Here are five different ways to help treat slugs, from our Nursery Expert, Shawn.
- “A handy trick to finding your slugs is to place a 1ft 2×6 piece of wood on the surface of the ground, directly under the affected plants. In the early morning, turn the wood over. Depending on where you live, you might find a handful of nocturnal critters. If you’ve collected some slugs, then how you dispose of them is up to you! Repeat this trick as many times as you need.”
- “Did you know, slugs won’t cross copper? Commercially available, copper tape or copper wire can be applied to containers or garden bed frames, to prevent slugs from getting into your crops.”
- “Garter snakes are a big predator of slugs, so if you happen to see some in your garden, let mother nature do its best work at getting rid of them naturally!”
- “Ducks love slugs, keeping ducks around your garden not only gets rid of slugs but also creates many, many other benefits for your plants!”
- “Above all, the best practice for keeping slugs away from your garden is to keep your yard and compost, neat and tidy. Denying slugs the natural habitat they need to live.”
Have a suggestion or question?
Let us know at info@wildwoodoutdoorliving.com.
Sign up here for more blogs dedicated to better gardening!

by Wildwood Outdoor Living | Jun 24, 2022 | news
Zippy yet delicate, the Hummingbird is always a pleasure to see around the garden or at your window. Hummingbirds are beautifully coloured and quirky to watch – and they’re also fantastic pollinators! In this week’s blog, we’re here to share some exciting facts about our hummingbird friends, what makes them unique, and how you can attract them to your home garden.
Canadian Hummingbirds
Across South America and North America, the Hummingbird can be found in over 300 varieties! However, in Canada, there are five extraordinary varieties that not only call our country home but also our gardens! Check them out below.

Anna’s Hummingbird – Known for their territorial instincts, Anna’s Hummingbird was named after the Duchess of Rivoli, Anna De Belle Massena, for its Ruby coloured neck (males). This particular Hummingbird can reach up to 80 km per hour, one of the world’s fastest animals for its size! Anna’s Hummingbird calls the shoreline of the west coast home, from British Columbia to Mexico.

Calliope Hummingbird – Is the teeniest-tiniest bird that can be found in North America! Weighing just one-tenth of an ounce (about the weight of a penny!) and around three inches long. The Calliope Hummingbird holds the title of the world’s smallest migratory bird. Spending its winters in Mexico and travelling to British Columbia for breeding.

Black-chinned Hummingbird – Unlike most colourful male hummingbirds, black-chinned hummingbird males are noticeably less colourful and often mistaken for females. The distinction, male black-chinned hummingbirds, have a metallic, unique colour-changing violet throat. If you listen carefully, the black-chinned Hummingbird’s wings flapping sounds similar to that of a bee buzzing! These amazing hummingbirds call the interior of the united states west coast home, with minimal breeding grounds in some of Alberta.

Rufous Hummingbird – A uniquely coloured hummingbird with a copper-coloured appearance featuring glowing spikes of green. In this species of Hummingbird, even the females show slight coloration – just less vibrant. Well-known for being territorial, the Rufous Hummingbird is small but mighty and will do its best to scare other birds away from its favourite source of nectar. From Mexico to British Columbia, the Rufous Hummingbird has been known to reach parts of Alaska!

Ruby-throated Hummingbird – The most common Hummingbird found in Canada! With a mouse-like squeak, the Ruby-throat hummingbird can flap its wings more than 50 times in a second! Breeding from Newfoundland to Alberta, down to Florida and across to Kansas! The Ruby-throated Hummingbird knows how to make an appearance!
Attracting Hummingbirds
Hummingbirds are one of Mother Nature’s best pollinators! With their long-skinny beaks, they can access pollen in places that even the bees can’t reach. Introducing pollinators like hummingbirds to your garden is a great way to grow healthy and happy plants by nourishing a solid ecosystem. To reap the benefits these pollinators offer, there are ways to make your garden more attractive for our hummingbird friends.

Colours
You might have noticed that hummingbird feeders are primarily red. This is because red is their favourite colour! Hummingbirds see in the combination of ultraviolet colours, making reds, pinks and oranges highly visible. When planting flowers, aim for bright reds to get their attention.
Feeders
Approaching a highly visible red saucer filled with sweet nectar has become second nature to our hummingbird friends. Before hanging your feeder, it’s essential to know that once these birds are familiar with it, they will come to rely on your feeder for their food source. The feeder will need to be replenished weekly to ensure your hummingbirds get the nutrients they need to survive. To hang your very own hummingbird feeder, try this!

Hummingbird Tray Feeder
1.) To feed your hummingbirds, mix 1 part sugar with 4 parts boiling water and mix until fully dissolved. It is important to use hot water so that any chemicals (such as bleach) are fully evaporated and will cause no harm to the hummingbirds.
2.) Allow your hummingbird nectar to cool down fully before pouring it into the bird feeder. This will prevent any plastic from melting and ensure that the Hummingbird does not get burned.
3.) Once your nectar is cold to the touch, pour it into your favourite hummingbird feeder and hang it somewhere highly visible!
Cleaning Your Feeder – Be sure to always wash your feeder each week! It’s essential to ensure mould does not build up in the feeder, as this can poison your hummingbirds! To prevent mould build-up, look for hummingbird feeders that are easy to clean. Once a week, soak your hummingbird feeder in hot water with mild soap. Use a bottle brush to clean hard-to-get areas, rinse with hot water, and set aside to dry.
Favourite Plants

Above all, our favourite method of attracting more hummingbirds is to plant their favourite plants! Since we’ve been in the gardening industry for over 40 years, we know our stuff when it comes to hummingbird favourites. Throughout that time, we’ve made a few notes that we’ve been asked to share yearly. To help you attract more hummingbirds, check out our list of Hummingbird Favourites here.
Have a suggestion or question?
Let us know at info@wildwoodoutdoorliving.com.
Sign up here for more blogs dedicated to better gardening!
by Wildwood Outdoor Living | Mar 17, 2022 | How To, news
Growing flowers for cutting is the best way to get the most out of your blooms! Whether you’re growing them for gifting, décor or fragrance, a constant supply of flowers is a beautiful gift from nature that will put a smile on anyone’s face. In this blog, we’re here to teach you everything you need to learn to grow your very own constant supply of cut flowers this year.
Step 1: Choosing Your Flowers

Choosing the best flowers for your cut garden isn’t as easy as picking the prettiest flowers you can find. After all, it doesn’t matter how lovely the flower is if all the petals fall off after it’s cut. A cut garden with a constant supply of blooms requires planning to ensure each flower’s needs are met and yours.
Long Stem
You will want to look for flowers with a long and robust stem for the best cut flowers. A long stem will allow your flower to absorb a healthy water supply, providing you with healthy, long-lasting blooms!
Bloom Times
In Canada, it’s common for most provinces to get up to 6 months of flower blooms. However, in 6 months, the flowers you choose to plant are likely to have different bloom times. When planning your cut-flower garden, be sure to check the package for bloom times and the duration of blooms. We recommend researching your favourite flowers to ensure you meet their growing requirements first. Then, using a pen, pencil, paper, computer, write out the following chart to help plan your bloom times. Here is an example of a successful cut-garden that will produce a combination of three or more blooms, all season long.
| FLOWER |
SOW |
MAY |
JUN |
JUL |
AUG |
SEPT |
OCT |
| Bachelor Button |
Direct, after last frost |
X |
X |
X |
X |
X |
X |
| Sweet William |
Direct, after last frost |
X |
X |
X |
|
|
|
| Poppy |
Direct, just before last frost |
X |
X |
|
|
|
|
| Foxglove |
Direct, after last frost |
|
X |
X |
X |
X |
|
| Dahlia |
Direct, April/May in warmer soil |
|
|
X |
X |
X |
X |
| Sunflower |
Direct, April/May in warmer soil |
|
|
X |
X |
X |
X |
| Zinnia |
Direct, after last frost |
|
|
X |
X |
X |
X |
Re-blooming
Another great way to get continuous blooms is to plant flowers that re-bloom. Re-blooming flowers produce more flowers even after you’ve harvested their blooms. It is essential to know that re-blooming flowers may take a while to produce more blooms, so be sure to time your flower harvest according to each re-blooming flower.
Step 2: Planning & Planting

Now that you have successfully planned a cut-garden that produces continuous blooms all season long, it’s time to plant them! For happy and healthy cut flowers, follow the below instructions for the best planting practices.
Tip: Consider planting contrasting colours together for a pop of colour!
Care instructions
Whether planting from seed or bulb, each flower you choose should come with care instructions. It’s essential to pay attention to the sun, water, spacing, planting depth and soil requirements for each flower you’re planting. We recommend keeping your seed/bulb package on hand for reference, as this information can be easily forgotten (plus, it’s also an excellent way to remember what you’ve planted!).
Soil & Fertilizer
If you are planting your flowers from seed or bulb, the soil requirements may vary. Seed Starter Mix will provide the best nutrients for seeds to grow healthy and strong. Once the seeds are ready to be transferred to the garden or pot, it is best to use well-draining soil like sandy loam, which is also best for bulbs. For added nutrition, mix compost in with your soil.
Tip: Add a layer of mulch to the top of your garden bed to reduce the chances of weeds and retain moisture.
Spacing
When planting your flowers, it’s important not to space them too close together, as this will create stress for your flowers, leading to disease and unwanted pests. If the flower packaging does not indicate the space needed for your flowers to grow, space your flowers according to size. As a general rule, space small flowers 6-12 inches apart, space medium size flowers 12-18 inches apart and space large/tall flowers 18-36 inches apart.
Tip: Mix your annuals and perennials for constant blooming, avoiding empty spaces.
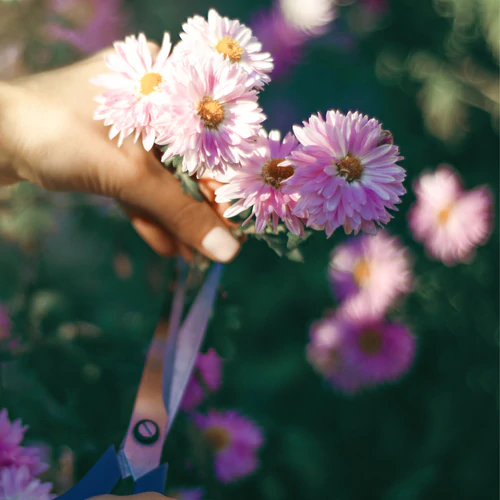
Step 3: Cutting & Cut Flowers

There are two areas to consider when it comes to cutting your new blooms. The first is to cut your blooms safely to maintain the integrity of your plant. The second is to get as much life out of your flowers as possible once they’ve been cut and placed in a vase.
Cutting Flowers
Taking a pair of pruners to your beautiful new blooms can be scary. But, with our help, you’ll have nothing to worry about. Get a clean pair of pruners, 70-100% Isopropyl alcohol and a clean rag. Using your clean pruners, follow the steps below while using the alcohol and clean rag to wipe your pruners clean in between use. This will prevent the spread of disease.
1. Cut: After your flowers have retained moisture overnight and are firm to the touch in the morning. Cut a 45-degree angle, 1 inch from the bottom of the stem. This will provide a better water intake for your flowers and allow your flowers to stand on a point.
2. Water: Immediately place your freshly cut blooms in room temperature water or cold water (for bulbs). Placing your flowers in water immediately is important to prevent air absorption.
3. Feed: For longer-lasting blooms, flowers require nutrients to thrive. To make your flower food, try the following recipe.
Flower Preservative
1 tsp sugar
1 tsp bleach
2 tsp lemon or lime juice
1-quart lukewarm water
Tip: Use a plastic pale to place your flowers in, as metal can affect pH levels.
Cut Flower Health

Now that we’ve created a beautiful arrangement of homegrown cut flowers, it’s time to give them the best possible chance at survival by caring for them in their new habitat. Here are the best tips for keeping your cut flowers happy and healthy for as long as possible.
- Don’t overcrowd. Overcrowding could lead to poor air quality, resulting in disease.
- Keep flowers away from sunlight and drafts. The best place for flowers is somewhere they can stay cool.
- Refresh water frequently, no less than every 2-3 days.
- Check for limpness re-cut as needed to increase water intake.
- Prune wilted blooms to prevent disease.
- Remove any debris from the water to keep it clean.
- Re-feed flowers each time the water is refreshed.
- Re-cut flower stems slightly at a 45-degree angle before placing them back into a freshwater vase. To prevent build-up of dirty water and allow for proper water intake.
There you have it! With this handy guide, you’ll be growing fresh-cut flowers in no time. The only thing left to do is decide on your favourite arrangements – the possibilities are endless!
Have a suggestion or question?
Sign up
here for more blogs dedicated to better gardening!
by Wildwood Outdoor Living | Jul 28, 2021 | news
Your garden has done it’s job by creating a beautiful space, providing nourishment to the earth, feeding you and your loved ones, and now it’s time to…die? Perhaps not! When August approaches, not all of us think about life after death for our beautiful plants. We generally think “until next time good friend”.
At Wildwood Outdoor Living Centre we want to help you grow as a gardener. To get the very most out of your garden in August, we’re going to share a few tips on how to collect seeds for next year. Here are a few tips from our garden to help you harvest your own seeds.
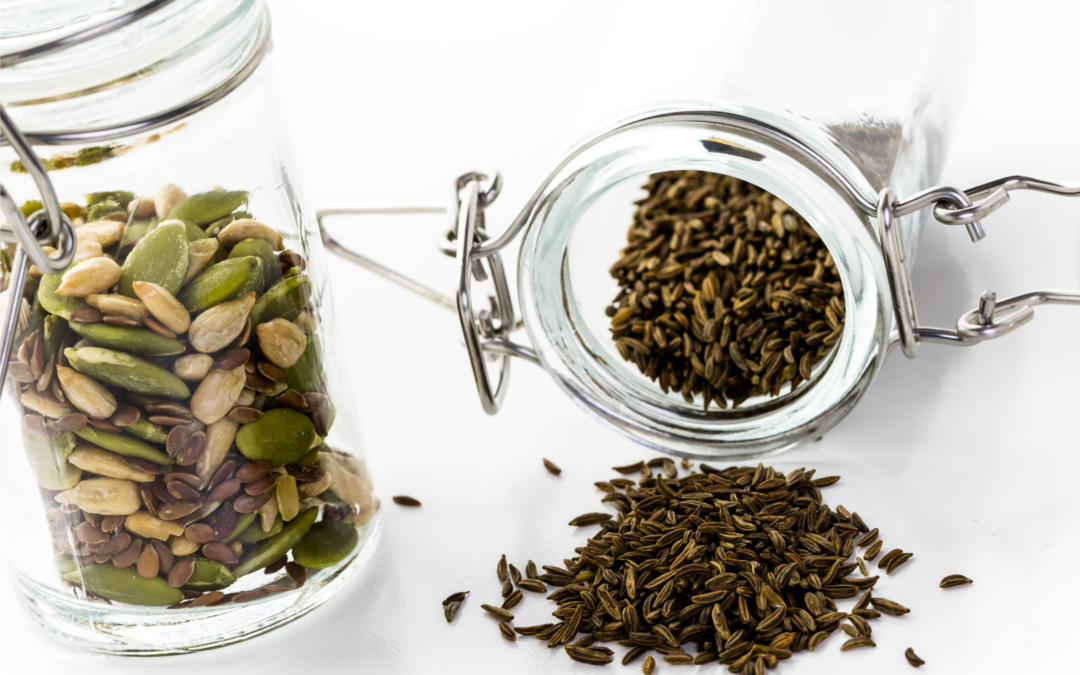
Once your flowers have pollinated, they will produce seeds. Note: fresh cut flowers may not provide seeds as they are mostly cut before pollination.
Steps
1.) Cut the flower head of your plant.
2.) Remove the seeds and place on wax paper.
3.) Give it a week to let those seeds dry.
4.) Gently clean the seeds and store them in an envelope in a cool dry place. Do not refrigerate.
For the best seeds, try cucumbers, tomatoes, peppers, eggplants, melons, squash.
Steps
1.) Allow your vegetable to fully development before harvesting.
2.) Wait 15 days after your vegetables have been harvested to collect the seeds. Seeds should be fully browned and dried on plants.
3.) Set your on a wax piece of paper and allow them to dry for a week.
4.) Store your seeds in an envelope in a cool dry place. Do not refrigerate.
And there you have it, next years harvest is already well on it’s way. Just be sure not to get your seeds mixed up and good luck! For all your start up seed needs, or start up soil, visit us at www.wildwood.express/. Happy Harvesting!


Have a suggestion or question?
Sign up
here for more blogs dedicated to better gardening!