by Wildwood Outdoor Living | Feb 24, 2022 | Gardening 101
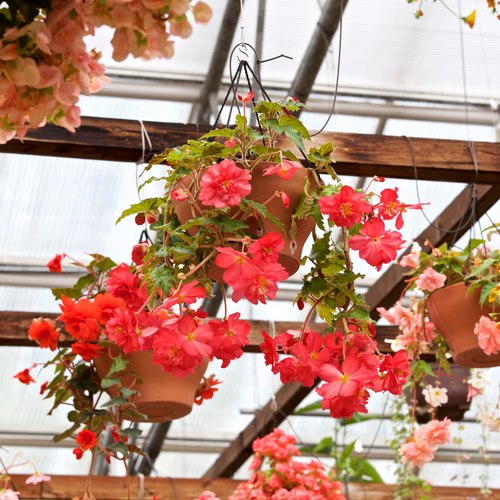
With over a thousand varieties, Begonias are famous for their rose-like appearance and ability to create beautiful hanging baskets, window boxes and all other containers! Not only do Begonia’s make the perfect container plant, but they can also be used for bedding in shadier areas! Let’s see what else there is to learn about Begonias.
About Begonias
Originating in the tropics of Central and South America and parts of Africa. Begonia’s enjoy the moisture and shade that tropical rainforests have to offer. Over centuries we have cultivated Begonias to grow in the warmer and dryer conditions that we have to offer in North America.
It is said that when given a Begonia it can represent uniqueness, caution and/or gratitude. Though each and every colour of Begonias possesses its own unique symbol. Pink Begonias represent romance and love. Blue Begonias represents creativity or passion. Yellow Begonias represents wealth and happiness.
Varieties
With thousands of varieties in different colours and shapes, there are four main types of Begonias; Fibrous, Tuberous, Canes and Rhizomatous.
Fibrous Begonias are known for their waxy appearance with round leaves. Performing well in both partial shade to full sun. Varieties that fall under the Fibrous Begonias category include Cane Begonias and Dragon-wing Begonias.

(Pink Waxed Begonia)
| Light |
Partial shade to full sun |
| Temperature |
23 C |
| Soil |
Rich, well drained soil |
| Moisture |
Prefers neither too dry nor too wet. Aim for 1 inch of water per week. |
Cane Begonias are sometimes called “Angel Wing” Begonias for their uniquely-shaped, spotted wings. Cane Begonias are easy to grow and flower year-round indoors when cared for in the right conditions. Varieties that fall under Cane Begonias include Polka Dot Begonia, Albo Picta and Tamaya.

(Albo Picta)
| Light |
Bright indirect sunlight |
| Temperature |
18-23C |
| Soil |
Rich, well-drained soil |
| Moisture |
High-humidity |
Tuberous Begonias offer big colourful blooms in shady areas that most flowering plants can’t tolerate. They come in a variety of shapes and colours. Popular varieties of Tuberous Begonias include Double Begonia Cemlia Orange, Fibriata White and Pendula Yellow.

(Double Yellow Begonia)
| Light |
Shade, with afternoon sun |
| Temperature |
23C |
| Soil |
Rich, well-draining soil |
| Moisture |
Maintain medium moisture |
Rhizomatous Begonias range from small table size plants to huge 3ft floor plants. Rhizomatous Begonias are known for their unique and robust foliage and not their flowers. Great indoor plants for bathrooms and kitchens, as they prefer low light and high humidity.

(Eyelash Begonia Tiger Paw)
| Light |
Light shade, low-indirect sun |
| Temperature |
14-22C |
| Soil |
Rich, well-draining soil |
| Moisture |
Medium-low moisture |
Planting Begonias
Whether you’re looking to add colour in shady areas or create masterful hanging baskets with long-lasting blooms, Begonia’s are just about in season for planting! Browse through our huge selection of Begonias to find your favourites. Also, check out the latest episode of Get Up and Grow with Gord Nickel and Jasmine Bala, below to learn more about planting your very own begonias this year.
Do you have a photo of your Begonias?
Sign up
here for more blogs dedicated to better gardening
by Wildwood Outdoor Living | Feb 10, 2022 | Gardening 101
We’re counting down the days until spring and we bet you are too! As we plan for our best garden yet, we’re sometimes reminded of something that we missed the mark on last year. We adorned our flowers and harvested many vegetables but something might have been missing. It’s not until Diane from next door offers you some of her homemade jellies and pies, that you might remember just how much you’ve been wanting to harvest fruit for that exact reason! Don’t worry, we’re here to help you get started on finding compatible fruit plants to get you jarring, jamming and jellying in no time.

Currants
Belonging to the Ribes family, currants can be found in a variety of colours and flavours including Currants White, Currants Black and Red Currants. Originating from Germany, Denmark, the Netherlands, the UK and North America. These small shrubs enjoy warm summers are cool winters. Tasty and versatile, currants are popular in jams, jellies, tarts, pies and fresh!
Planting:
These excellent ground covering shrubs are deer resistant and grow in zone 3. Growing up to 6 ft tall and 3-6 ft wide, currants require well-draining soil in full sun to partial shade.
Harvesting:
In June and July, you can expect a huge harvest of currants grown in clusters called ‘racemes’. Pick your currants when they begin to soften. Chilling or freezing them for an excellent prolonged life!
Tip:
Space your currant plant 4-5 feet apart. After planting water your plant thoroughly, then maintain even moisture throughout the spring and summer for best results.

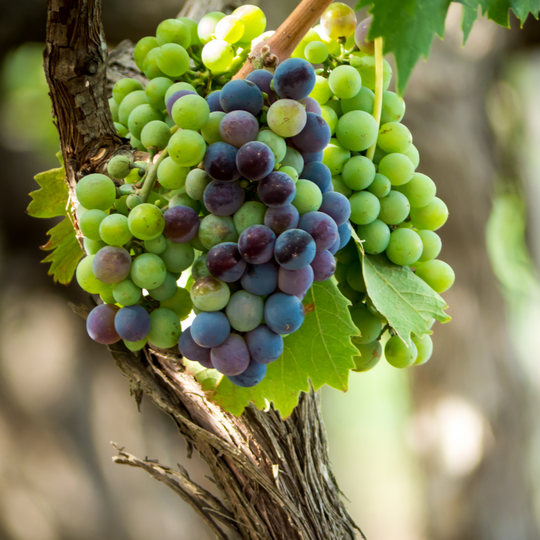
Grapes
As part of the Vitaceae family, grapes are adored for their versatility. From snacking from fresh to homemade jams, jellies, juices and of course wines! Although native to the Mediterranean and Central Asia grapes can grow all over the world in zones 4-10. Popular varieties of grapes that can be grown in Canada include Grape Himrod Seedless, Grape Vanessa Seedless and Grape Sovereign Coronation.
Planting:
For the healthiest results, place your grape plant in a full sun location with well-draining soil. Growing 4-10 ft tall and 6-10 ft wide, grapes are natural climbers who will use their surroundings for support. To help your grapes grow nicely, it is best to use a trellis for easier harvesting.
Harvesting:
In Canada, you can expect to harvest your grapes from September to October. With up to twenty pounds of grapes produced from a single mature grapevine! Dependent on the variety and location of your plant, grapevines can produce an optimal harvest for 20-40 years, giving you plenty of grapes for years to come!
Tip:
When watering your grapevine, be sure to apply water to the root source only. Watering the foliage could eventually lead to disease. Water 1/2 inch to 1 inch per week initially. Once matured, increase watering to 5 gallons over 3×3 ft.

Blackberries
As a part of the Rosaceae family, blackberries are related to Roses. From all over the world, blackberries have been cultivated for food, medicine and dye in Asia, America and Europe. The three types of blackberries are Erect Thorny Blackberries, Erect Thornless Blackberries (Blackberry Triple Crown) and Trailing Thornless Blackberries (Blackberry Chester).
Planting:
For best results plant your blackberries in full sun with well-draining soil that has a pH level of 5.5 to 7.5. Growing anywhere from 3-10 ft tall and 3-10 ft wide, be sure to set your rows 10-12 feet apart.
Harvesting:
Depending on the season, you can sometimes harvest your blackberries end of June but will likely get the most out of your harvest in July and August. Each blackberry plant will produce 10 to 20lbs of fruit per season! Great for freezing and adding to smoothies or thawing for baking!
Tip:
Use a trellis system to support your blackberry plant. This will not only allow your blackberry plant to grow nicely but it will make a much easier harvest!

Blueberries
The most popular plant of the Ericaceae family! Blueberries are an exceptional perennial berry that has a great number of health benefits including vitamin K, antioxidants, minerals, immune boosters and more! Originating in North America blueberries can now be found growing naturally all over the world.
Planting:
For a healthy harvest plant, your blueberry plant in zone 3 in at least 3/4 sun as blueberry plants do not tolerate shade. It is also important that blueberries grow in acidic soil, so be sure to test your soil levels beforehand and aim for a pH of 4.5 to 5.5. Your planting space has to be determined by the variety of blueberries you choose to plant, some varieties can grow up to 12ft tall and others only 4ft tall.
Harvesting:
Blueberries are easy to pick, if you find yourself pulling the berries from the branch they are not yet ready. Blueberries should almost fall off the branch when they’re ready. Each summer you can expect 5-7 pints of fresh blueberries ready for eating or freezing from July to August.
Tip:
Blueberry plants can be susceptible to root rot. To avoid root rot maintain even moisture at 1″ deep, never soggy.

Loganberries
A beautiful dark red berry, crossbred between the North American Blackberry and European Raspberry! Very flavourful and an essential source of Manganese and Vitamin C. Belonging to the Rosaceae family, Loganberries were discovered in California in 1881.
Planting:
In zone 5, Loganberries perform best in full sun but can tolerate partial shade. Although maintenance is easy, be sure to have well-draining and fertile soil for best harvest results. Growing up to 10ft tall and 5 feet wide, Loganberries require trellising to prevent them from dragging across the ground, causing them to lose berries.
Harvesting:
Loganberries can be harvested later summer, from August onwards. With a single plant producing 15-18lbs of fruit each year, you can expect to be making plenty of juices, jams, pies, tarts, syrups and more in no time!
Tip: Loganberries harvest at different times and should be picked weekly. Harvest berries when they appear dark-bright red.

Goji Berries
A member of the Solanaceae family and superfood family! The Goji Berry is known for its many health benefits including weight loss, better sleep, increased performance and much, more! Originating from China, Tibet and Mongolia the Goji Berry can now be found across the world in zones 5-9.
Planting:
When planted in full sun with slightly alkaline soil (pH range 6.8-8.1) Goji Berry plants can grow from 3-13 ft tall and 1-3m wide. If planting more than one bush, space your plants 5 feet apart for easy access for harvesting.
Harvesting:
Goji Berry plants will produce a harvest after two years, with each plant producing 2-6 lbs of berries per year. Once the berries have turned red allow them to remain on the vine for several weeks before harvesting. If the berry is not yet ripe it will taste slightly bitter.
Tip:
Try dehydrating your Goji Berries in the oven for a quick and tasty treat filled with health benefits!

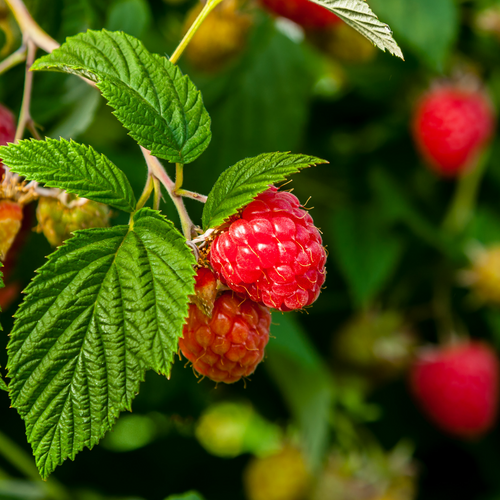
Raspberries
Raspberries belong to the Rosacea family and are believed to be native to Turkey but can now be spotted growing wild all over the world, including Canada, the USA and Europe. These versatile berries are easy to pick, low in sugar, cold and heat tolerant, self-pollinating, thornless and are a great source of nectar for bees.
Planting:
Although raspberries are willing to tolerate partial shade, they much prefer full sun with at least 6 hours of bright sunshine. The more sun you’re able to provide your raspberries, the more fruit you can expect to harvest! Raspberries prefer well-drained soil that is rich in nutrients. If your soil is on the heavy-clay side, it would be best to use a raised garden bed to provide proper drainage.
Before planting your raspberries, be sure to provide your soil with the proper nutrients by mixing a well-aged compost or general potting compost into your soil before planting. This is especially important, as raspberries need plenty of nutrients to bear fruit. The ideal pH for raspberries is 6.0 and 6.5.
Harvesting:
There are two main categories of raspberry plants to consider when planting. The plant you choose will depend on when you are looking to harvest your raspberries and how much.
1. Summer-fruiting – Also known as summer-bearing raspberries, grow fruit on the canes that grew last summer. If you plant your raspberries this year, you can expect raspberries the following summer.
2. Ever-bearing – Also known as fall-bearing raspberries, grow fruit on canes from the summer of the same year. If you plant raspberries this year, you can expect raspberries this autumn.
If you’re someone who wants fresh summer fruit, summer-fruiting raspberries are a great choice for you. If you’re someone who would prefer lots of berries that are worth the wait, ever-bearing raspberries are your best choice. Though, if you ask around it is highly recommended to go with both! Giving you two harvests a year!
Tip:
Avoid planting raspberry plants where tomatoes, peppers and potatoes have grown to reduce the risk of verticillium.
Sign up here for more blogs dedicated to better gardening

by Wildwood Outdoor Living | Feb 3, 2022 | Gardening 101
![Winter Pond Fish]()
If you’re lucky enough to have a pond, you know the joy it brings to your home and your backyard. From attracting nearby wildlife to lulling you to its relaxing sounds. Ponds create magical landscapes and beautiful homes not only for ourselves but for pond fish too! But what happens to our fish friends when we take to the cozy indoors for the winter? Good question. In this blog, we’re going to discuss the dos and don’ts of winter pond fish care.
Pond Fish
To keep your fish safe during the winter, you will need to start by identifying whether your fish can withstand cold winter temperatures. Here is a list of popular pond fish that can survive in outdoor ponds during the winter months.

Sterlets

Koi

Goldfish

Sticklebacks

Golden Rainbow Trout

Rosy Red Minnows
Feeding
Due to their natural ability to hibernate, you must not feed your fish during the winter months. To survive such cold temperatures their bodies adapt by lowering their metabolisms and using their energy to stay moving, instead of digesting. Feeding your fish during this process is likely to cause damage or death by choking or toxicity.
Winter Pond Care
There are two key elements when it comes to helping your pond fish survive the winter. The first is to ensure your fish don’t freeze and the second is to ensure they’re getting adequate oxygen. To do this, you’re going to want to have a Pond Aerator or Aqua Jet Pump. Both will create a more stable environment for your fish by increasing air circulation which will prevent your pond from freezing and provide your fish with the oxygen they need to survive while preventing unwanted gas build-up.
Frozen Pond Tips
If your pond is already frozen, do not break the ice. Breaking into a frozen pond could be deadly for fish either by striking them or stunning them from the vibrations. For the best tips and tricks to help your pond fish in the winter, check out the latest episode of Get Up and Grow with Gord and Jasmine below.
How did your winter pond care go?
Sign up
here for more blogs dedicated to better gardening
by Wildwood Outdoor Living | Jan 28, 2022 | Gardening 101
When it comes to growing small fruit plants, raspberries are one of the easiest growers. They provide an impressive harvest and they’re freezable, giving you a constant supply of berries all year round! These versatile berries are easy to pick, low in sugar, cold and heat tolerant, self-pollinating, thornless and are a great source of nectar for bees. If raspberry jam, smoothies, pies, salad and yogurt toppings are on your menu, growing raspberries is going to save to some money and time at the grocery store. In this article, we’re going to help you with what you need to know to get started on your very own raspberry bush this year.
About Raspberry Plants
With over 200 varieties, there is more than meets the eye when it comes to raspberry plants. Raspberries belong to the Rosacea family and are believed to be native to Turkey but can now be spotted growing wild all over the world, including Canada, the USA and Europe.
Types of Raspberries
There are two main categories of raspberry plants to consider when planting. The plant you choose will depend on when you are looking to harvest your raspberries and how much.
1. Summer-fruiting – Also known as summer-bearing raspberries, grow fruit on the canes that grew last summer. If you plant your raspberries this year, you can expect raspberries the following summer.
2. Ever-bearing – Also known as fall-bearing raspberries, grow fruit on canes from the summer of the same year. If you plant raspberries this year, you can expect raspberries this autumn.
If you’re someone who wants fresh summer fruit, summer-fruiting raspberries are a great choice for you. If you’re someone who would prefer lots of berries that are worth the wait, ever-bearing raspberries are your best choice. Though, if you ask around it is highly recommended to go with both! Giving you two harvests a year!
Varieties
With over 200 varieties, raspberries can be found in many colours and sizes. Most commonly found in shades of red, wildwood is happy to carry 19 varieties, some with unique shades of yellow, purple and even honey. You can browse through our selection here.
Raspberries, Fall Golden – Everbearing
Raspberries, Black – Summer Bearing
Growing conditions
Grown in zones 3-9, each raspberry variety has its own preference. Typically, red and yellow raspberries prefer cooler climates with black and purple raspberries requiring a little more warmth to survive.
Sun: Although raspberries are willing to tolerate partial shade, they much prefer full sun with at least 6 hours of bright sunshine. The more sun you’re able to provide your raspberries, the more fruit you can expect to harvest!
Soil: Raspberries prefer well-drained soil that is rich in nutrients. If your soil is on the heavy-clay side, it would be best to use a raised garden bed to provide proper drainage. Before planting your raspberries, be sure to provide your soil with the proper nutrients by mixing a well-aged compost or general potting compost into your soil before planting. This is especially important, as raspberries need plenty of nutrients to bear fruit. The ideal pH for raspberries is 6.0 and 6.5.
How to Plant Your Raspberries
Have what it takes to grow your very own raspberry plants? We hoped so! Here are the steps you need to get your new raspberry plant rooted and ready to bear as most fruit as possible. Keep in mind that the best time to plant raspberries is in the spring while the soil is workable and the climate is ideal.
1. Find the perfect place for your raspberry plant in full sun with well-draining soil. It is recommended to plant your raspberries against a fence or wall for easier picking. For spacing, be sure rows 3-4 ft apart with 24 inches in-between plants.
2. Dig a hole the size of the root mass, minus 1 or 2 inches so that the crown of the raspberry plant sits 1-2 inches above the ground.
3. Place your raspberry plant in the hole and loosen the root ball. Cut tightly wound roots to promote better root growth in the new soil.
4. Cover your raspberry plant with well-fertilized soil, water well and cover with mulch to retain moisture.
When first planted, be sure to water often maintaining lightly moist soil avoiding waterlogging the root system. Approximately 1-2 inches a week.
Pruning & Care Tips
- Avoid planting raspberry plants where tomatoes, peppers and potatoes have grown to reduce the risk of verticillium.
- Expect your raspberries to expand and spread.
- Summer-bearing raspberries: prune off old fruiting canes to promote new cane growth.
- Ever-bearing: prune off old fruiting canes in the summer and again in the fall for 2 harvests. For one harvest, no pruning is necessary.
- Watch for insects and be sure to treat infestations immediately. Insects to watch out for are Japanese beetles, Cane borers and Spider mites.
- Keep your plants clear of debris to prevent contamination and disease.
With what we’ve gone over today, we’re confident you’ll be picking fresh berries from the garden in no time! Now all that’s left to do is find your favourite raspberry recipes. Happy planting and good luck this season!
How did your raspberry planting go? Let us know at info@wildwoodoutdoorliving.com
Sign up here for more blogs dedicated to better gardening

by Wildwood Outdoor Living | Dec 9, 2021 | Gardening 101
It’s that time of year again, and our fresh-cut BC Christmas Trees are in! There are so many benefits to buying a real tree for the holidays. Not only does it save you storage space, but it also gives your home that fresh forest scent! If you’re eco-conscious like we are, you can rest easy knowing that Christmas Tree farming has been proven to help fight climate change. On top of that, purchasing from small, local businesses is a great way to boost your community’s economy! It is a win, win.
If you’re new to buying real Christmas trees or even if you’re a seasoned vet in the tree game, there are a few things we want to share with you when it comes to making that special selection. We’re here to help you decide which type of tree will be best for your home, and what to look out for when picking it out.
Tree Choices
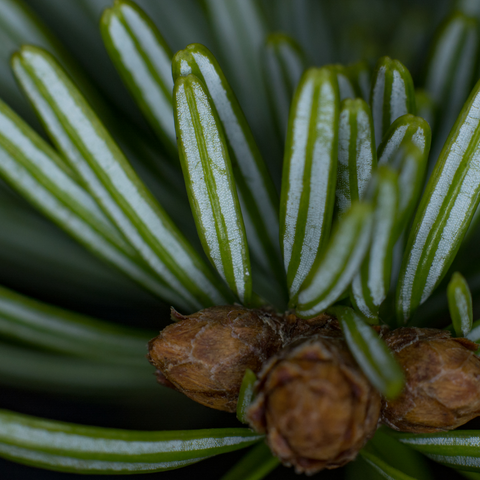
Noble Fir
The noblest of all Christmas Trees! With a strong frame, amazing needle retention and well-spaced branches the Noble Fir is the most sought-after Christmas tree on the market. Shaped to stand tall, full, and easy to decorate. Enjoy coming home to the refreshing smell of the fresh outdoors with a Noble Fir Christmas tree. Be sure to get these while you can, they’re a huge favourite!
Nordmann Fir
If you are looking for something a little more unique this year, the Nordmann Fir is a great choice for you. Large dark green needles with a silver contrast underneath gives this thick, dense tree a lot of character. Its full base leads to trim and narrow points with shorter branches, creating a shape that was once considered the ‘Classic Christmas Tree’. Mildly fragrant, the Nordmann Fir is a great Christmas tree for those with allergies.

Fraser Fir
Tall, narrow, and compact, the Fraser Fir Christmas tree is the tree for small spaces. Its short and strong branches carry smaller soft needles that hold well and make for easy decorating! Not only does this tree bring home aromatics from the great outdoors, but it also has a hint of citrus! Be on the lookout for this tree with excellent needle retention and a blue tint on the underside of the needles.

Douglas Fir
If you love having a real Christmas tree for the beautiful fragrance it brings into your home, then a Douglas Fir is the tree for you. Having one of the best fragrances of fir and citrus combined, the Douglas Fir Christmas tree will help you recall warm holiday memories year after year. This soft green tree is easy on the eyes, and on the wallet as the most economical tree on the market!

Grand Fir
The Grand Fir is a beautiful tree to decorate with soft and dense needles! Adored for its perfect pyramid shape and extremely fragrant lemony scent, the Grand Fir Christmas tree is one of the most popular Christmas tree choices. With good needle retention to boot, you can throw out your scented holiday candles and fill your home with the fresh scent of the Grand Fir for weeks to come. To ensure the best bang for your buck, go with a Grand Fir Christmas tree that’s fresh-cut with no scaring on the bark at the bottom- this will ensure proper water intake for the holidays!

Charlie Brown
Since 1965, Charlie Brown’s decision to pick an imperfectly perfect Christmas tree for his Christmas play has taught us the true meaning behind Christmas. Christmas isn’t about what you get, or what you have. It’s about being together and giving back. Today our “Charlie Brown” Christmas trees are Douglas Fir trees that come just as they are, deserving the same amount of love as all the other trees, if not more.
Charlie Brown: This little green one here seems to need a home.
Linus Van Pelt: I don’t know, Charlie Brown. Remember what Lucy said? This doesn’t seem to fit the modern spirit.
Charlie Brown: I don’t care. We’ll decorate it and it’ll be just right for our play. Besides, I think it needs me.
What to look for
When choosing your Christmas tree, it is important to consider a few things before grabbing the first one that catches your eye. Most importantly, you need to make sure that the tree is freshly cut. A fresh-cut tree is important as it contributes to the overall health and lifespan of the tree. Once you’ve spotted your Christmas tree favourite, try the following to make sure it will last the entire holiday season.
- A healthy fresh-cut tree should retain moisture, making the needles strong and resilient. Not weak and dry. Pinch a needle from the tree between your fingers, forming a “U” shape. If the needle breaks or snaps, it may be a sign that the tree is not retaining enough moisture.
- Another way to check for moisture retention is to lift the tree off the ground by a couple of inches from its trunk and let go of it, allowing it to land back to its standing position. If the tree drops a lot of needles, it is dehydrated and should be put back.
- Check for healthy green colour and good fragrance. Healthy trees lose their fragrance and colour as they mature. The greener and more fragrant, the fresher!
For more tips and information on buying your Christmas Tree tune, in below for a few tips and tricks from our President Gord as he teaches Jasmine Bala from Chek News, how to pick the best Christmas tree this year!
Sign up
here for more blogs dedicated to better gardening
by Wildwood Outdoor Living | Nov 25, 2021 | Gardening 101
Pruning might be the best trick there is to helping your plants grow to their fullest potential. By removing dead or dying branches, you’re removing the risk of disease to the entire plant. With the proper tool, you can expect your plant to recover faster from clippings. A clean pruning cut will remove the risk of unwanted mites and insects from entering your plant, causing further damage.
Pruning Tools
To start, let’s make sure you have the right tools for the job. Choosing the right tool for your pruning task is important. Using the right tool will allow you to create the perfect cuts safely for you and your plants. Here are the top 5 must have pruning tools for all your pruning needs.
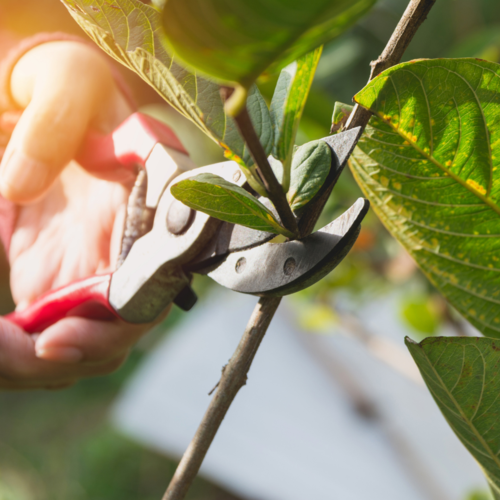
1. Pruners

The number one pruning tool for all gardeners to have is a good pair of pruners. The sharp curved blade creates a clean-cut, allowing plants to heal faster. Great for small clippings like branches, flower stems and shrubs.
Pro-tip: When shopping for your pruners, look for a light pair with grip, this will allow you to work easily and more efficiently with one hand and will also prevent hand cramping.
2. Loppers

Loppers are the next level up from pruners. Used to cut through thicker branches, up to 2 inches thick. Use loppers to remove branch stubs and branches that rub together, inviting more light to access your plants. Great for fruit trees, nut trees and vines.
Pro-tip: Look for loppers that offer more power and grip. Using a lopper can require lots of force or very little depending on the enhanced power it provides. It is also important to test the weight of the product beforehand, to ensure that you’re capable of working with it safely.
3. Pole Pruners

Also known as ‘tree shears’. Pole pruners are the perfect tool to use for reaching dead branches. With a reach of up to 8 ft long, the pole pruner removes the unsafe need for using ladders. Great for cutting through branches up to 1 ¼ inch thick.
Pro-tip: For an easier way to prune tall and hard to reach branches, try using an electric pole pruner.
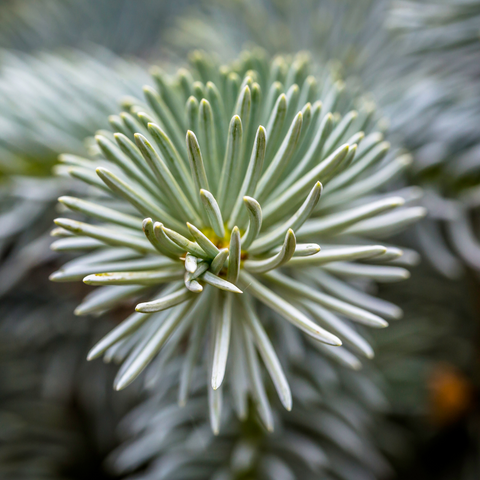
4. Hedge Shears

Great for small shrubs, hedges, evergreens, and perennials. Also known as ‘manual hedge trimmers’. Hedge Shears do the perfect job for shaping and trimming hedges, all while promoting new growth. Capable of cutting up to 2 ¼ inch thick branches and shrubs.
Pro-tip: Hedge Shears come in a variety of different blade types. Straight blades, wavy blades, and serrated blades all perform differently, so be sure to choose the right blade for the job.
5. Pruning Saw

For wood up to 5 inches thick. Pruning saws are the last manual pruning tool used to take care of a pruning tasks before upgrading to power tools. With sharp teeth, the pruning saw only requires a quick push and pull to make a clean cut through branches.
Pro-tip: Be sure to wear gloves with a good grip when handling a pruning saw. You want to maintain a tight grip with every push and pull to ensure full control when handling this tool. Safety first!
Clean Tools, Healthy Plants
Always, always, always keep your garden tools clean! Pruning with dirty tools doesn’t only make working with the tools much harder when they’re covered in sap and saw dust but it’s actually unhealthy for your plants. By not cleaning your tools you can transfer disease from branch to branch and even from plant to plant defeating the entire purpose of pruning. To prevent the spread of disease, clean your tools in-between each use and before storing. When cleaning your pruning tools be careful not to rust them. To do this you’ll want to spray your tools with rubbing alcohol, allow the alcohol to disinfect your tool for 20 seconds then wiping it off with a clean rag. This will not only kill bacteria but also clean stubborn sap.
Pro-tip: Keep a rag and 91% alcohol in your back pocket for quick access in between clippings.
When to Prune
For more pruning tips, check out the latest episode of ‘Get Up and Grow: When You Should Prune Your Plants, The Three D’s of Pruning’. Where our president Gord teaches Jasmine how to take care of her plants by showing her when to prune them and how.

